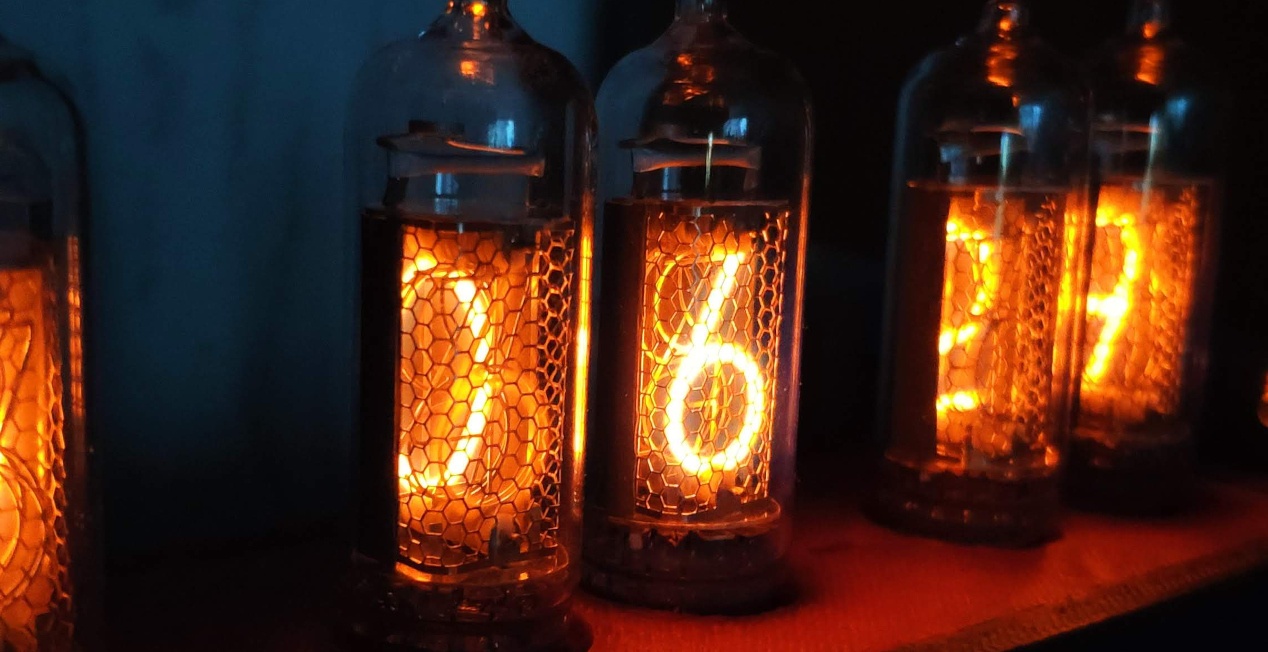
Радиолампы, словно артефакты из прошлого, олицетворяют нечто большее, чем просто технологию. Они несут в себе определенную магию, отражающую уникальное сочетание технического мастерства и эстетики. Не удивительно, что часы на неоновых индикаторах занимают довольно уникальную нишу в мире дизайна и интерьера. Они представляют собой не просто инструмент для отображения времени, но и элемент декора, который может значительно изменить атмосферу помещения. Этой статье я расскажу о своем опыте создания Nixie Clock на базе драйвера собственной разработки.
❯ С чего всё началось
Однажды, на предприятии где я работал, на складе обнаружилось много неликвидного материала, который хранился там ещё с советских времен.
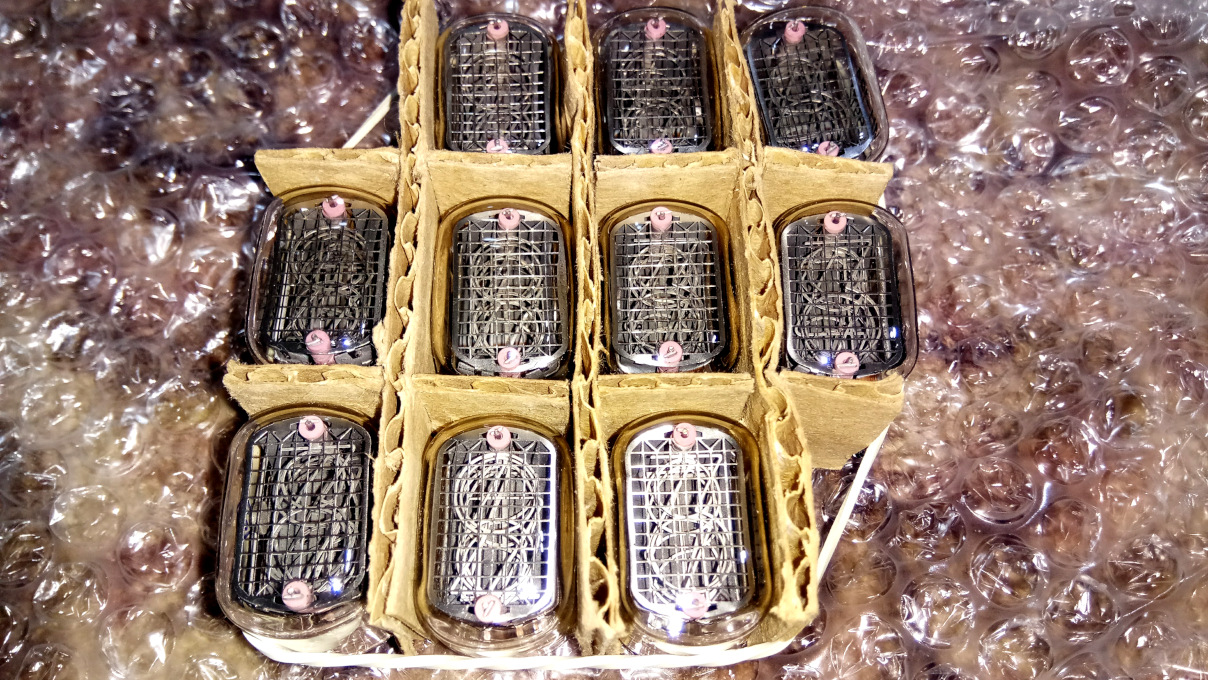 Неликвид состоял из электронных компонентов, которые нам отдали безвозмездно для использования в личных целях, чтобы не тратить средства на утилизацию. На самом деле, там было очень много ценных компонентов, среди которых оказались неоновые индикаторные лампы марки ИН-12. В итоге я их забрал себе. С радиолампами знаком еще с детства, увлекаясь радиоконструированием, я часто собирал различные схемы, в том числе и на лампах. А тут такой флешбэк.
❯ Разработка часов
По состоянию на 2016 год, было много различных схем часов на лампах, но мне не нравилась их схемотехника, она казалась мне избыточной и не эффективной. Хотелось реализовать что-то простое, питающееся от стандартного USB порта, без использования модуля RTC и светодиодной подсветки, которая, по моему мнению, только портит всю эстетику ламп. На тот момент большинство схем работало на Arduino и микроконтроллерах от компании Atmel. Годом ранее, компания Espressif Systems выпустила на рынок свой микроконтроллер ESP8266, который произвел революцию. Так как на тот момент, широкополосный интернет уже был достаточно распространен, в том числе и домашние сети Wi-Fi, я решил отказаться от применения RTC модуля в своей схеме часов и использовать NTP серверы для синхронизации времени. Как вы могли догадаться, в своей схеме я применил модуль ESP8266. Далее я поделился в Twitter своим опытом применения нового модуля ESP8266 в своем проекте. Мой твит вызвал интерес, и мне предложили написать статью на Hackaday.io. Я последовал совету и опубликовал свою статью там.
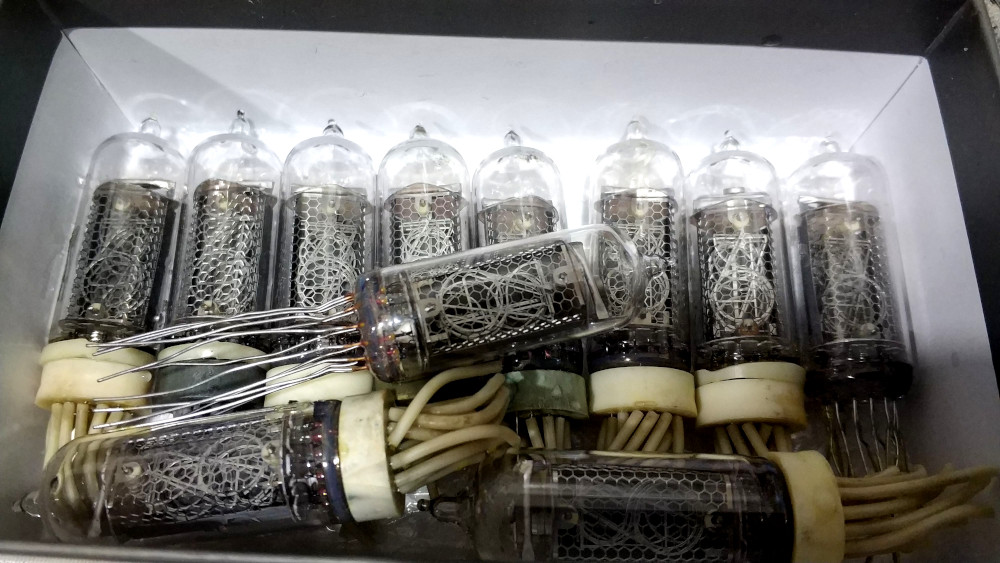
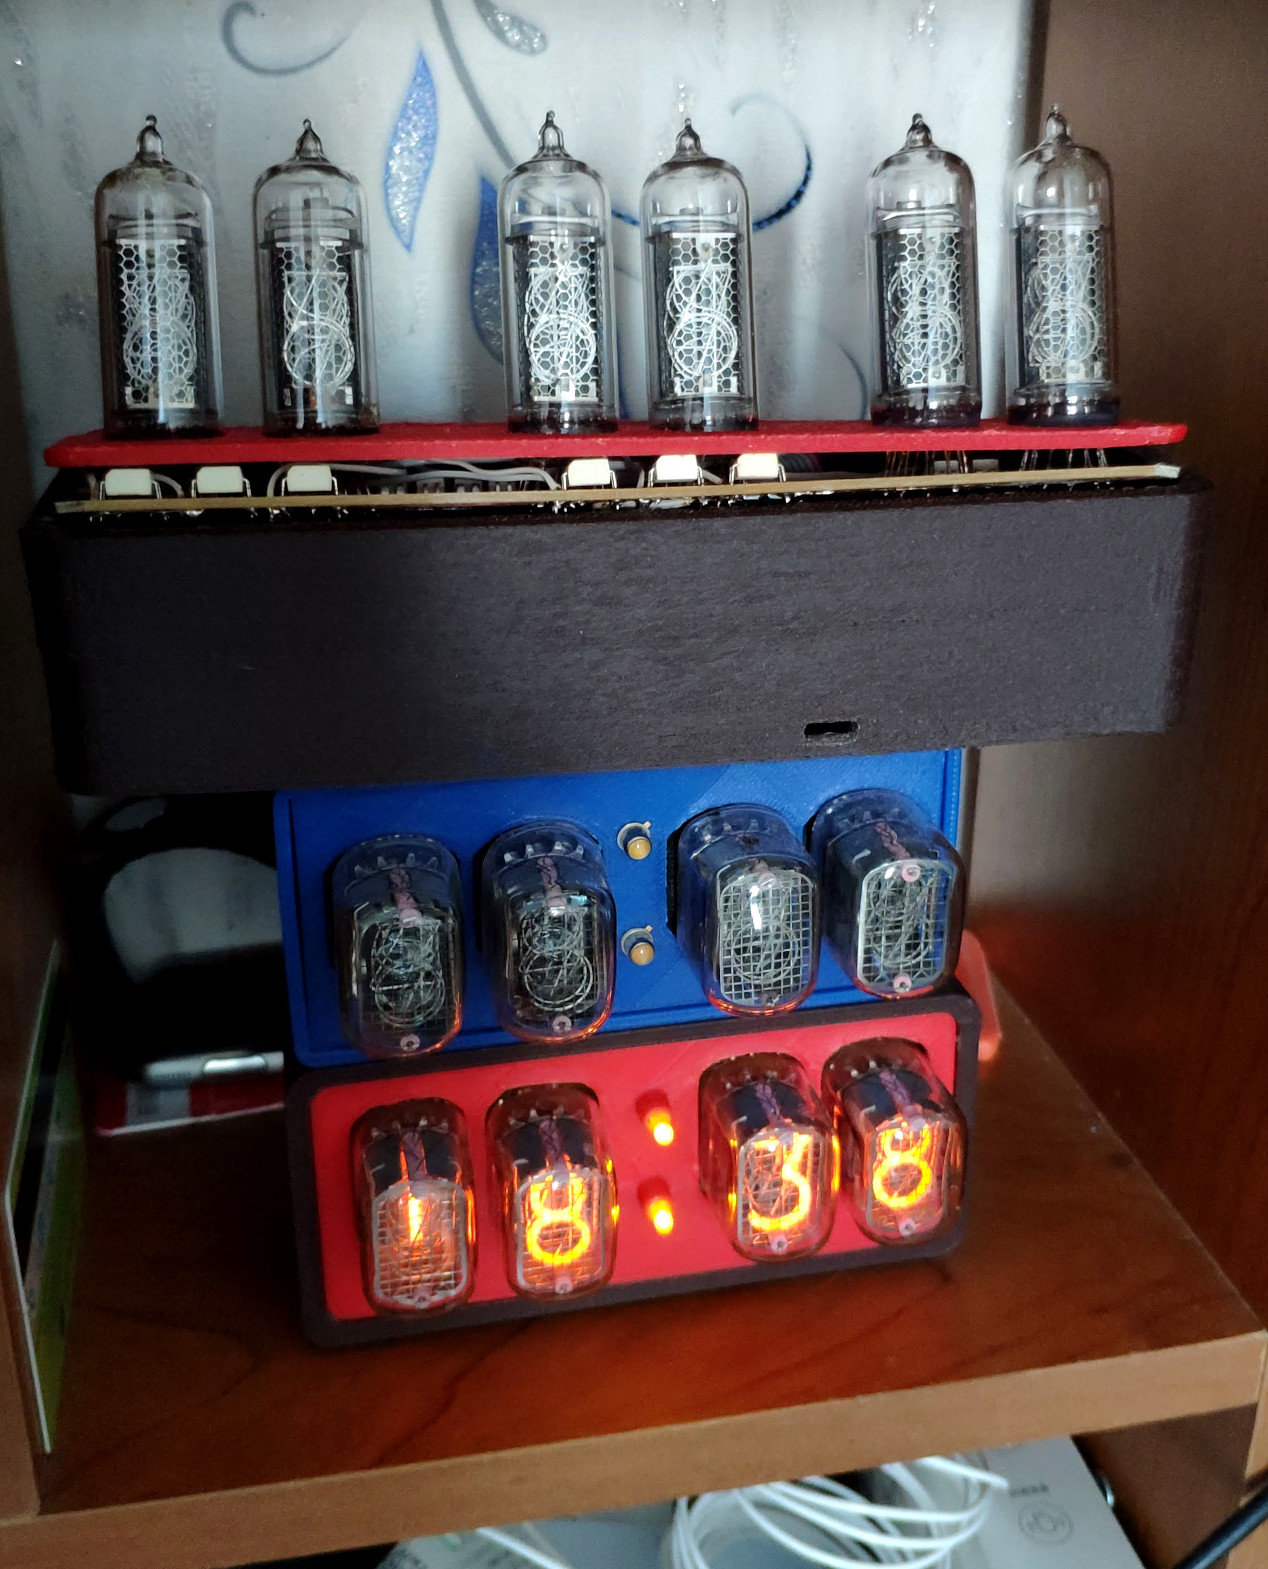
Но в этой статье я хочу описать реализацию часов с применением шести индикаторов ИН-14 с использованием улучшенного драйвера. Как выглядят эти лампы, вы можете увидеть ниже.
Давайте приступим
Ниже изображена схема драйвера часов:
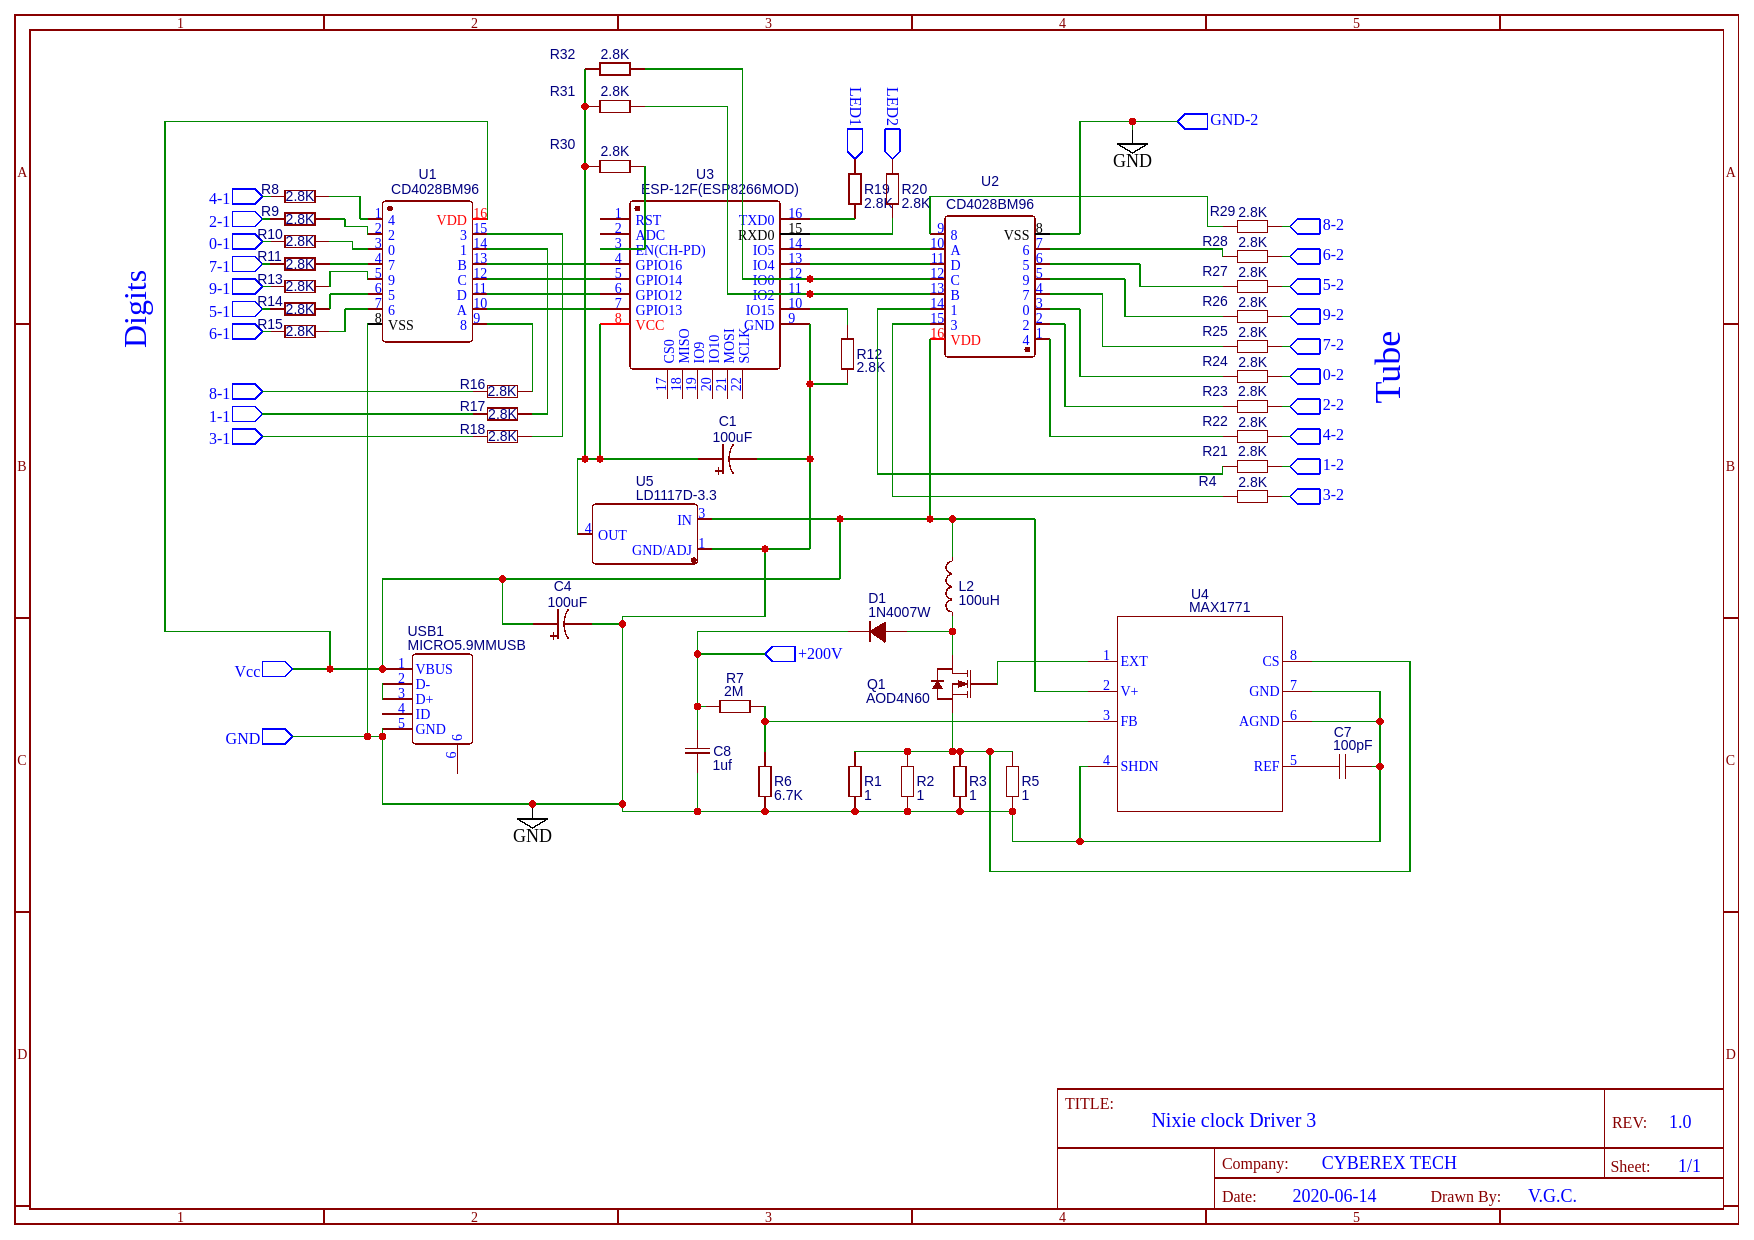
Схема подключения ламп:
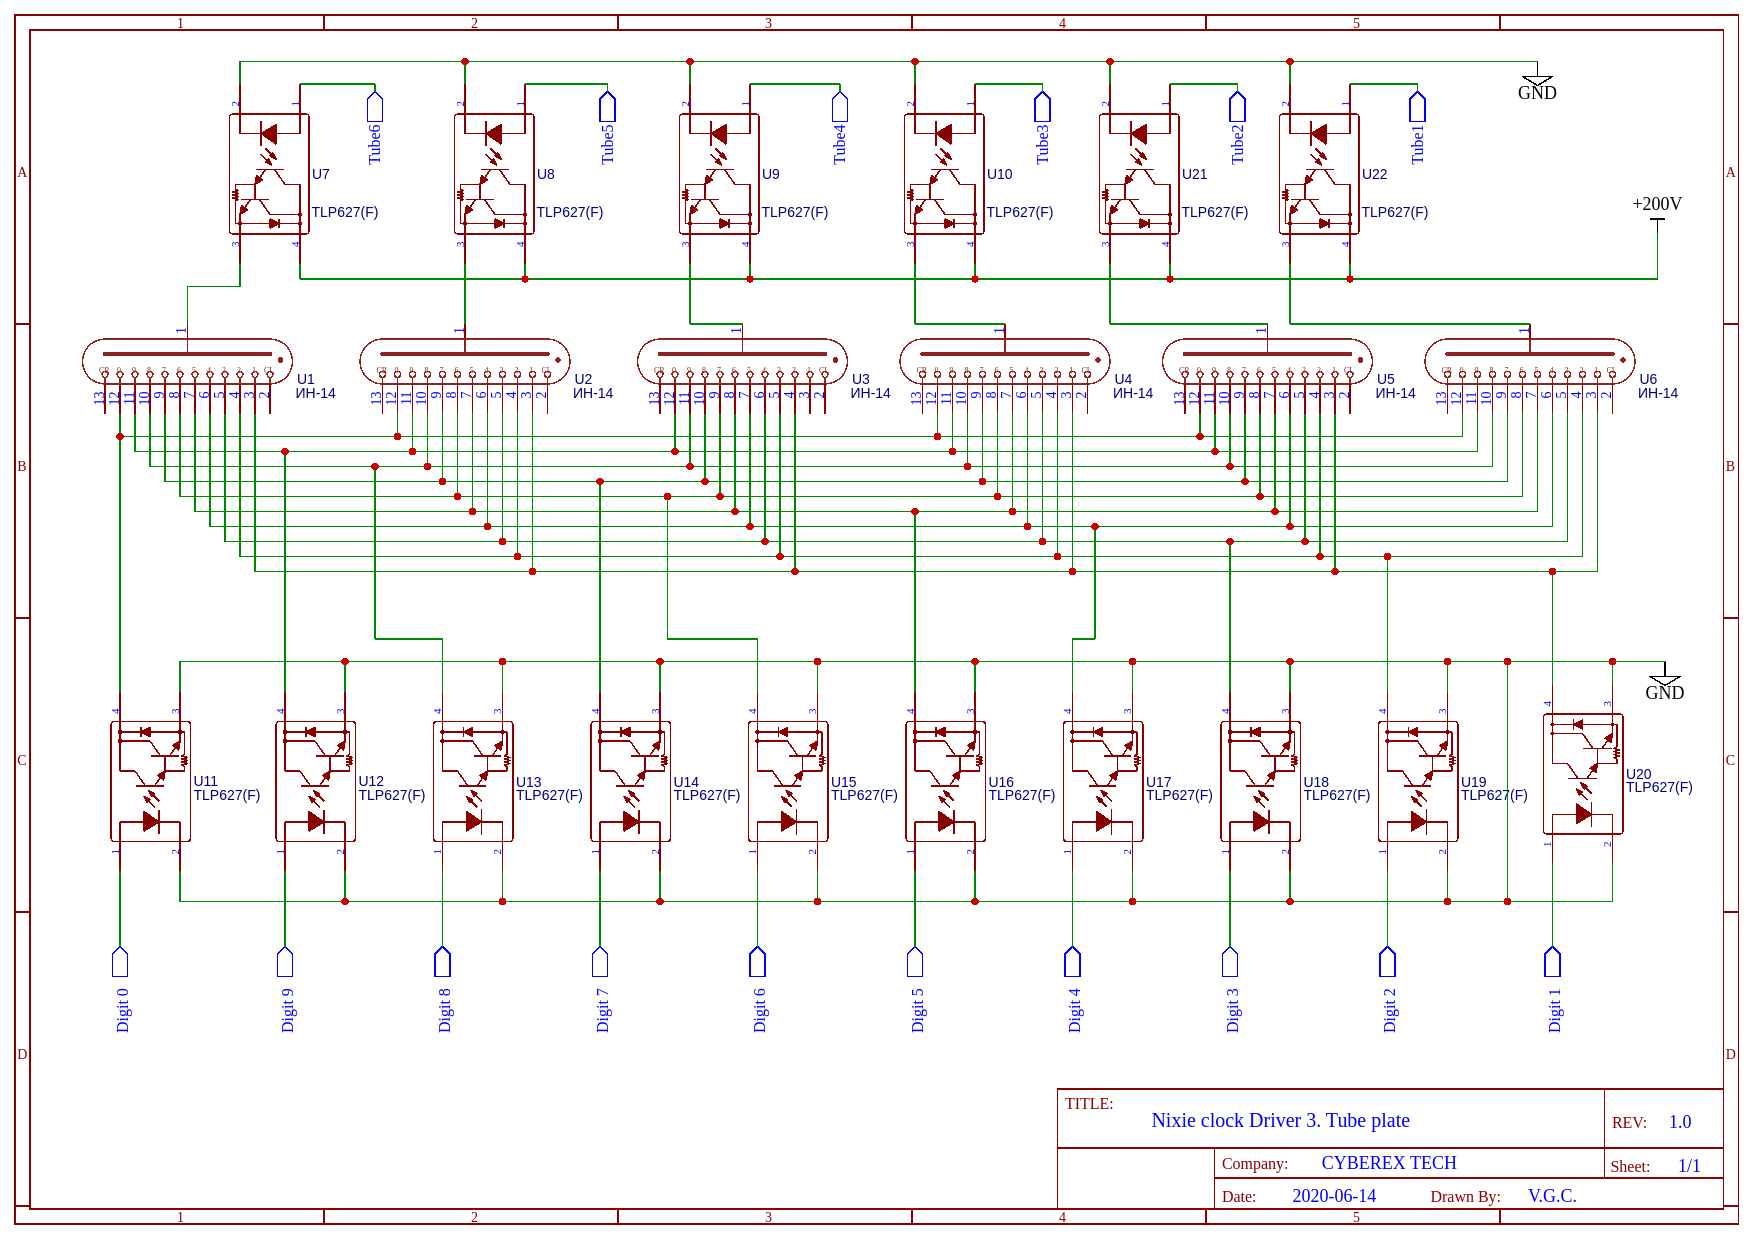
Согласно документации, индикаторная лампа работает от напряжения в 170В (напряжение возникновения разряда), для стабильной работы нам потребуется напряжение в 200В. Как вы можете видеть из схемы, для повышения напряжения до 200В применен set-up преобразователь на базе ШИМ контроллера МАХ1771 в связке с L2, D1 и Q1. Так как нам недостаточно выводов ESP8266 для управления лампами, то будем «размножать» пины управления с помощью дешифраторов CD4028BM96. Данный модифицированный драйвер позволяет управлять десятью газоразрядными индикаторными лампами. Выше описанный драйвер имеет динамический метод управления индикацией, то есть в определенный момент времени загорается только одна лампа, но переключение выполняется настолько быстро, что человеческий глаз практически не воспринимает переключение ламп и кажется что все лампы горят одновременно. Данный режим переводит работу ламп в импульсный режим, что положительно сказывается на их срок службы.
Разработка платы
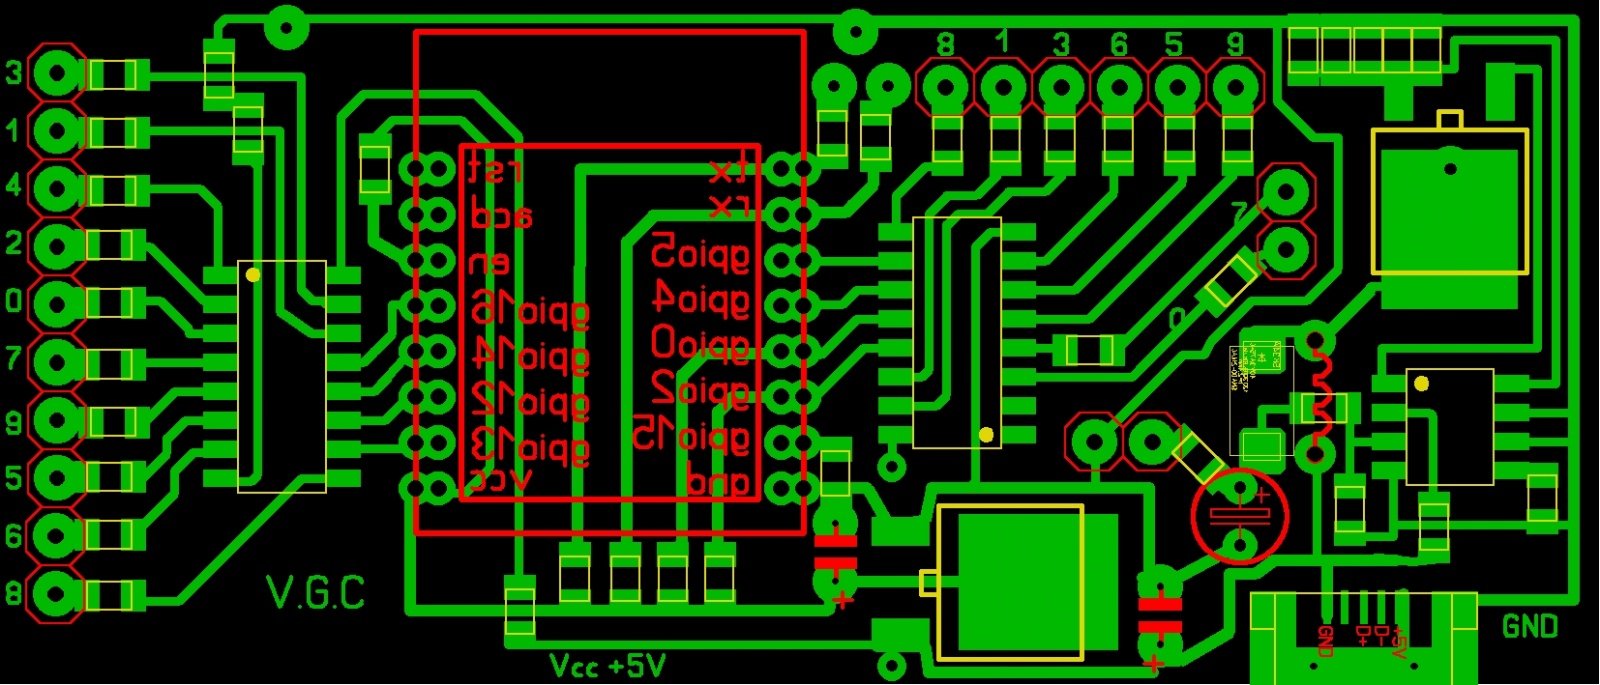
Разработка платы велась в Sprint-Layout 5.0, так как мне это было удобнее для изготовления платы в домашних условиях.
Плата драйвера:
Плата для установки ламп:

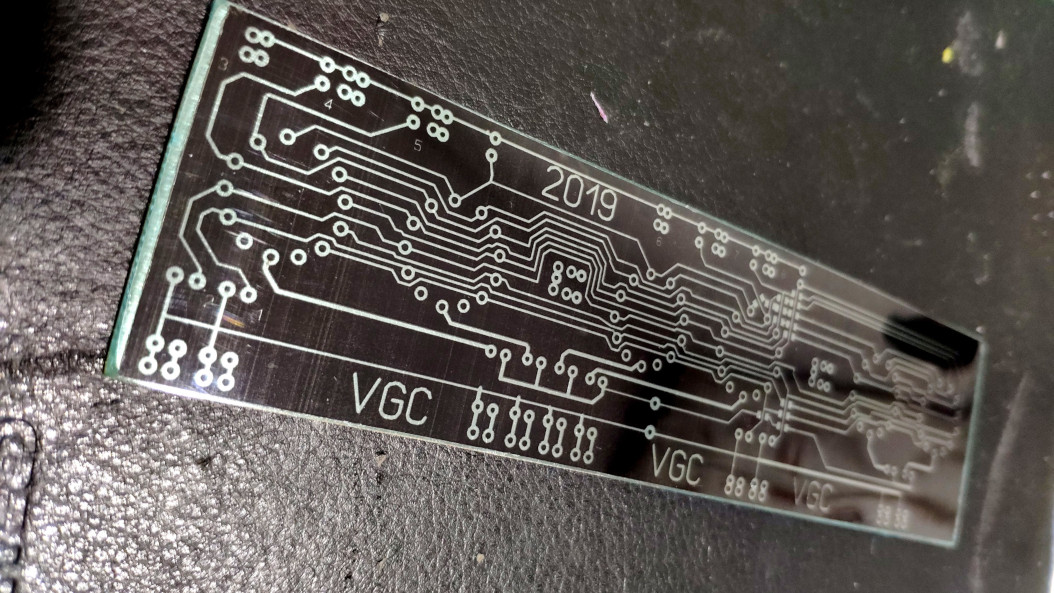
Изготовление печатной платы выполнялось с применение фотошаблона и фоторезиста:
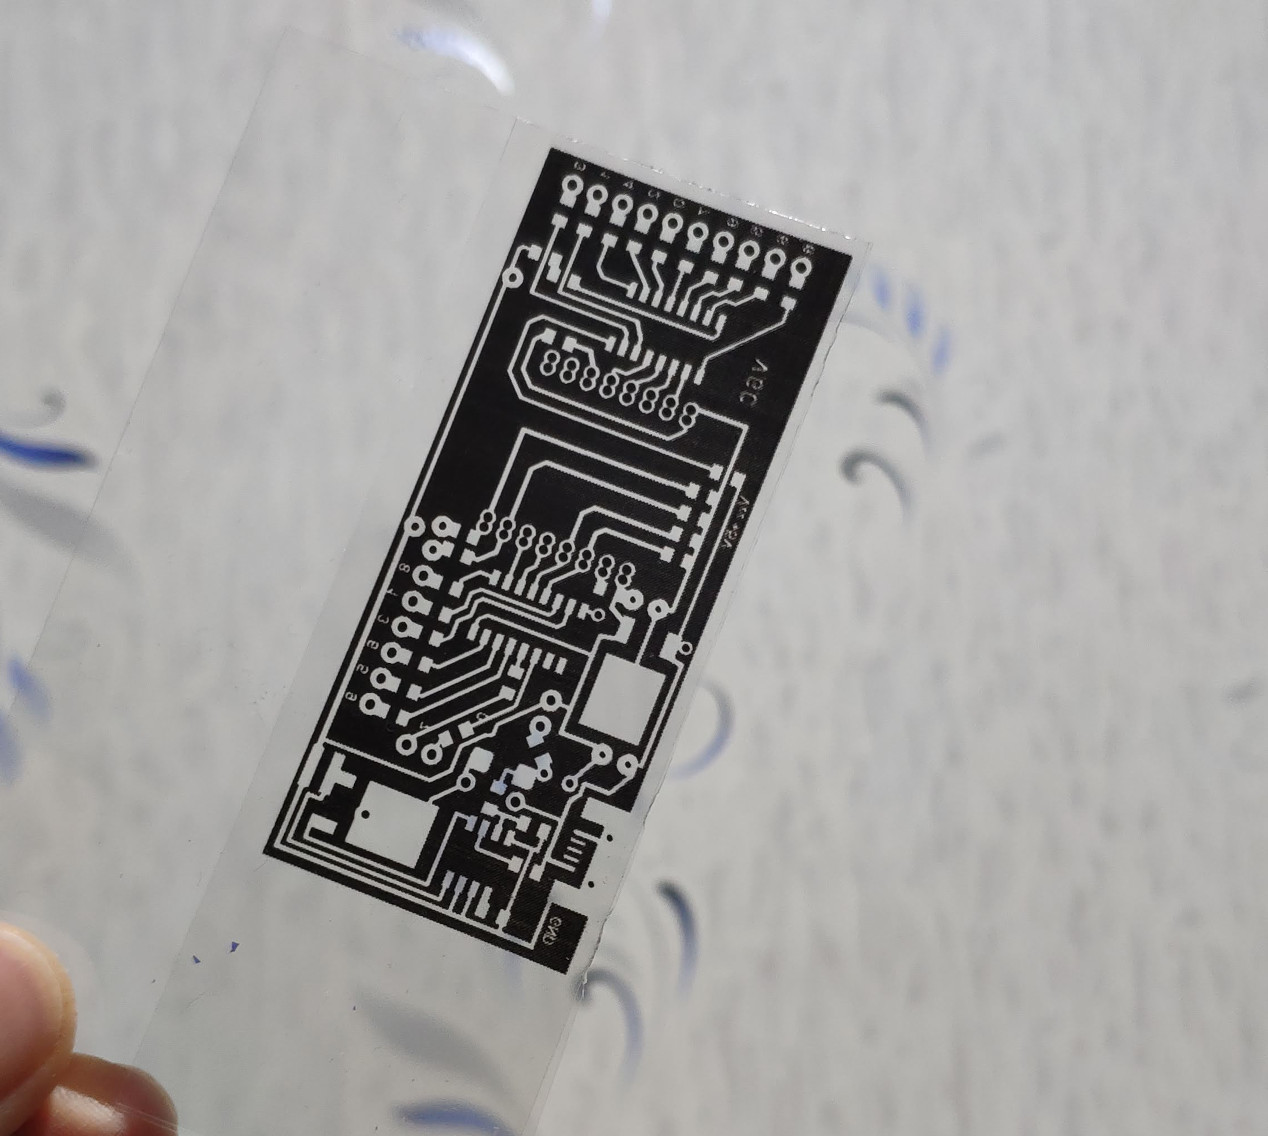
Засветка фоторезиста платы драйвера:
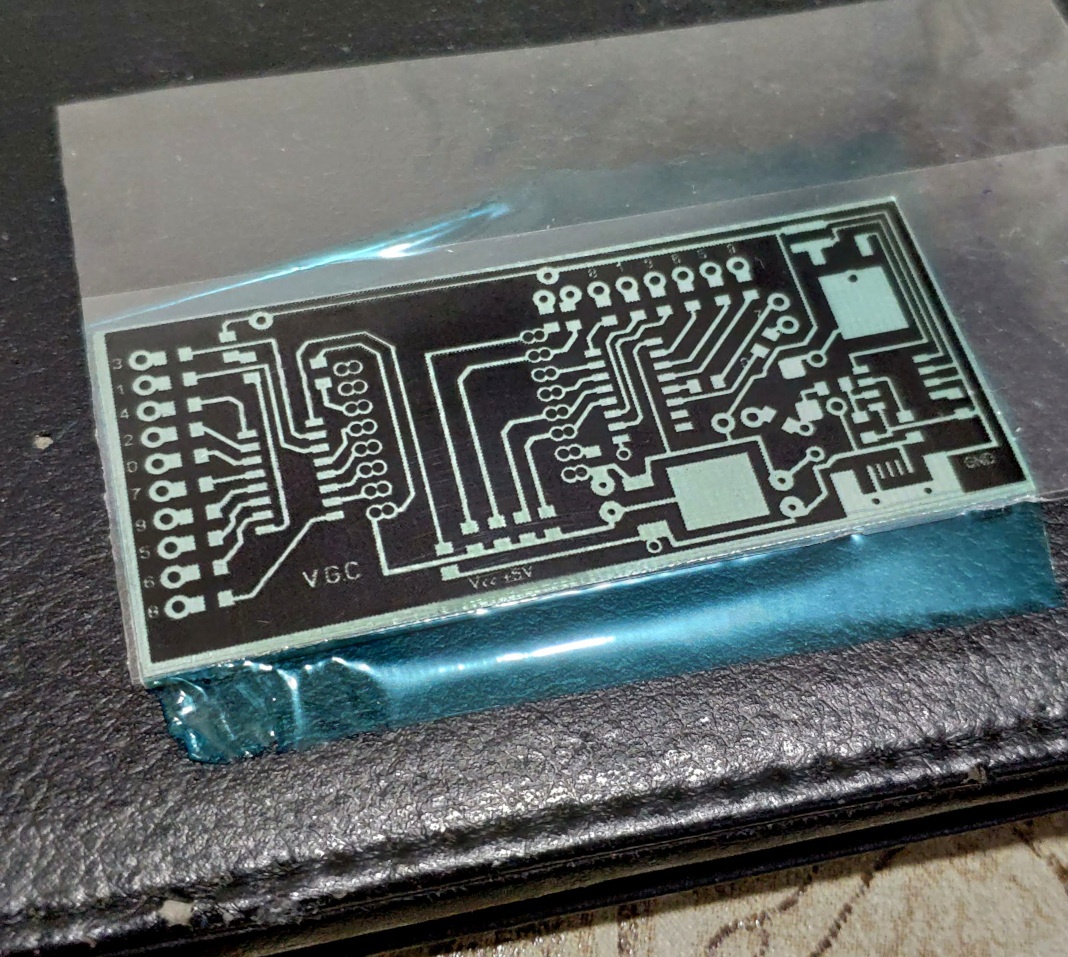
Засветка фоторезиста платы крепления ламп:
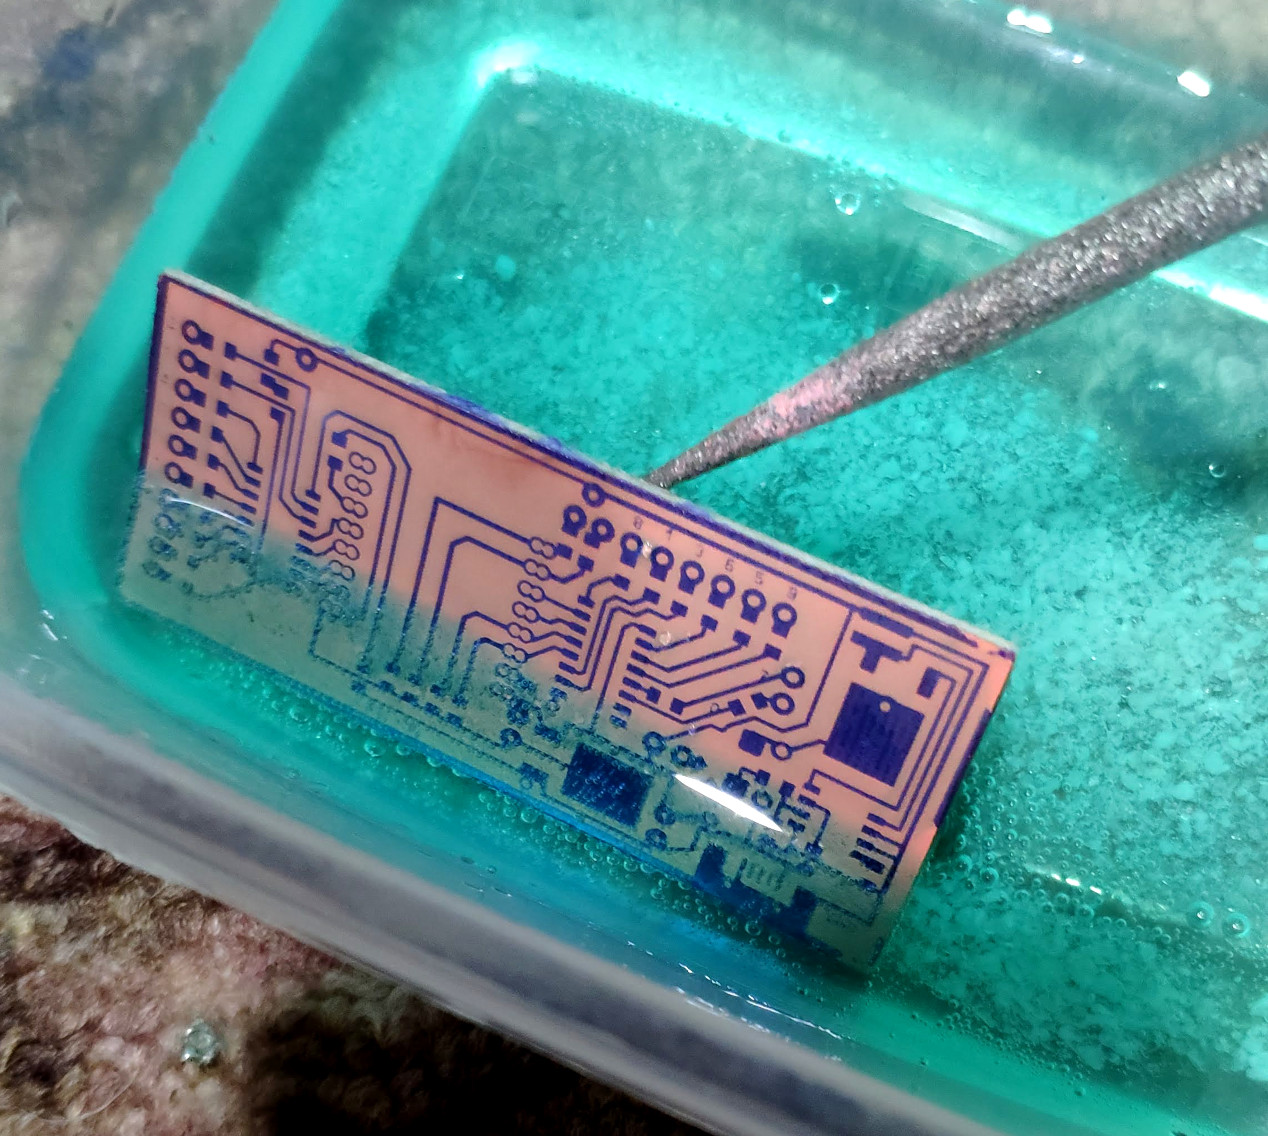
Травление платы драйвера:
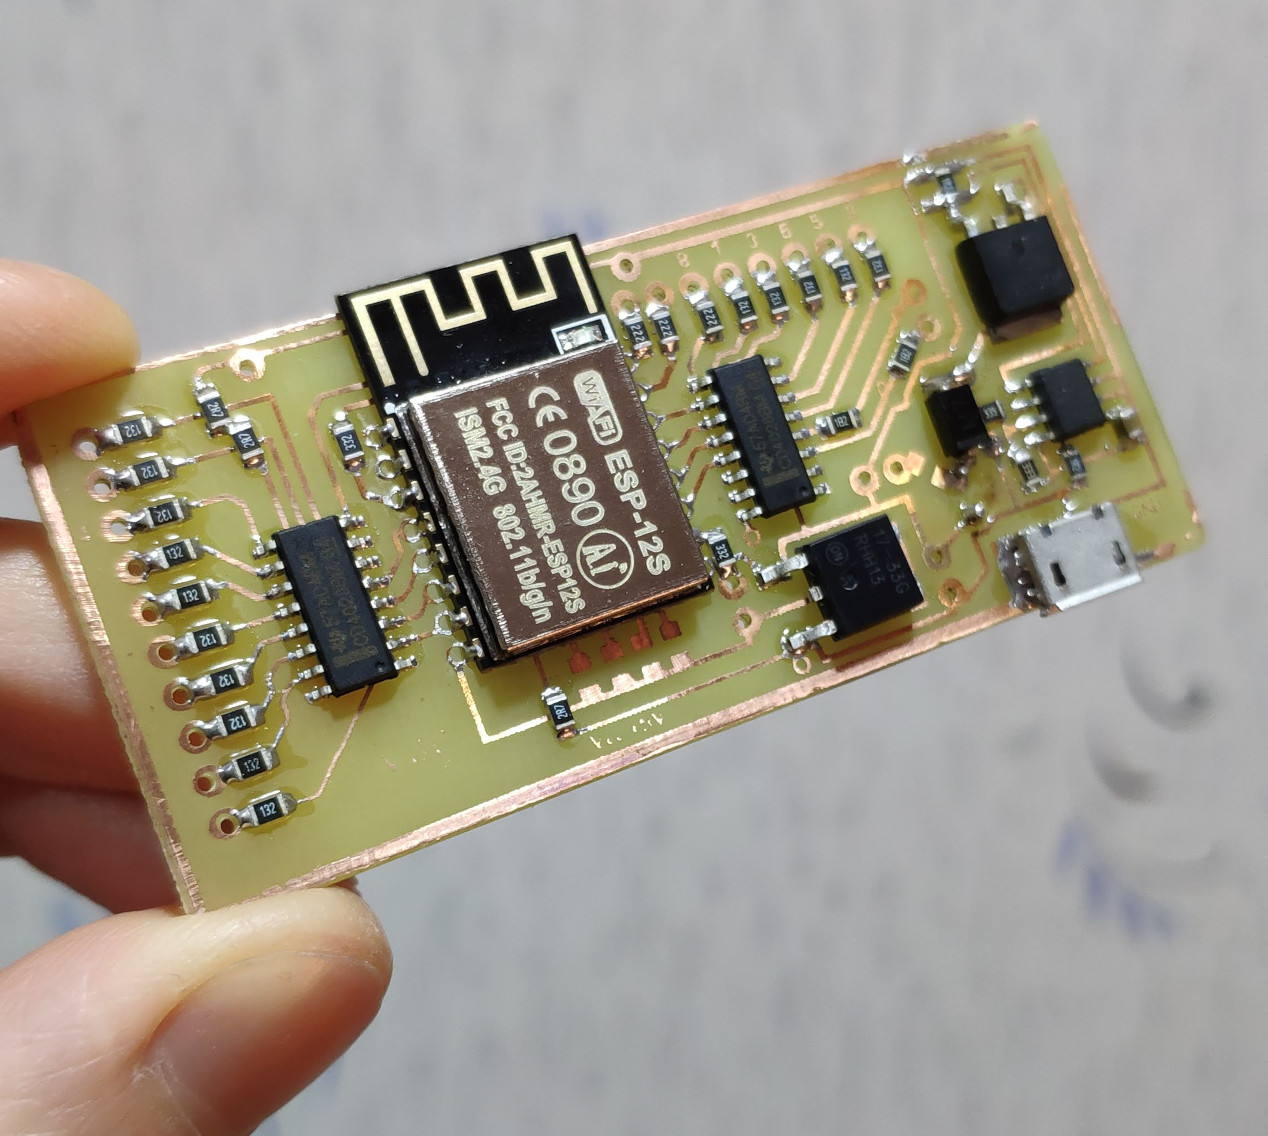
Пайка компонентов:
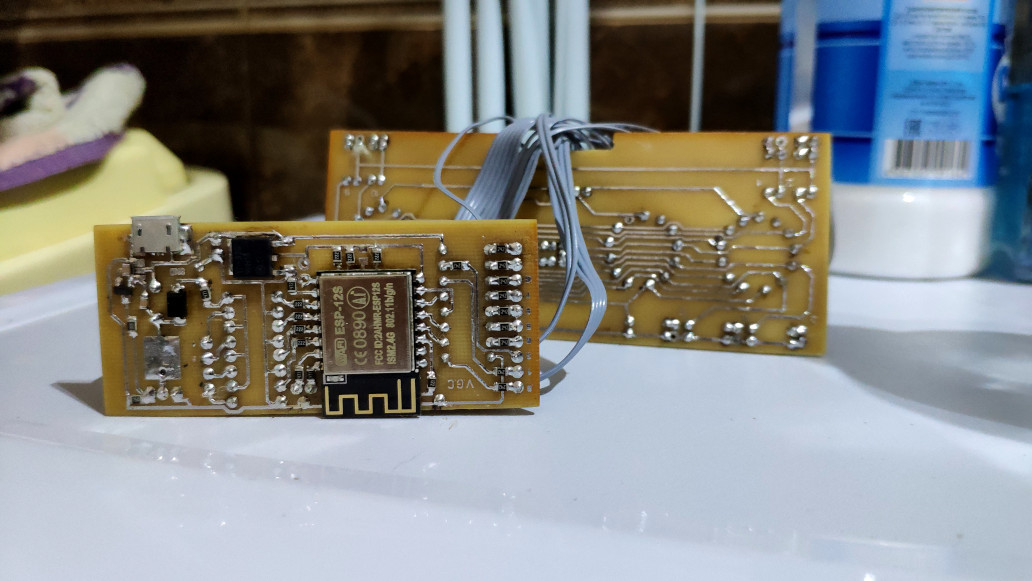
Плата драйвера в собранном виде:
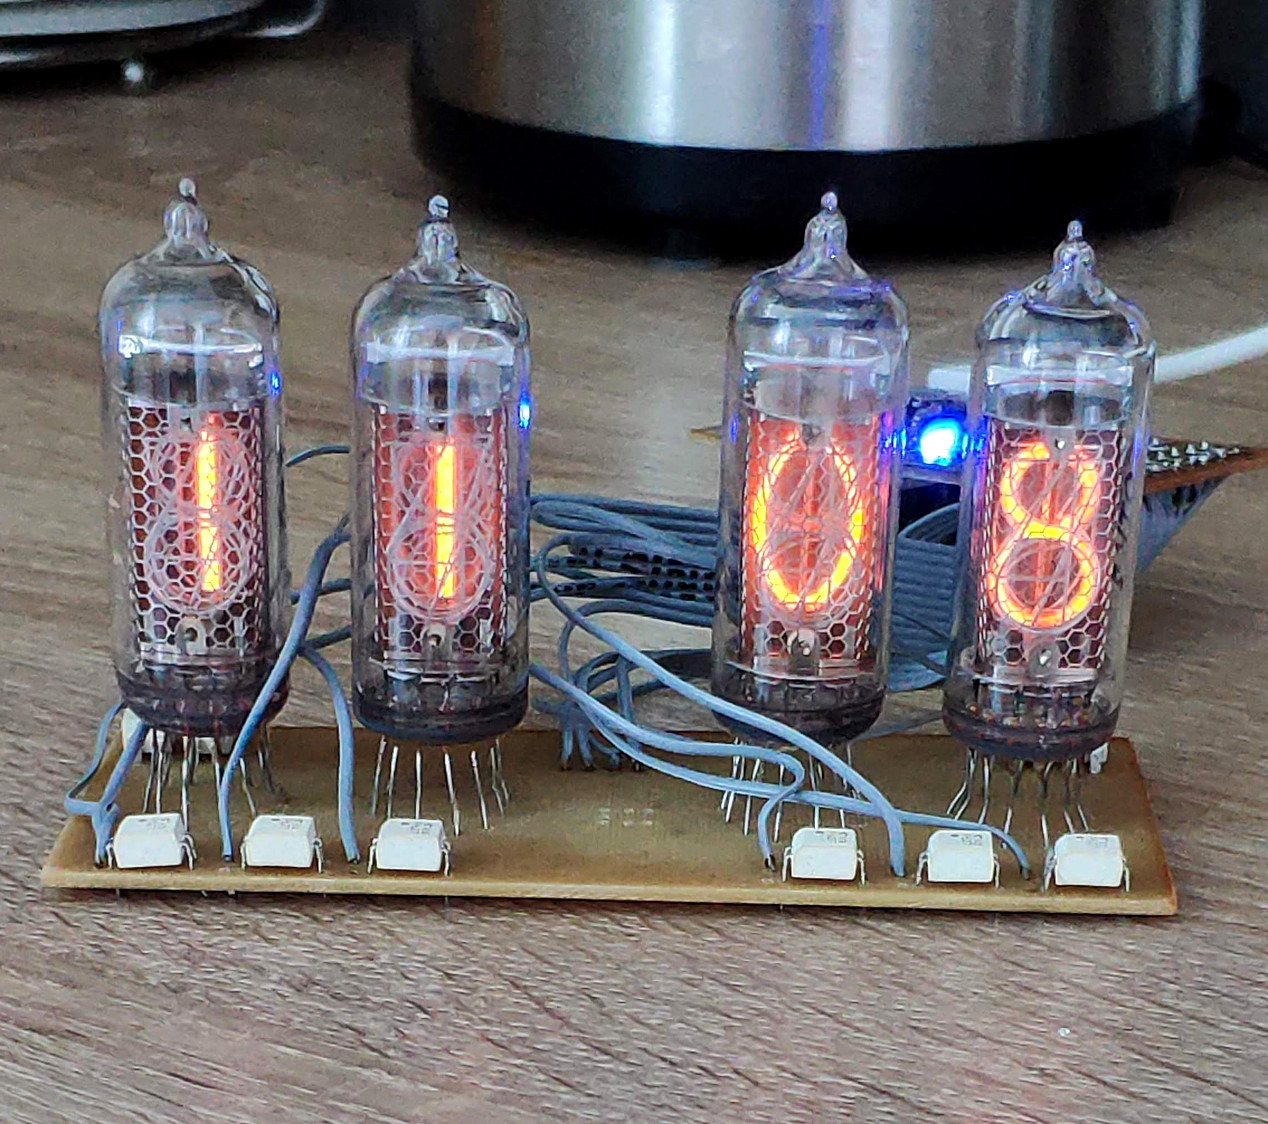
Монтаж ламп на плату управления:
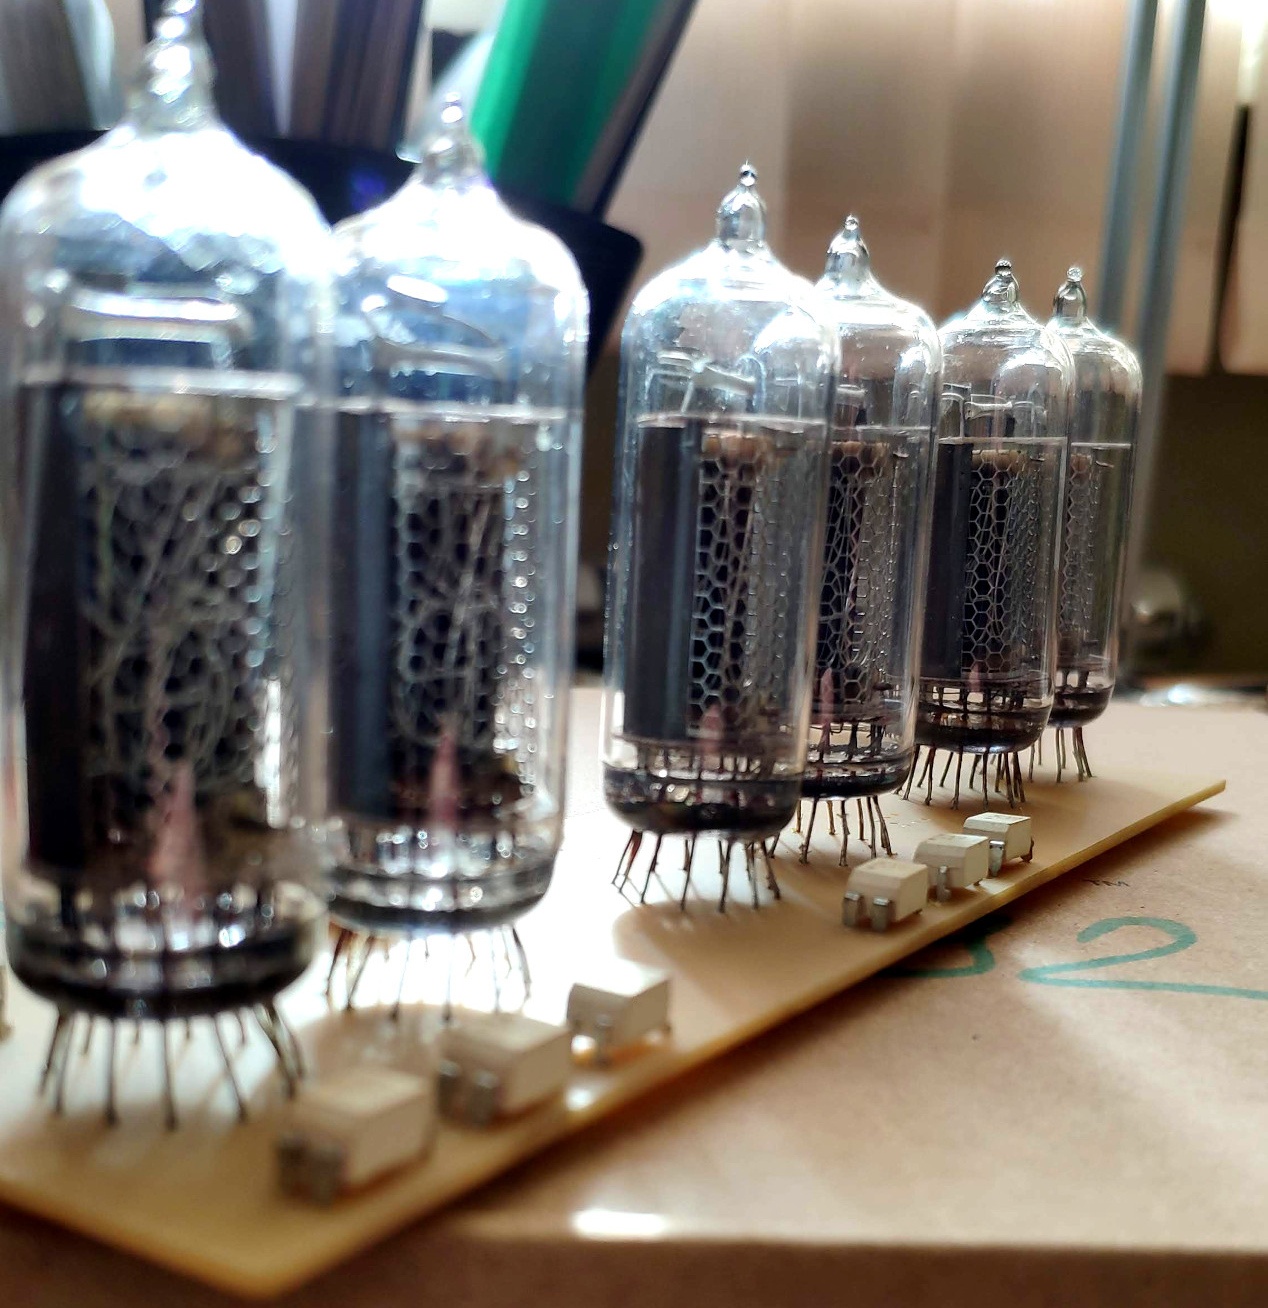
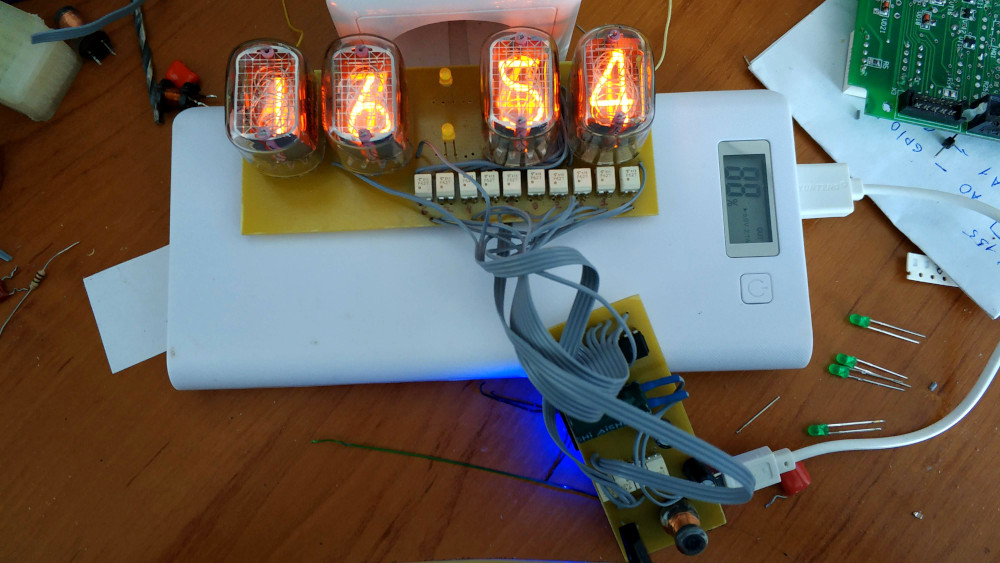
Тест работы схемы часов с небольшой отладкой:
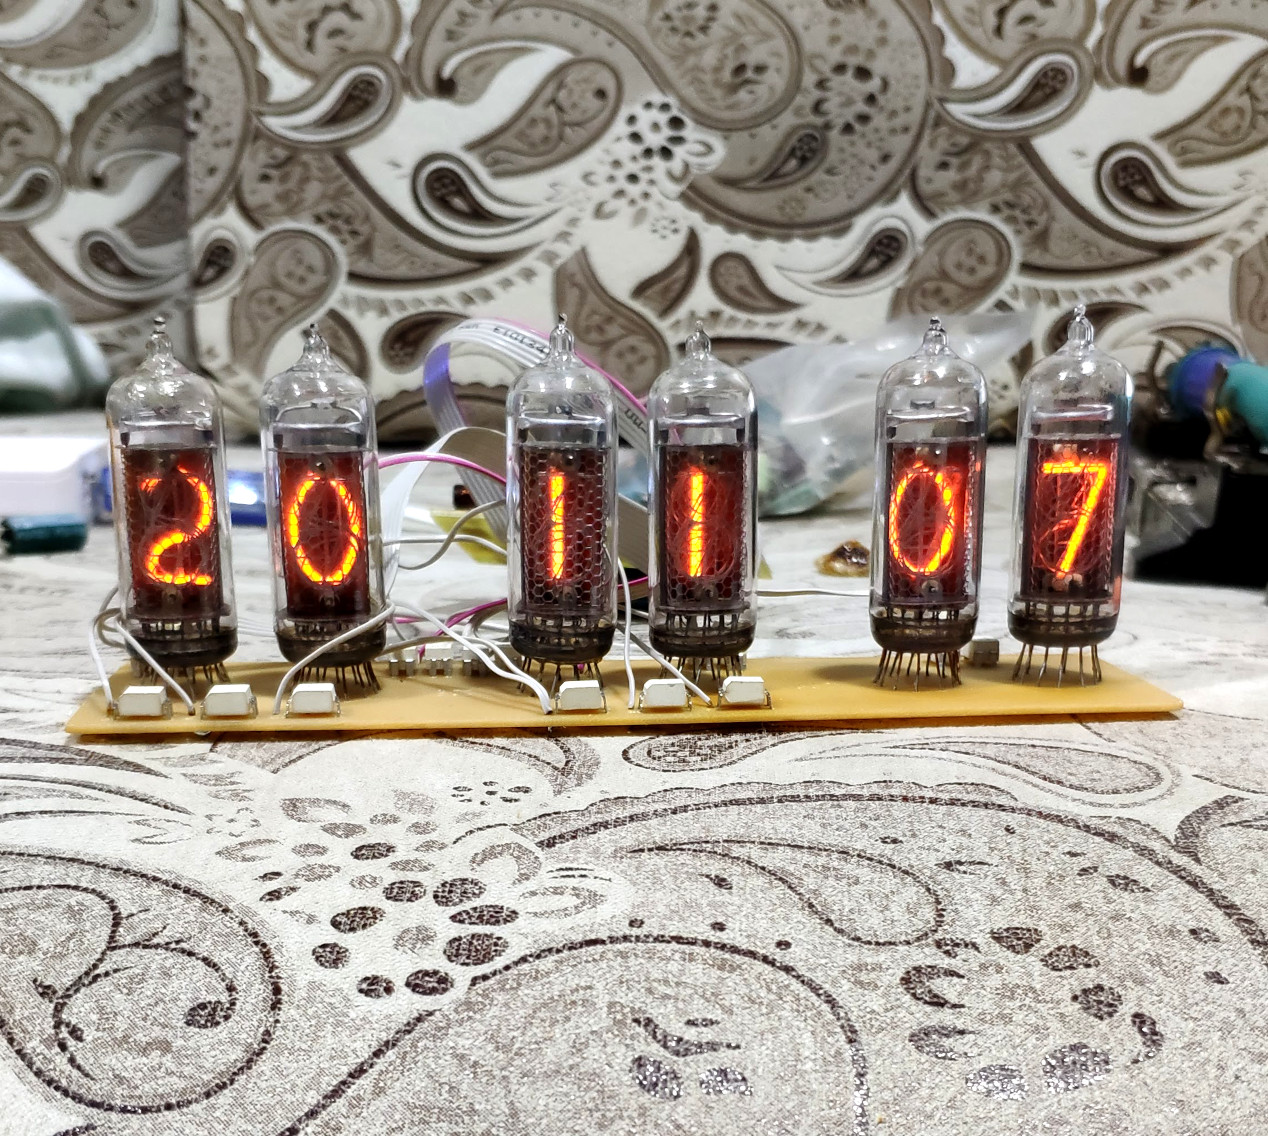
Для управления высоким напряжением используются оптроны TLP627 от компании TOSHIBA.
TLP627 — высоковольтный транзисторный оптрон со схемой Дарлингтона на выходе.
Корпус часов
Корпус часов не предполагает какой либо сложной конструкции, разработка выполнялась во FreeCAD:
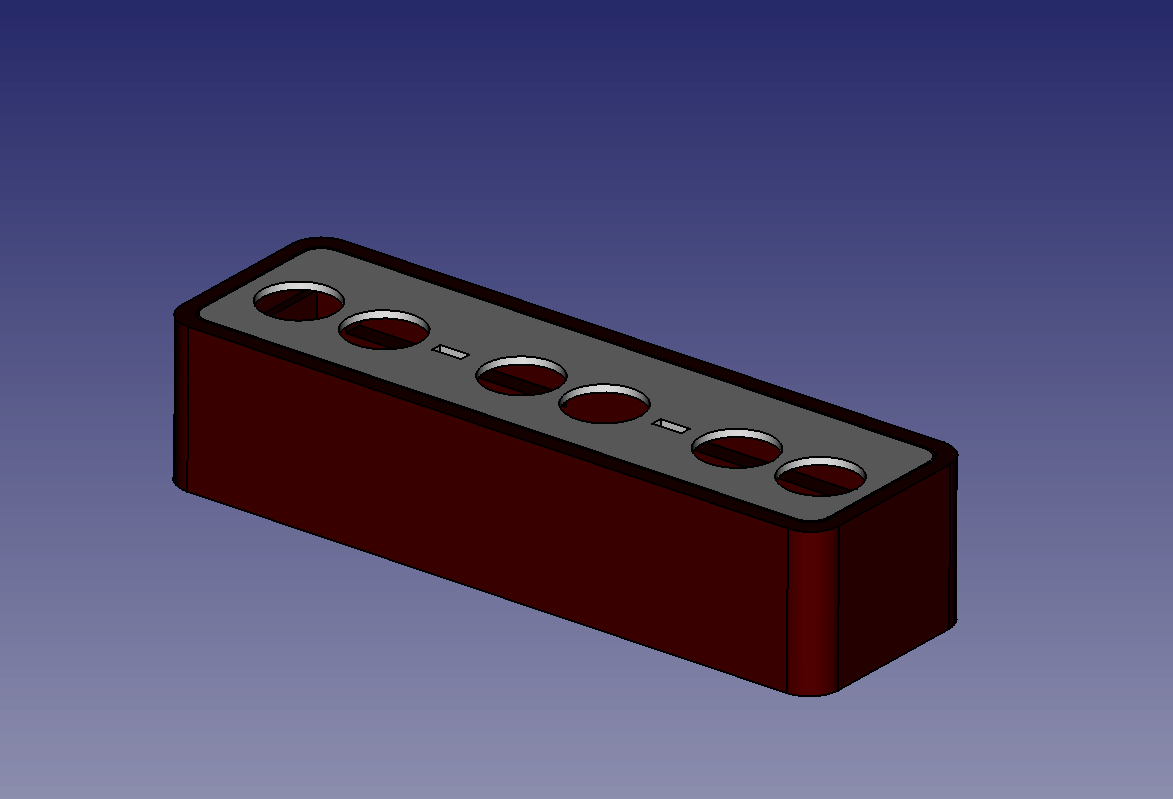
Далее корпус был распечатан на 3D принтере, с использованием HIPS пластика. Данный пластик при печати создает структуру стенки, которая чем-то похоже на дерево и не обладает глянцевым эффектом как другие виды пластика типа PLA, ABS и т. п.
Монтаж электроники
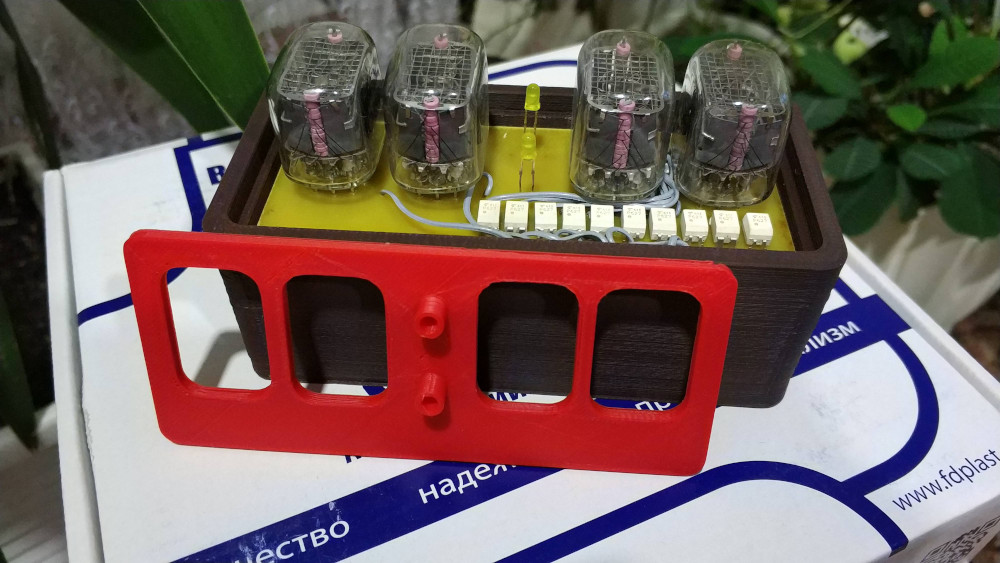
После изготовления корпуса, необходимо смонтировать все компоненты. Ниже показан монтаж платы драйвера с применением, всеми любимого, термоклея. :)
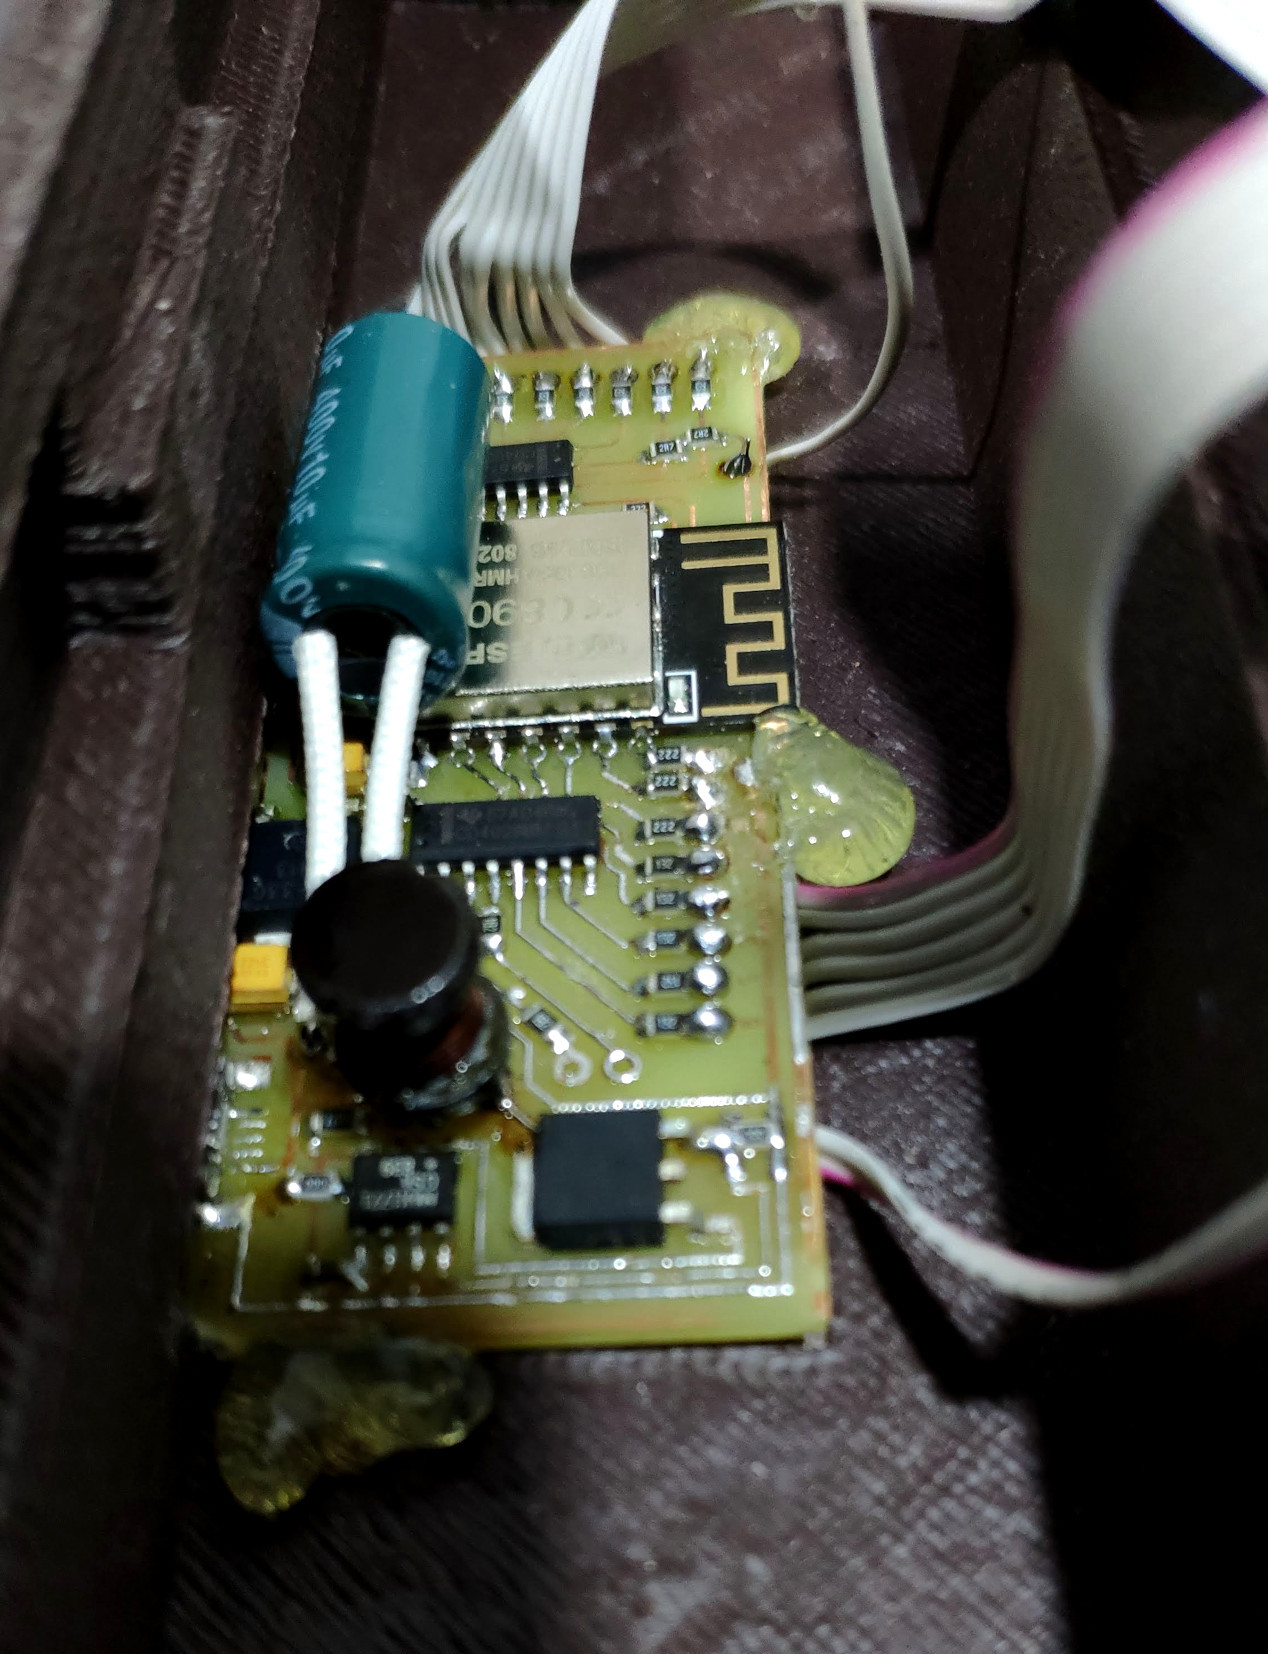
В итоге мы получаем следующее:
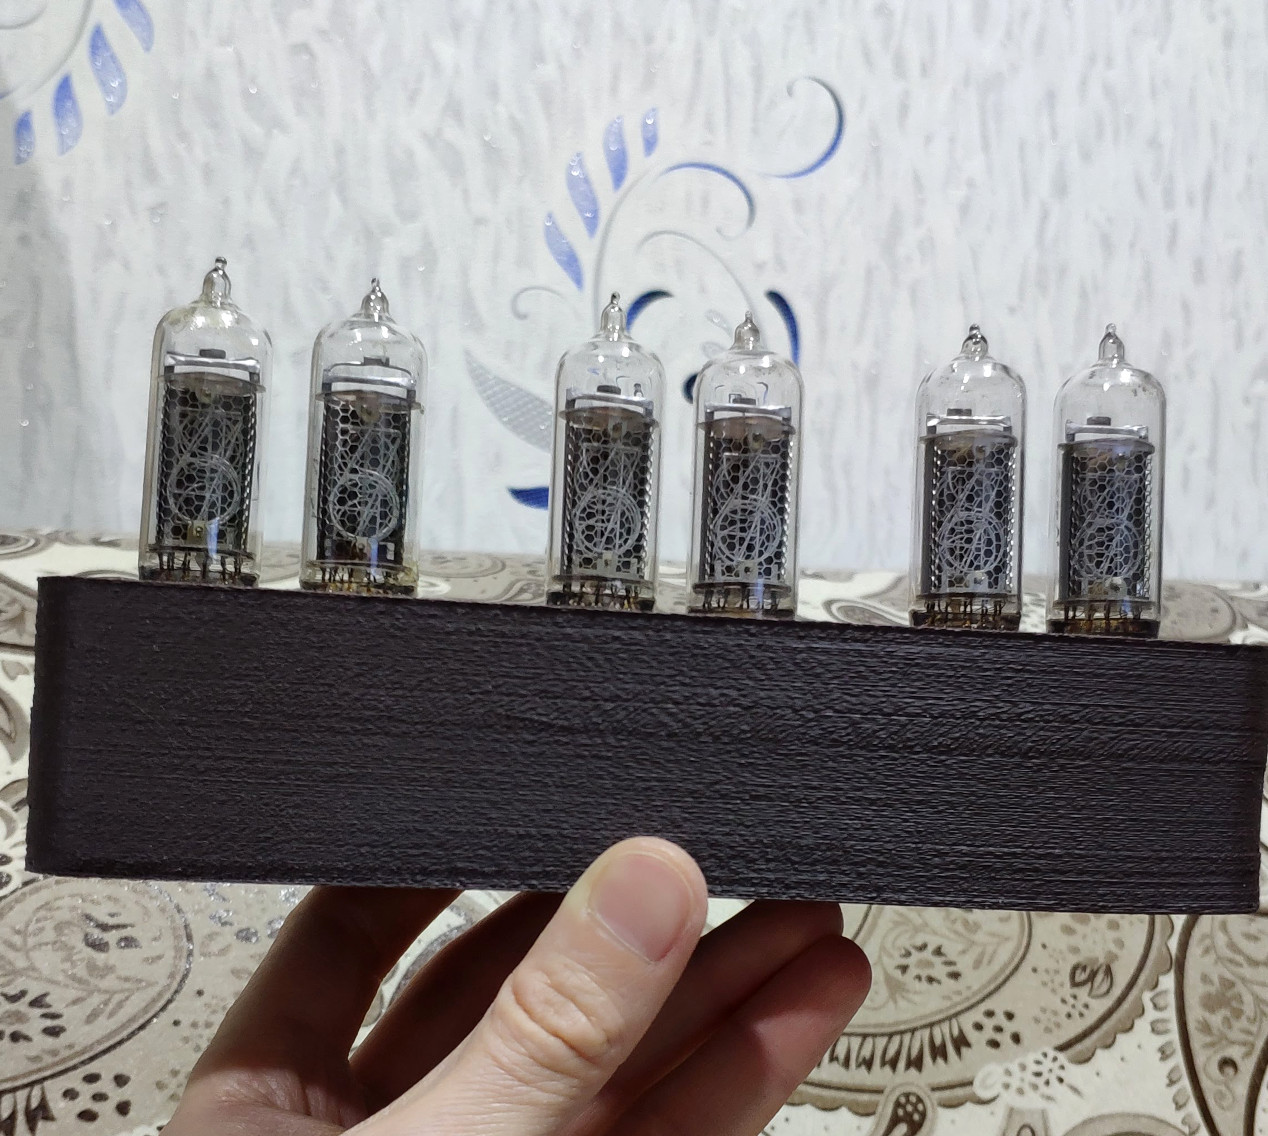
Часы в работе:

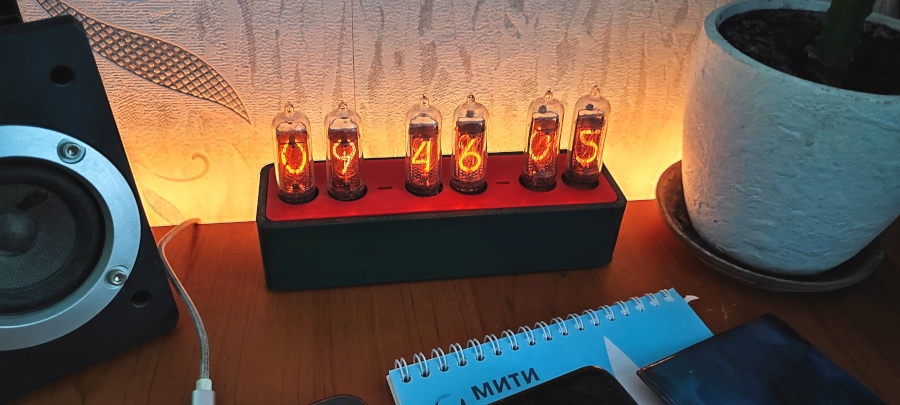
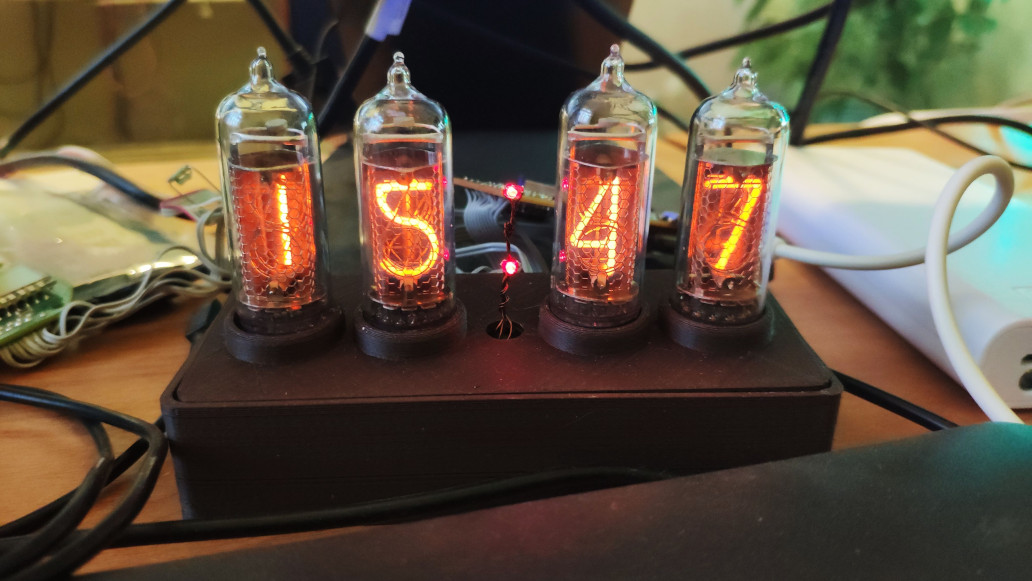
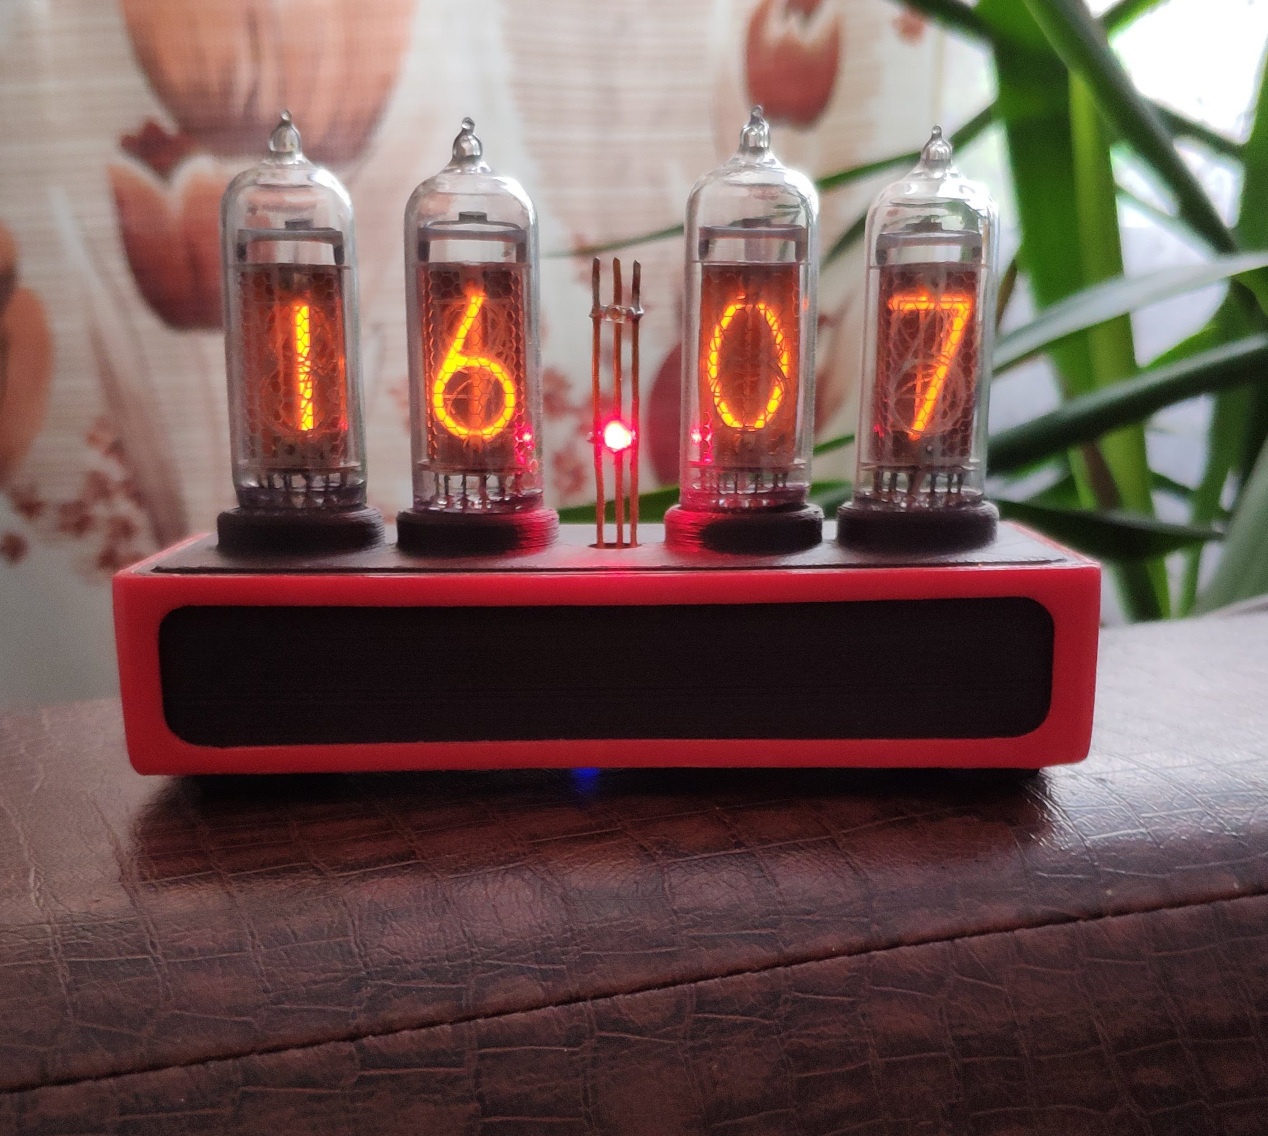
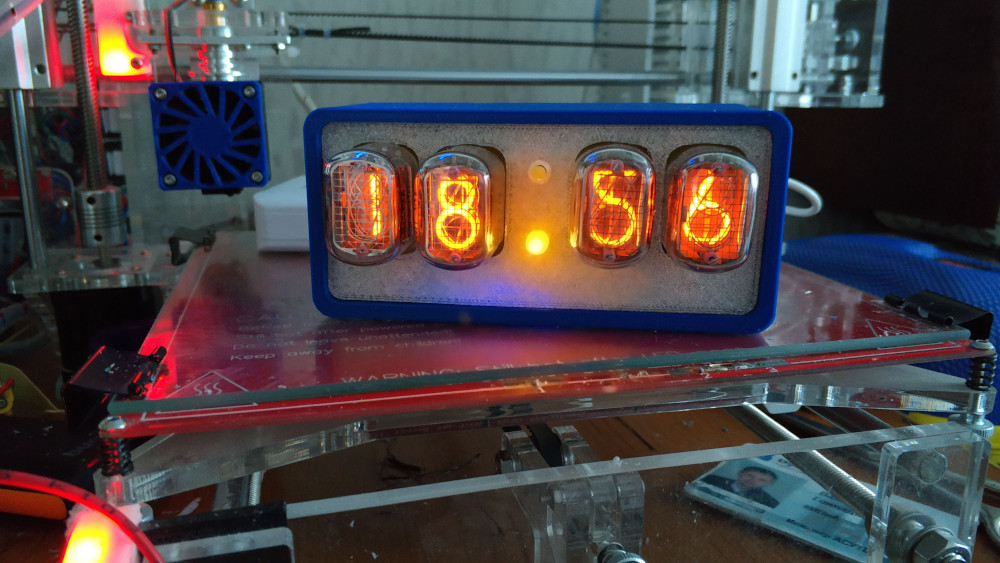
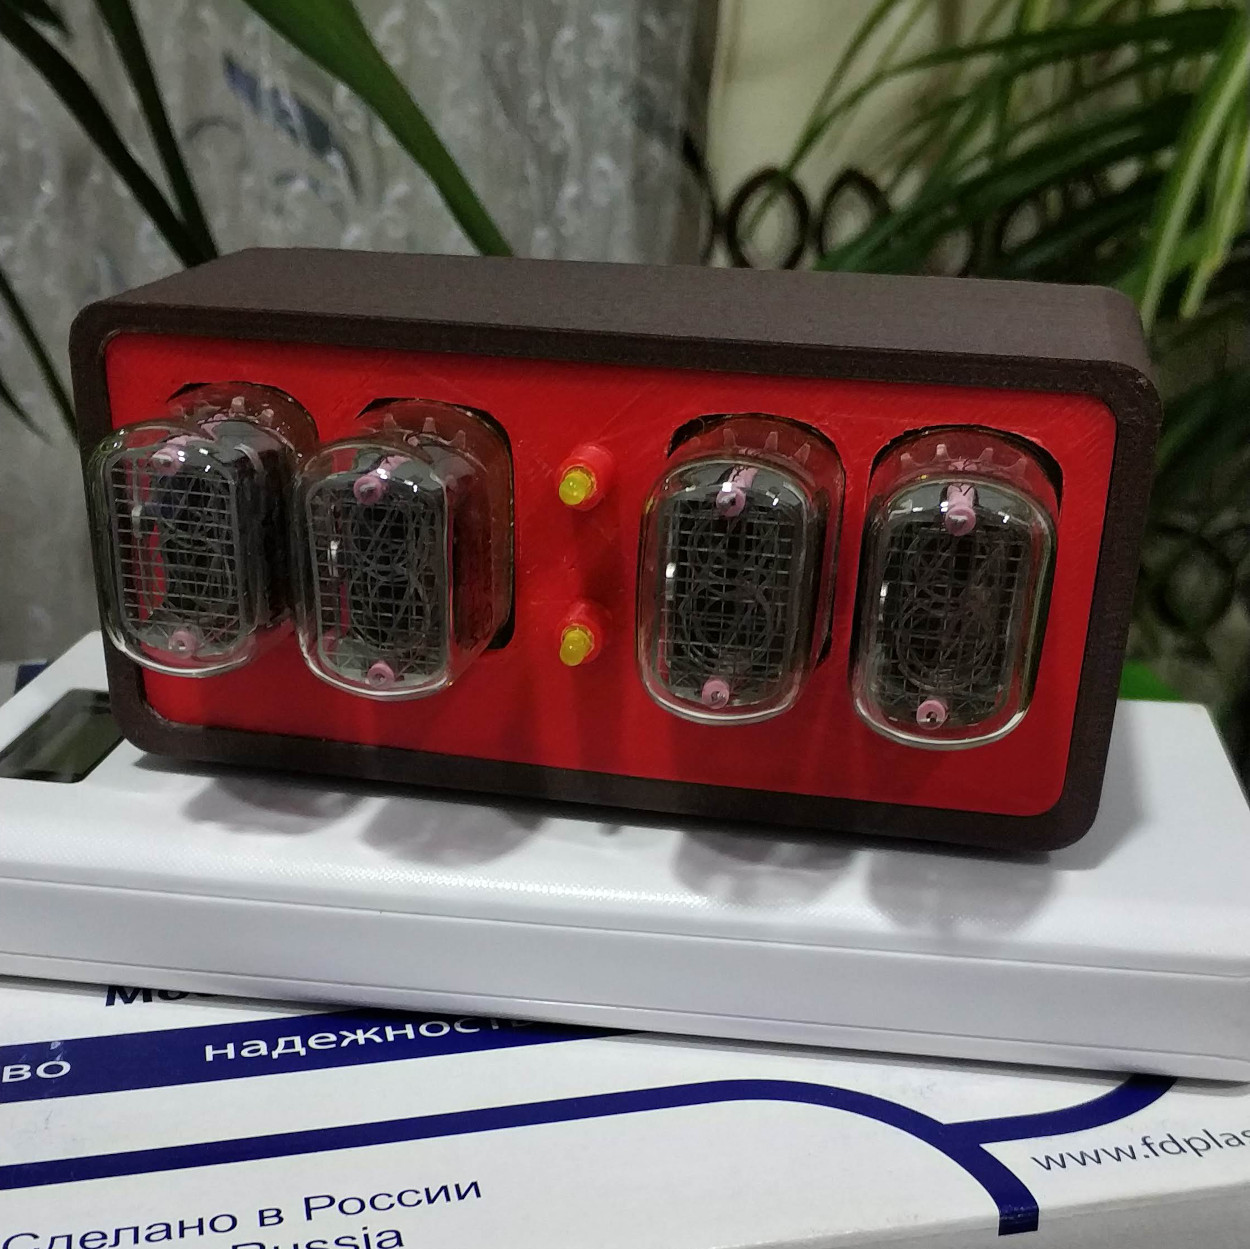
Часы в данный момент находятся на моём на рабочем столе, естественно, в живую они выглядят гораздо красивее:
❯ Давайте поговорим о прошивке часов
Для разработки прошивки часов, я использовал среду разработки Arduino IDE. Ниже представлен код прошивки:
#include <TimeLib.h>
#include <ESP8266WiFi.h>
#include <WiFiClient.h>
#include <ESP8266WebServer.h>
#include <ESP8266mDNS.h>
#include <ESP8266HTTPUpdateServer.h>
#include <WiFiUdp.h>
#include <EEPROM.h>
#include <ESP8266SSDP.h>

const char* host = "retroclock";
const char *ap_ssid = "NixieClock";
const char *ap_password = "EsPnEtWoRk";
int statusCode;
String st;
String content;

// NTP Servers:
String ntpServerName2;
int timeZone = 0;     // Time zone

ESP8266WebServer httpServer(80);
ESP8266HTTPUpdateServer httpUpdater;

WiFiUDP Udp;
unsigned int localPort = 8888;  // local port to listen for UDP packets

time_t getNtpTime();
void digitalClockDisplay();
void printDigits(int digits);
void sendNTPpacket(IPAddress &address);
/*
const int D_A0 = 16;
const int D_A1 = 12;
const int D_A2 = 13;
const int D_A3 = 14;
*/
const int D_A0 = 13; //A
const int D_A1 = 16; //B
const int D_A2 = 14; //C
const int D_A3 = 12; //D
//digits multiplex
const int D_M1 = 5; //A
const int D_M2 = 2; //B
const int D_M3 = 0; //C
const int D_M4 = 4; //D
const int LED1 = 1; //used Tx pin 1
const int LED2 = 3; //used Rx pin 3
int counter  = 0;
int counter2 = 0;

uint32_t ms,  ms1 = 0; //for timer
uint32_t ms2,  ms3 = 0;
uint32_t ms4,  ms5 = 0;
uint32_t ms6,  ms7 = 0;

void setup() {
EEPROM.begin(512);

timeZone =  read_EEPROM(32,96).toInt();
ntpServerName2 =  read_EEPROM(0,32);

pinMode(D_A0, OUTPUT); //A0
pinMode(D_A1, OUTPUT); //A1
pinMode(D_A2, OUTPUT); //A2
pinMode(D_A3, OUTPUT); //A3
pinMode(D_M1, OUTPUT); //1
pinMode(D_M2, OUTPUT); //2
pinMode(D_M3, OUTPUT); //3
pinMode(D_M4, OUTPUT); //4
pinMode(LED1, OUTPUT); //LED1
pinMode(LED2, OUTPUT); //LED2


httpServer.on("/",   rootPageHandler);
httpServer.on("/wlan_config", wlanPageHandler);
httpServer.on("/setting", setting);
httpServer.on("/time.html", timess);
httpServer.on("/times.html", testpage);
httpServer.onNotFound(handleNotFound);

  WiFi.mode(WIFI_STA);
  WiFi.begin();
  for (int x = 0; x < 100; x ++){
    if (WiFi.status() == WL_CONNECTED){
      break;
    }
    delay(500);
  }
  if(WiFi.status() != WL_CONNECTED) {
    delay(500);
      WiFi.mode(WIFI_AP_STA);
      WiFi.softAP(ap_ssid, ap_password);
        }
  WiFi.hostname("IoT Nixie Clock IN-14");
  MDNS.begin(host);
  httpUpdater.setup(&httpServer);
  //httpServer.begin();

  MDNS.addService("http", "tcp", 80);
  delay(2000);
        HTTP_init();    //настраиваем HTTP интерфейс
        SSDP_init();    //запускаем SSDP сервис

Udp.begin(localPort);
setSyncProvider(getNtpTime);
setSyncInterval(300);
}


time_t prevDisplay = 0;


void loop() {
 httpServer.handleClient();
 ms4 = micros();
 if((ms4-ms5) >= 800 ) {
      counter++;
      ms5 = ms4;
 }
  if(counter > 30){
    counter = 0;
  }
  if (millis() > 20000) {
      switchs();
  }
  else {
      demo();
  }
}

 void displayig(){
 if (counter == 1 or counter == 5 or counter == 10 or counter == 15 or counter == 20 or counter == 25) {
         multiplex(7);
 }
  if (counter == 3 or counter == 4 or counter == 2){ // 1-я цифра //секунды десятые

        int times = second() /10;
        digitfunction(times);
        multiplex(1);
  }

 if (counter == 8 or counter == 9 or counter == 7){ // 2-я цифра /скунды ед

        int times = second() %10;
        digitfunction(times);
        multiplex(2);

  }

  if (counter == 13 or counter == 14 or counter == 12 ){ // 1-я цифра //минуты десятые

        int times = minute() /10;
        digitfunction(times);
        multiplex(4);

  }

   if (counter == 18 or counter == 19 or counter == 17){ // 2-я цифра //минуты ед

       int times = minute() % 10;
       digitfunction(times);
       multiplex(3);

  }

  if (counter == 23 or counter == 24 or counter == 22){ // 3-я цифра

       int times = hour()% 10;;
       digitfunction(times);
       multiplex(5);

  }

  if (counter == 28 or counter == 29 or counter == 27){ // 4-я цифра

      int times = hour()/10;
      digitfunction(times);
      multiplex(6);
  }
}

 void multiplex_sw(int M1, int M2, int M3, int M4) {

     digitalWrite(D_M1, M1); digitalWrite(D_M2, M2); digitalWrite(D_M3, M3); digitalWrite(D_M4, M4);

}


 void multiplex(int chanel){

  switch (chanel) {
    case 1:
     multiplex_sw(HIGH, LOW, HIGH, LOW);
      break;
    case 2:
     multiplex_sw(HIGH, LOW, LOW, HIGH);
      break;
    case 3:
     multiplex_sw(LOW, HIGH, HIGH, LOW);
      break;
    case 4:
     multiplex_sw(HIGH, HIGH, LOW, LOW);
      break;
    case 5:
     multiplex_sw(HIGH, LOW, LOW, LOW);
      break;
    case 6:
     multiplex_sw(LOW, LOW, LOW, HIGH);
     break;
    case 7:
     multiplex_sw(LOW, LOW, LOW, LOW);
     break;
     }
}

 void changeMux(int AO, int A1, int A2, int A3) {

     digitalWrite(D_A0, AO); digitalWrite(D_A1, A1); digitalWrite(D_A2, A2); digitalWrite(D_A3, A3);

}

void digitfunction(int times){

  switch (times) {
    case 0:
        changeMux(LOW, LOW, LOW, LOW);
        break;
    case 1:
        changeMux(HIGH, LOW, LOW, LOW);
        break;
    case 2:
        changeMux(LOW, HIGH, LOW, LOW);
        break;
    case 3:
        changeMux(HIGH, HIGH, LOW, LOW);
        break;
    case 4:
        changeMux(LOW, LOW, HIGH, LOW);
        break;
    case 5:
        changeMux(HIGH, LOW, HIGH, LOW);
        break;
    case 6:
        changeMux(LOW, HIGH, HIGH, LOW);
        break;
    case 7:
        changeMux(HIGH, HIGH, HIGH, LOW);
        break;
      case 8:
        changeMux(LOW, LOW, LOW, HIGH);
        break;
      case 9:
        changeMux(HIGH, LOW, LOW, HIGH);
        break;
     }
  }

void switchs() {
  ms2 = second();
    if(( ms2 ) >= 0 && ( ms2 ) <= 44){
      displayig();
      int pww = 1024;
      ms = millis();
      if(( ms - ms1 ) >= 0 && ( ms - ms1 ) <= 500){analogWrite(LED1, pww);}
      if(( ms - ms1 ) >= 250 && ( ms - ms1 ) <= 500){analogWrite(LED2, pww);}
      if(( ms - ms1 ) >= 500){analogWrite(LED1, 0); analogWrite(LED2, 0);}
      if(( ms - ms1 ) >= 1000){ ms1 = ms;}

      }
    if(( ms2 ) >= 45 && ( ms2  ) <= 60){
      displayig();
      int pww = 1024;
      ms = millis();
      if(( ms - ms1 ) >= 0 && ( ms - ms1 ) <= 500){analogWrite(LED1, pww);
      analogWrite(LED2, pww);}
      //if(( ms - ms1 ) >= 250 && ( ms - ms1 ) <= 500){analogWrite(LED2, pww);}
      if(( ms - ms1 ) >= 500){analogWrite(LED1, 0); analogWrite(LED2, 0);}
      if(( ms - ms1 ) >= 1000){ ms1 = ms;}
      }
}


/*-------- NTP code ----------*/

const int NTP_PACKET_SIZE = 48; // NTP time is in the first 48 bytes of message
byte packetBuffer[NTP_PACKET_SIZE]; //buffer to hold incoming & outgoing packets

time_t getNtpTime(){
  IPAddress ntpServerIP; // NTP server's ip address
         char char_var_resp[ntpServerName2.length()];
         ntpServerName2.toCharArray(char_var_resp, ntpServerName2.length()+1);

  while (Udp.parsePacket() > 0) ; // discard any previously received packets
   WiFi.hostByName(char_var_resp, ntpServerIP);
  sendNTPpacket(ntpServerIP);
  uint32_t beginWait = millis();
  while (millis() - beginWait < 1500) {
    int size = Udp.parsePacket();
    if (size >= NTP_PACKET_SIZE) {
      Udp.read(packetBuffer, NTP_PACKET_SIZE);  // read packet into the buffer
      unsigned long secsSince1900;
      // convert four bytes starting at location 40 to a long integer
      secsSince1900 =  (unsigned long)packetBuffer[40] << 24;
      secsSince1900 |= (unsigned long)packetBuffer[41] << 16;
      secsSince1900 |= (unsigned long)packetBuffer[42] << 8;
      secsSince1900 |= (unsigned long)packetBuffer[43];
      return secsSince1900 - 2208988800UL + timeZone * SECS_PER_HOUR;
    }
  }
  return 0; // return 0 if unable to get the time
}

// send an NTP request to the time server at the given address
void sendNTPpacket(IPAddress &address){
  // set all bytes in the buffer to 0
  memset(packetBuffer, 0, NTP_PACKET_SIZE);
  // Initialize values needed to form NTP request
  // (see URL above for details on the packets)
  packetBuffer[0] = 0b11100011;   // LI, Version, Mode
  packetBuffer[1] = 0;     // Stratum, or type of clock
  packetBuffer[2] = 6;     // Polling Interval
  packetBuffer[3] = 0xEC;  // Peer Clock Precision
  // 8 bytes of zero for Root Delay & Root Dispersion
  packetBuffer[12] = 49;
  packetBuffer[13] = 0x4E;
  packetBuffer[14] = 49;
  packetBuffer[15] = 52;
  // all NTP fields have been given values, now
  // you can send a packet requesting a timestamp:
  Udp.beginPacket(address, 123); //NTP requests are to port 123
  Udp.write(packetBuffer, NTP_PACKET_SIZE);
  Udp.endPacket();
}

void demo(){
  ms6 = millis();
  if ((ms6-ms7) >= 2) {
  counter2++;
  ms7 = ms6;
 }
  if (counter2 > 0 && counter2 < 1000){ // 4-я цифра
    multiplex(2);
if(counter2 == 100) { digitfunction(9);}
if(counter2 == 200) { digitfunction(8);}
if(counter2 == 300) { digitfunction(7);}
if(counter2 == 400) { digitfunction(6);}
if(counter2 == 500) { digitfunction(5);}
if(counter2 == 600) { digitfunction(4);}
if(counter2 == 700) { digitfunction(3);}
if(counter2 == 800) { digitfunction(2);}
if(counter2 == 900) { digitfunction(1);}
if(counter2 == 1000) { digitfunction(0);}
  }

  if (counter2 >1100 && counter2 < 2100){ // 3-я цифра
  multiplex(1);
    if(counter2 == 1100) { digitfunction(9);}
    if(counter2 == 1200) { digitfunction(8);}
    if(counter2 == 1300) { digitfunction(7);}
    if(counter2 == 1400) { digitfunction(6);}
    if(counter2 == 1500) { digitfunction(5);}
    if(counter2 == 1600) { digitfunction(4);}
    if(counter2 == 1700) { digitfunction(3);}
    if(counter2 == 1800) { digitfunction(2);}
    if(counter2 == 1900) { digitfunction(1);}
    if(counter2 == 2000) { digitfunction(0);}
  }

  if (counter2 >2100 && counter2 < 3100){ // 2-я цифра
    multiplex(3);
    if(counter2 == 2100) { digitfunction(9);}
    if(counter2 == 2200) { digitfunction(8);}
    if(counter2 == 2300) { digitfunction(7);}
    if(counter2 == 2400) { digitfunction(6);}
    if(counter2 == 2500) { digitfunction(5);}
    if(counter2 == 2600) { digitfunction(4);}
    if(counter2 == 2700) { digitfunction(3);}
    if(counter2 == 2800) { digitfunction(2);}
    if(counter2 == 2900) { digitfunction(1);}
    if(counter2 == 3000) { digitfunction(0);}
  }

  if (counter2 >3100 && counter2 < 4100){ // 4-я цифра
    multiplex(4);
    if(counter2 == 3100) { digitfunction(9);}
    if(counter2 == 3200) { digitfunction(8);}
    if(counter2 == 3300) { digitfunction(7);}
    if(counter2 == 3400) { digitfunction(6);}
    if(counter2 == 3500) { digitfunction(5);}
    if(counter2 == 3600) { digitfunction(4);}
    if(counter2 == 3700) { digitfunction(3);}
    if(counter2 == 3800) { digitfunction(2);}
    if(counter2 == 3900) { digitfunction(1);}
    if(counter2 == 4000) { digitfunction(0);}
  }
  if (counter2 >4100 && counter2 < 5100){ // 5-я цифра
    multiplex(5);
   if(counter2 == 4100) { digitfunction(9);}
   if(counter2 == 4200) { digitfunction(8);}
   if(counter2 == 4300) { digitfunction(7);}
   if(counter2 == 4400) { digitfunction(6);}
   if(counter2 == 4500) { digitfunction(5);}
   if(counter2 == 4600) { digitfunction(4);}
   if(counter2 == 4700) { digitfunction(3);}
   if(counter2 == 4800) { digitfunction(2);}
   if(counter2 == 4900) { digitfunction(1);}
   if(counter2 == 5000) { digitfunction(0);}
  }
  if (counter2 >5100 && counter2 < 6100){ // 6-я цифра
    multiplex(6);
   if(counter2 == 5100) { digitfunction(9);}
   if(counter2 == 5200) { digitfunction(8);}
   if(counter2 == 5300) { digitfunction(7);}
   if(counter2 == 5400) { digitfunction(6);}
   if(counter2 == 5500) { digitfunction(5);}
   if(counter2 == 5600) { digitfunction(4);}
   if(counter2 == 5700) { digitfunction(3);}
   if(counter2 == 5800) { digitfunction(2);}
   if(counter2 == 5900) { digitfunction(1);}
   if(counter2 == 6000) { digitfunction(0);}
  }
}


//web interface/////////======================================
/* WLAN page allows users to set the WiFi credentials */
String twoDigits(int digits){
  if(digits < 10) {
    String i = '0'+String(digits);
    return i;
  }
  else {
    return String(digits);
  }
}

void wlanPageHandler(){
  if (httpServer.hasArg("ssid")){
    if (httpServer.hasArg("password")){
      WiFi.begin(httpServer.arg("ssid").c_str(), httpServer.arg("password").c_str());
    }else{
      WiFi.begin(httpServer.arg("ssid").c_str());
    }

    while (WiFi.status() != WL_CONNECTED){
      delay(500);
    }

    delay(500);
  }

  String response_message = "";
  response_message +="<head>";
  response_message +="<title>Wi-Fi конфигурация</title>";
  response_message += "<meta http-equiv="Content-Type" content="text/html; charset=utf-8;" />";
  response_message += "<style type="text/css">body{background-color: #7D8EE2;color:#FFF;}a {color:#73B9FF;}.blockk {border:solid 1px #2d2d2d;text-align:center;background:#0059B3;padding:10px 10px 10px 10px;-moz-border-radius: 5px;-webkit-border-radius: 5px;border-radius: 5px;}";
  response_message += ".blockk{border:double 2px #000000;-moz-border-radius: 5px;-webkit-border-radius: 5px;border-radius: 5px;}";
  response_message +="</style><style type="text/css" media='(min-width: 810px)'>body{font-size:18px;}.blockk {width: 400px;}</style>";
  response_message +="<style type="text/css" media='(max-width: 800px) and (orientation:landscape)'>body{font-size:8px;}</style></head>";
  response_message += "<body><center><div class="blockk">";
  response_message += "Настройка беспроводного соединения<br><hr>";

  if (WiFi.status() == WL_CONNECTED){
    IPAddress ip = WiFi.localIP();
    String ipStr = String(ip[0]) + '.' + String(ip[1]) + '.' + String(ip[2]) + '.' + String(ip[3]);
    response_message += "Статус: Модуль подключен к сети "+String(WiFi.SSID())+"<br><hr>";
    response_message += "Уровень сигнала: "+String(WiFi.RSSI())+" dBi <br><hr>";
    response_message += "IP адрес подключения: "+String(ipStr)+"<br><hr>";
  }else{
    response_message += "Статус: Модуль отключен от сети<br><hr>";
  }

  response_message += "<p>Для подключения к  WiFi сети, пожалуйста выберите сеть...</p><br><hr>";

  // Get number of visible access points
  int ap_count = WiFi.scanNetworks();

  if (ap_count == 0){
    response_message += "Не найдено ниодной беспроводной сети.<br><hr>";
  }else{
    response_message += "<form method="get">";
    // Show access points
    for (uint8_t ap_idx = 0; ap_idx < ap_count; ap_idx++){
      response_message += "<input type="radio" name="ssid" value="" + String(WiFi.SSID(ap_idx)) + "">";
      response_message += String(WiFi.SSID(ap_idx)) + " [Уровень сигнала: " + WiFi.RSSI(ap_idx) +" dBi]";
      (WiFi.encryptionType(ap_idx) == ENC_TYPE_NONE) ? response_message += " " : response_message += "[защищена]";
      response_message += "<br><br>";
    }

    response_message += "WiFi пароль доступа (если сеть защищена):<br>";
    response_message += "<input type="text" name="password"><br><hr>";
    response_message += "<input type="submit" value="Подключиться">";
    response_message += "</form>";
  }

  response_message += "</body></html>";
  response_message += "<a href="/">Вернуться назад</a><br><hr>";
  httpServer.send(200, "text/html", response_message);
}
/* Called if requested page is not found */
void handleNotFound(){
  String message = "Файл не найденnn";
  message += "URI: ";
  message += httpServer.uri();
  message += "nMethod: ";
  message += (httpServer.method() == HTTP_GET)?"GET":"POST";
  message += "nArguments: ";
  message += httpServer.args();
  message += "n";

  for (uint8_t i = 0; i < httpServer.args(); i++){
    message += " " + httpServer.argName(i) + ": " + httpServer.arg(i) + "n";
  }

  httpServer.send(404, "text/plain", message);
}
/* Root page for the webserver */

//================================================================================

void rootPageHandler() {
  String response_message = "<html>";
  response_message +="<head>";
  response_message +="<title>Интерфейс неоновых часов</title>";
  response_message += "<meta http-equiv="Content-Type" content="text/html; charset=utf-8;" />";
  response_message += "<style type="text/css">body{background-color: #7D8EE2;color:#FFF;}a {color:#73B9FF;}.blockk {border:solid 1px #2d2d2d;text-align:center;background:#0059B3;padding:10px 10px 10px 10px;-moz-border-radius: 5px;-webkit-border-radius: 5px;border-radius: 5px;}";
  response_message += ".blockk{border:double 2px #000000;-moz-border-radius: 5px;-webkit-border-radius: 5px;border-radius: 5px;}";
  response_message +="</style><style type="text/css" media='(min-width: 810px)'>body{font-size:18px;}.blockk {width: 400px;}</style>";
  response_message +="<style type="text/css" media='(max-width: 800px) and (orientation:landscape)'>body{font-size:8px;}</style>";
  response_message +="<script>n";
  response_message +="setInterval(server_time,1000);n";
  response_message +="function server_time(){n";
  response_message +="var req = new XMLHttpRequest();n";
  response_message +="req.open("GET","times.html",true);n";
  response_message +="req.onreadystatechange = function(){n";
  response_message +="document.getElementById("xz").innerHTML = req.responseText;n";
  response_message +=" }n";
  response_message +=" req.send();n";
  response_message +="}n";
  response_message +="</script>";
  response_message +="<script>n";
  response_message +="setInterval(server_time1,1000);n";
  response_message +="function server_time1(){n";
  response_message +="var req1 = new XMLHttpRequest();n";
  response_message +="req1.open("GET","time.html",true);n";
  response_message +="req1.onreadystatechange = function(){n";
  response_message +="document.getElementById("xzy").innerHTML = req1.responseText;n";
  response_message +=" }n";
  response_message +=" req1.send();n";
  response_message +="}n";
  response_message +="</script>";
  response_message +="</head>";
  response_message += "<body><center><div class="blockk">";
  response_message += "Интерфейс неоновых часов <br><hr>";
  //time display
  response_message += "<b>Идентификатор устройства: "+String(ESP.getChipId())+" </b><hr>";
  //time
  int times =(millis()/1000);
  int timehour =(((times)  % 86400L) / 3600);
    if ( ((times % 3600) / 60) < 10 ) {
      // In the first 10 minutes of each hour, we'll want a leading '0'
      int timehour = 0;
               }
    int timeminuts=((times  % 3600) / 60); // print the minute (3600 equals secs per minute)
    if ( (times % 60) < 10 ) {
      // In the first 10 seconds of each minute, we'll want a leading '0'
      int timeminuts = 0;
        }
    int timeseconds=(times % 60); // print the second

  response_message += "<div id="content3">Время работы модуля: <br>";
  response_message += "<body>";
  response_message += "<div id="xz"></div>";
  response_message += "</body>";
  response_message += "<center>NTP сервер: "+String(ntpServerName2)+" <br></center>";
  response_message += "<center>Часовой пояс: </center>";
  response_message += "<center>";
 if(timeZone==5){ response_message += "UTC/GMT+5 (Екатеринбург)"; }
 if(timeZone==3){ response_message += "UTC/GMT+3 (Москва)"; }
 if(timeZone==4){ response_message += "UTC/GMT+4 (Самара, Ижевск)"; }
 if(timeZone==6){ response_message += "UTC/GMT+6 (Омск)"; }
 if(timeZone==7){ response_message += "UTC/GMT+7 (Красноярск)"; }
 if(timeZone==8){ response_message += "UTC/GMT+8 (Иркутск)"; }
 if(timeZone==9){ response_message += "UTC/GMT+9 (Якутск)"; }
 if(timeZone==10){ response_message += "UTC/GMT+10 (Владивосток)"; }
 if(timeZone==11){ response_message += "UTC/GMT+11 (Камчатка)"; }
 if(timeZone==1){ response_message += "UTC/GMT+1(Центральная Европа)"; }
 if(timeZone==-2){ response_message += "UTC/GMT-2 (Среднеатлантическое время)"; }
 if(timeZone==-3){ response_message += "UTC/GMT-3 (Аргентина)"; }
 if(timeZone==-4){ response_message += "UTC/GMT-4 (Канада)"; }
 if(timeZone==-5){ response_message += "UTC/GMT-5 (Нью-Йорк)"; }
 if(timeZone==-6){ response_message += "UTC/GMT-6 (Чикаго)"; }
 if(timeZone==-7){ response_message += "UTC/GMT-7 (Денвер)"; }
 if(timeZone==-8){ response_message += "UTC/GMT-8 (Лос-Анджелес)"; }
 response_message += "</center>";
 String timenow = String(hour())+":"+twoDigits(minute())+":"+twoDigits(second());
 response_message += "<hr>Время сети: <div id="xzy">"+String(timenow)+"</div>";
  if (WiFi.status() == WL_CONNECTED){
    IPAddress ip = WiFi.localIP();
    String ipStr = String(ip[0]) + '.' + String(ip[1]) + '.' + String(ip[2]) + '.' + String(ip[3]);
    response_message += "<hr>Статус: подключен к сети "+String(WiFi.SSID())+"<br>";
    response_message += "Уровень сигнала: "+String(WiFi.RSSI())+" dBi <br><hr>";
    response_message += "IP адрес подключения: "+String(ipStr)+"<br><hr>";
  }else{
    response_message += "<br><hr>WLAN статус: Отключено<br><hr>";
  }
        response_message += "</p><form method='get' action='setting'><label>NTP сервер: <br></label><input name='ssid' length=32><br><label>Часовой пояс</label><br>";
        response_message += "<select name='pass'>";
        response_message += "<option disabled>Выберите часовой пояс</option>";
        response_message += "<option selected value = '5'>UTC/GMT+5 (Екатеринбург)</option>";
        response_message += "<option value = '3'>UTC/GMT+3 (Москва)</option>";
        response_message += "<option value = '4'> UTC/GMT+4 (Самара, Ижевск)</option>";
        response_message += "<option value = '6'> UTC/GMT+6 (Омск)</option>";
        response_message += "<option value = '7'> UTC/GMT+7 (Красноярск)</option>";
        response_message += "<option value = '8'> UTC/GMT+8 (Иркутск)</option>";
        response_message += "<option value = '9'> UTC/GMT+9 (Якутск)</option>";
        response_message += "<option value = '10'> UTC/GMT+10 (Владивосток)</option>";
        response_message += "<option value = '11'> UTC/GMT+11 (Камчатка)</option>";
        response_message += "<option value = '1'> UTC/GMT+1(Центральная Европа)</option>";
        response_message += "<option value = '0'> UTC/GMT-0 (Гринвич)</option>";
        response_message += "<option value = '-2'> UTC/GMT-2 (Среднеатлантическое время)</option>";
        response_message += "<option value = '-3'> UTC/GMT-3 (Аргентина)</option>";
        response_message += "<option value = '-4'> UTC/GMT-4 (Канада)</option>";
        response_message += "<option value = '-5'> UTC/GMT-5 (Нью-Йорк)</option>";
        response_message += "<option value = '-6'> UTC/GMT-6 (Чикаго)</option>";
        response_message += "<option value = '-7'> UTC/GMT-7 (Денвер)</option>";
        response_message += "<option value = '-8'> UTC/GMT-8 (Лос-Анджелес)</option>";
        response_message += "</select>";
        response_message += "<br><br><input type='submit'></form>";
        response_message += "<a href="/wlan_config">Настройки беспроводного соединения</a><br><hr>";
        response_message += "<a href="/update">Обновление прошивки (OTA)</a><br><hr>";
        response_message += "</div></center></body></html>";

  httpServer.send(200, "text/html", response_message);
}
///====================================================

void setting() {
  String response_message = "<html>";
  response_message +="<head>";
  response_message +="<title>Интерфейс неоновых часов</title>";
  response_message += "<meta http-equiv="Content-Type" content="text/html; charset=utf-8;" />";
  response_message += "<style type="text/css">body{background-color: #7D8EE2;color:#FFF;}a {color:#73B9FF;}.blockk {border:solid 1px #2d2d2d;text-align:center;background:#0059B3;padding:10px 10px 10px 10px;-moz-border-radius: 5px;-webkit-border-radius: 5px;border-radius: 5px;}";
  response_message += ".blockk{border:double 2px #000000;-moz-border-radius: 5px;-webkit-border-radius: 5px;border-radius: 5px;}";
  response_message +="</style><style type="text/css" media='(min-width: 810px)'>body{font-size:18px;}.blockk {width: 400px;}</style>";
  response_message +="<style type="text/css" media='(max-width: 800px) and (orientation:landscape)'>body{font-size:8px;}</style></head>";
  response_message += "<body><center><div class="blockk">";
  response_message += "Интерфейс Smart Power Switch <br><hr>";
  //time display
  response_message += "<b>Идентификатор устройства: "+String(ESP.getChipId())+" </b><hr>";
  //time
  int times =(millis()/1000);
  int timehour =(((times)  % 86400L) / 3600);
    if ( ((times % 3600) / 60) < 10 ) {
      int timehour = 0;
          }
    int timeminuts=((times  % 3600) / 60); // print the minute (3600 equals secs per minute)
    if ( (times % 60) < 10 ) {
      int timeminuts = 0;
        }
    int timeseconds=(times % 60); // print the second

    response_message += "<div id="content3">"+String(timehour)+":"+String(timeminuts)+":"+String(timeseconds)+"</div>";


  if (WiFi.status() == WL_CONNECTED){
    IPAddress ip = WiFi.localIP();
    String ipStr = String(ip[0]) + '.' + String(ip[1]) + '.' + String(ip[2]) + '.' + String(ip[3]);
    response_message += "<br><hr>Статус: подключен к сети "+String(WiFi.SSID())+"<br>";
    response_message += "Уровень сигнала: "+String(WiFi.RSSI())+" dBi <br><hr>";
    response_message += "IP адрес подключения: "+String(ipStr)+"<br><hr>";

  }else{
    response_message += "<br><hr>WLAN статус: Отключено<br><hr>";
  }
  ///====
String qsid =  httpServer.arg("ssid");
        String qpass =  httpServer.arg("pass");
        if (qsid.length() > 0 && qpass.length() > 0) {
          timeZone = qpass.toInt();
          for (int i = 0; i < 96; ++i) { EEPROM.write(i, 0); }

          for (int i = 0; i < qsid.length(); ++i)
            {
              EEPROM.write(i, qsid[i]);
            }

          for (int i = 0; i < qpass.length(); ++i)
            {
              EEPROM.write(32+i, qpass[i]);

            }
          EEPROM.commit();
          timeZone = qpass.toInt();
          ntpServerName2 = string_to_char(qsid);
          response_message += "Выполнено! Сохранено в памяти... перезагрузите устройство для активации изменений <br>";
          statusCode = 200;
        } else {
          response_message += "Ошибка! Отсутствуют данныее <br>";
          statusCode = 404;

        }


  ////===

  response_message += "<a href="/wlan_config">Настройки беспроводного соединения</a><br><hr>";
  response_message += "<a href="/update">Обновление прошивки (OTA)</a><br><hr>";
  response_message += "<a href="/">Главная</a><br><hr>";
  response_message += "</div></center></body></html>";

  httpServer.send(200, "text/html", response_message);
}
void timess(){
  String response_message = "";
  String timenow = String(hour())+":"+twoDigits(minute())+":"+twoDigits(second());
 response_message += String(timenow);
 httpServer.send(200, "text/html", response_message);
}
void testpage(){
  String response_message = "";
 int times =(millis()/1000);
  int timehour =(((times)  % 86400L) / 3600);
    if ( ((times % 3600) / 60) < 10 ) {
      // In the first 10 minutes of each hour, we'll want a leading '0'
      int timehour = 0;
               }
    int timeminuts=((times  % 3600) / 60); //
    if ( (times % 60) < 10 ) {
      int timeminuts = 0;
        }
    int timeseconds=(times % 60); //

  String timenow = String(timehour)+":"+twoDigits(timeminuts)+":"+twoDigits(timeseconds);
  response_message += String(timenow);
 httpServer.send(200, "text/html", response_message);
}

void SSDP_init(){
              SSDP.setName("V.G.C. Smart Device Network");
              SSDP.setSchemaURL("description.xml");
              SSDP.setHTTPPort(80);
              SSDP.setName("NixieClock IN-14");
              SSDP.setSerialNumber(String(ESP.getChipId()));
              SSDP.setURL("index.html");
              SSDP.setModelName("NixieClock IN-14");
              SSDP.setModelNumber("1.1.5");
              SSDP.setModelURL("https://cyberex.online");
              SSDP.setManufacturer("V.G.C. Smart Electronics");
              SSDP.setManufacturerURL("https://cyberex.online");
              SSDP.begin();
           }


      void HTTP_init(){
              httpServer.on("/index.html", HTTP_GET, [](){
              httpServer.send(200, "text/plain", "NixieClock IN-14");
             });
              httpServer.on("/description.xml", HTTP_GET, [](){
              SSDP.schema(httpServer.client());
             });
              httpServer.begin();
         }

   char* string_to_char(String char_var){ //преобразуем в char
         char char_var_resp[char_var.length()];
         char_var.toCharArray(char_var_resp, char_var.length()+1);
         return char_var_resp;
         }
          // Чтение данных их ячейки
   String read_EEPROM(int star_t, int end_t){
            String data;
            for(int i = star_t; i < end_t; ++i){
            int bu = EEPROM.read(i);
              if(bu > 31 && bu < 241){
                 data += char(bu);
              }
              }
            return data;
         }

// запись данных в ячейки
    String save_EEPROM (String data, int cell_start, int cell_end){

          for (int i = cell_start; i < cell_end; ++i) //стираем данные перед записью
           {
            EEPROM.write(i, 0);
            }
          for (int i = 0; i < data.length(); ++i) //записываем данные в ячейки
            {
            EEPROM.write(cell_start+i, data[i]);
            }
            EEPROM.commit();

         return data;
   }
После удачной прошивки и первом включении, часы создадут Wi-Fi точку доступа. Для конфигурации часов необходимо подключиться к созданной точке доступа (пароль сети указан в прошивке) и перейдя по IP адресу 192.168.4.1 в браузере вашего устройства, выполнить не сложную настройку часов. Ниже представлен скриншот интерфейса устройства:
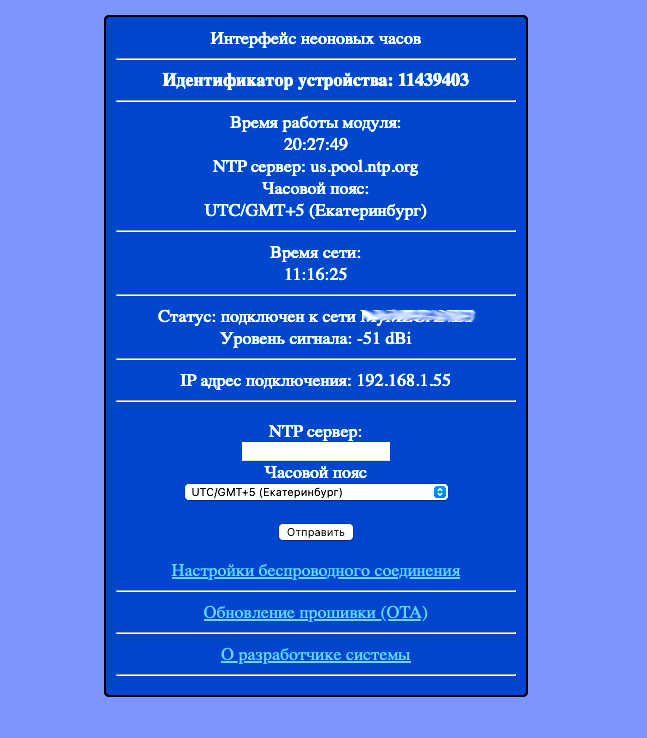
Для настройки часов, вам необходимо будет подключиться к вашей Wi-Fi сети, указать NTP сервер и ваш часовой пояс. Затем перезагрузить часы. Всё, часы готовы к использованию.
❯ Что в итоге?
В итоге у нас получились простые в реализации часы на ламповых индикаторах, где не требуется применять антикварные микросхемы типа К155ИД1, вся схема выполнена на современной элементарной базе. Часы не нуждаются в ручной настройке времени, синхронизация времени выполняется автоматически с удаленного NTP сервера, что гарантирует постоянную точность времени. Разработанный драйвер показал хорошие результаты надежности, работая уже более пяти лет.
Есть желание собрать часы на базе этого драйвера с применением ламп ИН-18, но пока стоимость ламп меня пугает).
Спасибо, что дочитали до конца! Если статья понравилась, то вы знаете что делать. И как всегда, вопросы, пожелания, осуждение? :) — добро пожаловать в комментарии. До встречи в новых статьях!
Ссылки к статье:
- Модель корпуса часов
- Моё мобильное приложение для быстрого поиска и доступа к моим(и не только) самодельным устройствам.
Автор: Valeriy


