Добрый день, дорогие обитатели !
Не так давно мне представилась возможность реализовать небольшой проект без особых требований по технической части. То есть, я был волен выбирать стек технологий на своё усмотрение. Потому не преминул возможностью как следует «пощупать» модные, молодёжные многообещающие, но малознакомые мне на практике Kotlin и Vue.js, добавив туда уже знакомый Spring Boot и примерив всё это на незамысловатое веб-приложение.
Приступив, я опрометчиво полагал, что в Интернете найдётся множество статей и руководств на эту тему. Материалов действительно достаточно, и все они хороши, но только до первого REST-контроллера. Затем начинаются трудности противоречия. А ведь даже в простом приложении хотелось бы иметь более сложную логику, чем отрисовка на странице текста, возвращаемого сервером.
Кое-как разобравшись, я решил написать собственное руководство, которое, надеюсь, будет кому-нибудь полезно.
О чём и для кого статья
Данный материал — руководство для «быстрого старта» разработки веб-приложения с бэкендом на Kotlin + Spring Boot и фронтендом на Vue.js. Сразу скажу, что я не «топлю» за них и не говорю о каких-то однозначных преимуществах данного стека. Цель данной статьи — поделиться опытом.
Материал рассчитан на разработчиков, имеющих опыт работы с Java, Spring Framework/Spring Boot, React/Angular или хотя бы чистым JavaScript. Подойдёт и тем, у кого нет такого опыта — например, начинающим программистам, но, боюсь, тогда придётся разбираться в некоторых деталях самостоятельно. Вообще, некоторые моменты этого руководства стоит рассмотреть подробнее, но, думаю, лучше сделать это в рамках других публикаций, чтобы сильно не отклоняться от темы и не делать статью громоздкой.
Быть может, кому это поможет сформировать представление о бэкенд-разработке на Kotlin без необходимости самому погружаться в данную тематику, а кому-то — сократить время работы, взяв за основу уже готовый скелет приложения.
Несмотря описание конкретных практических шагов, в целом, на мой взгляд, статья имеет экспериментально-обзорный характер. Сейчас такой подход, да и сама постановка вопроса видится, скорее, как хипстерская затея — собрать как можно больше модных слов в одном месте. Но в будущем, возможно, и займёт свою нишу в энтерпрайзной разработке. Быть может, среди нас есть начинающие (и продолжающие) программисты, которым предстоит жить и работать во времена, когда Kotlin и Vue.js будут так же популярны и востребованы, как сейчас Java и React. Ведь Kotlin и Vue.js действительно подают большие надежды.
За то время, пока я писал это руководство, в сети уже стали появляться похожие публикации, как, например, эта. Повторюсь, материалов, где разбирается порядок действий до первого REST-контроллера достаточно, но интересно было бы увидеть более сложную логику — например, реализацию аутентификации с разделением по ролям, что является довольно необходимым функционалом. Именно этим я дополнил своё собственное руководство.
Содержание
- Краткая справка
- Инструменты разработки
- Инициализация проекта
- REST API
- Подключение к базе данных
- Аутентификация
- Пути улучшения
- Полезные ссылки
Краткая справка
Kotlin — язык программирования, работающий поверх JVM и разрабатываемый международной компанией JetBrains.
Vue.js — JavaScript -фреймворк для разработки одностраничных приложений в реактивном стиле.
Инструменты разработки
В качестве среды разработки я бы рекомендовал использовать IntelliJ IDEA — среду разработки от JetBrains, получившую широкую популярность в Java-сообществе, поскольку она имеет удобные инструменты и фичи для работы с Kotlin вплоть для преобразования Java-кода в код на Kotlin. Однако, не стоит рассчитывать, что таким образом можно мигрировать целый проект, и всё вдруг заработает само собой.
Счастливые обладатели IntelliJ IDEA Ultimate Edition могут для удобства работы с Vue.js установить соответствующий плагин. Если же вы ищете компромисс между халявой ценой и удобством, то очень рекомендую использовать Microsoft Visual Code с плагином Vetur.
Полагаю, для многих это очевидно, но на всякий случай напомню, что для работы c Vue.js требуется менеджер пакетов npm. Инструкцию по установке Vue.js можно найти на сайте Vue CLI.
В качестве сборщика проектов на Java в данном руководстве используется Maven, в качестве сервера баз данных — PostgreSQL.
Инициализация проекта
Создадим директорию проекта, назвав, например kotlin-spring-vue. Нашем проекте будут два модуля — backend и frontend. Сначала будет собираться фронтенд. Затем, при сборке бэкенд будет копировать себе index.hmtl, favicon.ico и все статические файлы (*.js, *.css, изображения и т.д.).
Таким образом, в корневом каталоге у нас будут находится две подпапки — /backend и /frontend. Однако, не стоит торопиться создавать их вручную.
Инициализировать модуль бэкенда можно несколькими путями:
- вручную (путь самурая)
- сгенерирован проект Spring Boot приложения средствами Spring Tool Suite или IntelliJ IDEA Ultimate Edition
- С помощью Spring Initializr, указав нужные настройки — это, пожалуй, самый распространенный способ
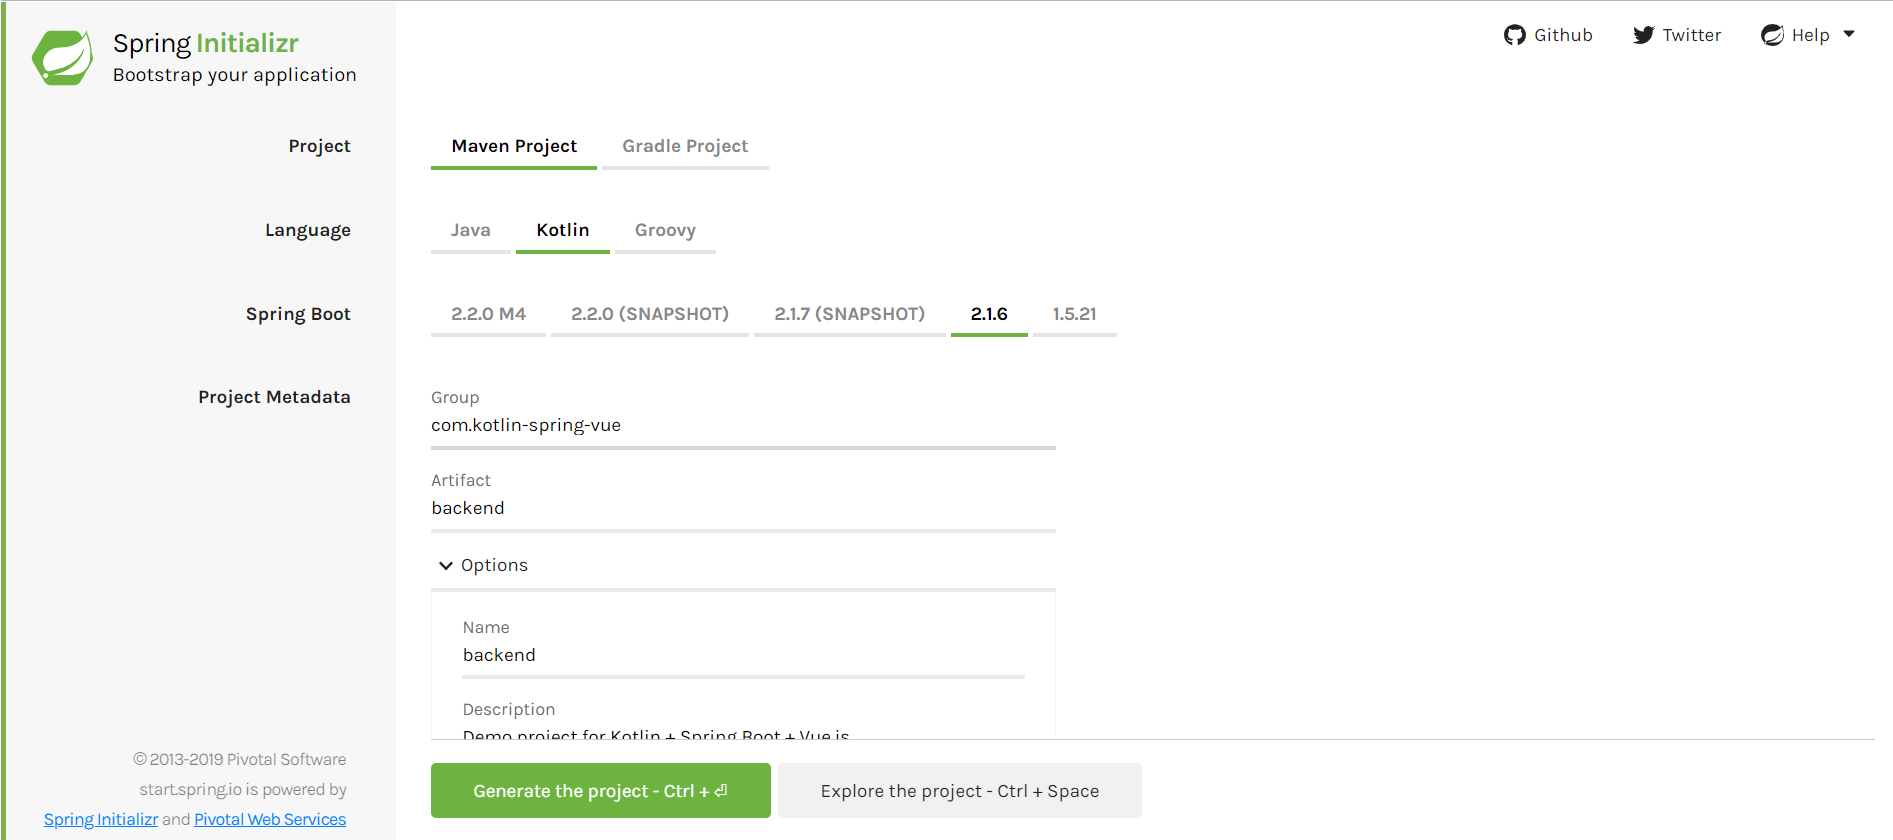
В нашем случае первичная конфигурация такова:
- Project: Maven Project
- Language: Kotlin
- Spring Boot: 2.1.6
- Project Metadata: Java 8, JAR packaging
- Dependencies: Spring Web Starter, Spring Boot Actuator, Spring Boot DevTools
pom.xml должен выглядеть следующим образом:
<?xml version="1.0" encoding="UTF-8"?>
<project xmlns="http://maven.apache.org/POM/4.0.0" xmlns:xsi="http://www.w3.org/2001/XMLSchema-instance"
	xsi:schemaLocation="http://maven.apache.org/POM/4.0.0 http://maven.apache.org/xsd/maven-4.0.0.xsd">
	<modelVersion>4.0.0</modelVersion>

	<parent>
		<groupId>com.kotlin-spring-vue</groupId>
		<artifactId>demo</artifactId>
		<version>1.0-SNAPSHOT</version>
	</parent>

	<groupId>com.kotlin-spring-vue</groupId>
	<artifactId>backend</artifactId>
	<version>0.0.1-SNAPSHOT</version>
	<name>backend</name>
	<description>Backend module for Kotlin + Spring Boot + Vue.js</description>

	<properties>
		<java.version>1.8</java.version>
		<kotlin.version>1.2.71</kotlin.version>
		<project.build.sourceEncoding>UTF-8</project.build.sourceEncoding>
		<project.reporting.outputEncoding>UTF-8</project.reporting.outputEncoding>
		<rest-assured.version>3.3.0</rest-assured.version>
		<start-class>com.kotlinspringvue.backend.BackendApplicationKt</start-class>
	</properties>

	<dependencies>
		<dependency>
			<groupId>org.springframework.boot</groupId>
			<artifactId>spring-boot-starter-actuator</artifactId>
		</dependency>
		<dependency>
			<groupId>org.springframework.boot</groupId>
			<artifactId>spring-boot-starter-web</artifactId>
		</dependency>
		<dependency>
			<groupId>com.fasterxml.jackson.module</groupId>
			<artifactId>jackson-module-kotlin</artifactId>
		</dependency>
		<dependency>
			<groupId>org.jetbrains.kotlin</groupId>
			<artifactId>kotlin-reflect</artifactId>
		</dependency>
		<dependency>
			<groupId>org.jetbrains.kotlin</groupId>
			<artifactId>kotlin-stdlib-jdk8</artifactId>
		</dependency>

		<dependency>
			<groupId>org.springframework.boot</groupId>
			<artifactId>spring-boot-devtools</artifactId>
			<scope>runtime</scope>
			<optional>true</optional>
		</dependency>
		<dependency>
			<groupId>org.springframework.boot</groupId>
			<artifactId>spring-boot-starter-test</artifactId>
			<scope>test</scope>
		</dependency>
	</dependencies>

	<build>
		<sourceDirectory>${project.basedir}/src/main/kotlin</sourceDirectory>
		<testSourceDirectory>${project.basedir}/src/test/kotlin</testSourceDirectory>
		<plugins>
			<plugin>
				<groupId>org.springframework.boot</groupId>
				<artifactId>spring-boot-maven-plugin</artifactId>
				<configuration>
					<mainClass>com.kotlinspringvue.backend.BackendApplicationKt</mainClass>
				</configuration>
			</plugin>
			<plugin>
				<groupId>org.jetbrains.kotlin</groupId>
				<artifactId>kotlin-maven-plugin</artifactId>
				<configuration>
					<args>
						<arg>-Xjsr305=strict</arg>
					</args>
					<compilerPlugins>
						<plugin>spring</plugin>
					</compilerPlugins>
				</configuration>
				<dependencies>
					<dependency>
						<groupId>org.jetbrains.kotlin</groupId>
						<artifactId>kotlin-maven-allopen</artifactId>
						<version>${kotlin.version}</version>
					</dependency>
				</dependencies>
			</plugin>
			<plugin>
				<artifactId>maven-resources-plugin</artifactId>
				<executions>
					<execution>
						<id>copy Vue.js frontend content</id>
						<phase>generate-resources</phase>
						<goals>
							<goal>copy-resources</goal>
						</goals>
						<configuration>
							<outputDirectory>src/main/resources/public</outputDirectory>
							<overwrite>true</overwrite>
							<resources>
								<resource>
									<directory>${project.parent.basedir}/frontend/target/dist</directory>
									<includes>
										<include>static/</include>
										<include>index.html</include>
										<include>favicon.ico</include>
									</includes>
								</resource>
							</resources>
						</configuration>
					</execution>
				</executions>
			</plugin>
		</plugins>
	</build>
</project>
Обращаю внимание:
- Название главного класса заканчивается на Kt
- Выполняется копирование ресурсов из корневая_папка_проекта/frontend/target/dist в src/main/resources/public
- Родительский проект (parent) в лице spring-boot-starter-parent пренесён на уровень главного pom.xml
Чтобы инициализировать модуль фронтенда, переходим в корневую директорию проекта и выполняем команду:
$ vue create frontendДалее можно выбрать все настройки по умолчанию — в нашем случае этого будет достаточно.
По умолчанию модуль будет собираться в подпапку /dist, однако нам нужно видеть собранные файлы в папке /target. Для этого создадим файл vue.config.js прямо в /frontend со следующими настройками:
module.exports = {
     outputDir: 'target/dist',
     assetsDir: 'static'
}
Поместим в модуль frontend файл pom.xml такого вида:
<?xml version="1.0" encoding="UTF-8"?>
<project xmlns="http://maven.apache.org/POM/4.0.0" xmlns:xsi="http://www.w3.org/2001/XMLSchema-instance" xsi:schemaLocation="http://maven.apache.org/POM/4.0.0 http://maven.apache.org/xsd/maven-4.0.0.xsd">
  <modelVersion>4.0.0</modelVersion>
  <artifactId>frontend</artifactId>

  <parent>
     <groupId>com.kotlin-spring-vue</groupId>
     <artifactId>demo</artifactId>
     <version>0.0.1-SNAPSHOT</version>
  </parent>

  <properties>
     <project.build.sourceEncoding>UTF-8</project.build.sourceEncoding>
     <project.reporting.outputEncoding>UTF-8</project.reporting.outputEncoding>
     <java.version>1.8</java.version>
      <frontend-maven-plugin.version>1.6</frontend-maven-plugin.version>
  </properties>

  <build>
     <plugins>
        <plugin>
           <groupId>com.github.eirslett</groupId>
           <artifactId>frontend-maven-plugin</artifactId>
           <version>${frontend-maven-plugin.version}</version>
           <executions>
              <!-- Install our node and npm version to run npm/node scripts-->
              <execution>
                 <id>install node and npm</id>
                 <goals>
                    <goal>install-node-and-npm</goal>
                 </goals>
                 <configuration>
                    <nodeVersion>v11.8.0</nodeVersion>
                 </configuration>
              </execution>
              <!-- Install all project dependencies -->
              <execution>
                 <id>npm install</id>
                 <goals>
                    <goal>npm</goal>
                 </goals>
                 <!-- optional: default phase is "generate-resources" -->
                 <phase>generate-resources</phase>
                 <!-- Optional configuration which provides for running any npm command -->
                 <configuration>
                    <arguments>install</arguments>
                 </configuration>
              </execution>
              <!-- Build and minify static files -->
              <execution>
                 <id>npm run build</id>
                 <goals>
                    <goal>npm</goal>
                 </goals>
                 <configuration>
                    <arguments>run build</arguments>
                    </configuration>
              </execution>
           </executions>
        </plugin>
     </plugins>
  </build>
</project>
И, наконец, поместим pom.xml в корневую директорию проекта:
<?xml version="1.0" encoding="UTF-8"?>
<project xmlns="http://maven.apache.org/POM/4.0.0"
         xmlns:xsi="http://www.w3.org/2001/XMLSchema-instance"
         xsi:schemaLocation="http://maven.apache.org/POM/4.0.0 http://maven.apache.org/xsd/maven-4.0.0.xsd">
    <modelVersion>4.0.0</modelVersion>

    <groupId>com.kotlin-spring-vue</groupId>
    <artifactId>demo</artifactId>
    <packaging>pom</packaging>
    <version>1.0-SNAPSHOT</version>
    <modules>
        <module>backend</module>
        <module>frontend</module>
    </modules>

    <name>kotlin-spring-vue</name>
    <description>Kotlin + Spring Boot + Vue.js</description>

    <parent>
        <groupId>org.springframework.boot</groupId>
        <artifactId>spring-boot-starter-parent</artifactId>
        <version>2.1.3.RELEASE</version>
        <relativePath/> <!-- lookup parent from repository -->
    </parent>

    <properties>
        <main.basedir>${project.basedir}</main.basedir>
        <!-- Analysis Tools for CI -->
        <build-plugin.jacoco.version>0.8.2</build-plugin.jacoco.version>
        <build-plugin.coveralls.version>4.3.0</build-plugin.coveralls.version>
        <kotlin.version>1.2.71</kotlin.version>
    </properties>

    <dependencies>
        <dependency>
            <groupId>org.jetbrains.kotlin</groupId>
            <artifactId>kotlin-stdlib-jdk8</artifactId>
            <version>${kotlin.version}</version>
        </dependency>
        <dependency>
            <groupId>org.jetbrains.kotlin</groupId>
            <artifactId>kotlin-test</artifactId>
            <version>${kotlin.version}</version>
            <scope>test</scope>
        </dependency>
    </dependencies>

    <build>
        <plugins>
            <plugin>
                <groupId>org.jacoco</groupId>
                <artifactId>jacoco-maven-plugin</artifactId>
                <version>${build-plugin.jacoco.version}</version>
                <executions>
                    <!-- Prepares the property pointing to the JaCoCo
                    runtime agent which is passed as VM argument when Maven the Surefire plugin
                    is executed. -->
                    <execution>
                        <id>pre-unit-test</id>
                        <goals>
                            <goal>prepare-agent</goal>
                        </goals>
                    </execution>
                    <!-- Ensures that the code coverage report for
                    unit tests is created after unit tests have been run. -->
                    <execution>
                        <id>post-unit-test</id>
                        <phase>test</phase>
                        <goals>
                            <goal>report</goal>
                        </goals>
                    </execution>
                </executions>
            </plugin>
            <plugin>
                <groupId>org.eluder.coveralls</groupId>
                <artifactId>coveralls-maven-plugin</artifactId>
                <version>${build-plugin.coveralls.version}</version>
            </plugin>
            <plugin>
                <groupId>org.jetbrains.kotlin</groupId>
                <artifactId>kotlin-maven-plugin</artifactId>
                <version>${kotlin.version}</version>
                <executions>
                    <execution>
                        <id>compile</id>
                        <phase>compile</phase>
                        <goals>
                            <goal>compile</goal>
                        </goals>
                    </execution>
                    <execution>
                        <id>test-compile</id>
                        <phase>test-compile</phase>
                        <goals>
                            <goal>test-compile</goal>
                        </goals>
                    </execution>
                </executions>
                <configuration>
                    <jvmTarget>1.8</jvmTarget>
                </configuration>
            </plugin>
        </plugins>
    </build>
</project>
где мы видим два наших модуля — frontend и backend, а также parent — spring-boot-starter-parent.
Важно: модули должны собираться именно в таком порядке — сначала фронтенд, потом бэкенд.
Теперь мы можем выполнить сборку проекта:
$ mvn installИ, если всё собралось, запустить приложение:
$ mvn --project backend spring-boot:runПо адресу http://localhost:8080/ будет доступна страничка Vue.js по умолчанию:

REST API
Теперь давайте создадим какой-нибудь простенький REST-сервис. Например, «Hello, [имя_пользователя]!» (по умолчанию — World), который считает, сколько раз мы его дёрнули.
Для этого нам понадобится структура данных состоящая из числа и строки — класс, единственным назначением которого является хранение данных. Для этого в Kotlin существуют классы данных. И наш класс будет выглядеть так:
data class Greeting(val id: Long, val content: String)Всё. Теперь можем написать непосредственно сервис.
Примечание: для удобства будет вынесить все сервисы в отдельный маршрут /api с помощью аннотации @RequestMapping перед объявлением класса:
import org.springframework.web.bind.annotation.*
import com.kotlinspringvue.backend.model.Greeting
import java.util.concurrent.atomic.AtomicLong

@RestController
@RequestMapping("/api")
class BackendController() {

     val counter = AtomicLong()

     @GetMapping("/greeting")
     fun greeting(@RequestParam(value = "name", defaultValue = "World") name: String) =
     Greeting(counter.incrementAndGet(), "Hello, $name")

}
Теперь перезапустим приложение и посмотрим результат http://localhost:8080/api/greeting?name=Vadim:
{"id":1,"content":"Hello, Vadim"}Обновим страничку и убедимся, что счётчик работает:
{"id":2,"content":"Hello, Vadim"}
Теперь поработаем над фронтендом, чтобы красиво отрисовывать результат на странице.
Установим vue-router для того, чтобы реализовать навигацию по «страницам» (по факту — по маршрутам и компонентам, поскольку страница у нас всего одна) в нашем приложении:
$ npm install --save vue-router Добавим router.js в /src — этот компонент будет отвечать за маршрутизацию:
import Vue from 'vue'
import Router from 'vue-router'
import HelloWorld from '@/components/HelloWorld'
import Greeting from '@/components/Greeting'

Vue.use(Router)

export default new Router({
   mode: 'history',
   routes: [
     {
       path: '/',
       name: 'Greeting',
       component: Greeting
     },
     {
       path: '/hello-world',
       name: 'HelloWorld',
       component: HelloWorld
     }
   ]
})
Примечание: по корневому маршруту ("/") нам будет доступен компонент Greeting.vue, который мы напишем чуть позже.
Сейчас же заимпортируем наш роутер. Для этого внесём изменения в
import Vue from 'vue'
import App from './App.vue'
import router from './router'

Vue.config.productionTip = false

new Vue({
     router,
     render: h => h(App),
}).$mount('#app')
Затем
<template>
     <div id="app">
           <router-view></router-view>
     </div>
</template>

<script>
export default {
     name: 'app'
}
</script>

<style>
</style>
Для выполнения запросов к серверу воспользуемся HTTP-клиентом AXIOS:
$ npm install --save axiosДля того, чтобы не писать каждый раз одни и те же настройки (например, маршрут запросов — "/api") в каждом компоненте, я рекомендую вынести их в отельный компонент http-commons.js:
import axios from 'axios'

export const AXIOS = axios.create({
     baseURL: `/api`
})
Примечание: чтобы избежать предупреждений при в выводе в консоль (console.log()), я рекомендую прописать эту строку в package.json:
"rules": {
     "no-console": "off"
}
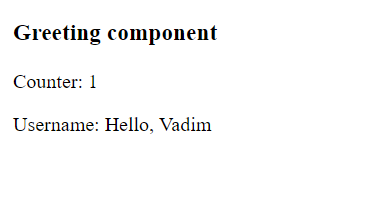
Теперь, наконец, создадим компонент (в /src/components)
import {AXIOS} from './http-common'

<template>
   <div id="greeting">
       <h3>Greeting component</h3>
       <p>Counter: {{ counter }}</p>
       <p>Username: {{ username }}</p>
   </div>
</template>

export default {
   name: 'Greeting',
   data() {
       return {
           counter: 0,
           username: ''
       }
   },
   methods: {
       loadGreeting() {
           AXIOS.get('/greeting', { params: { name: 'Vadim' } })
           .then(response => {
               this.$data.counter = response.data.id;
               this.$data.username = response.data.content;
           })
           .catch(error => {
               console.log('ERROR: ' + error.response.data);
           })
       }
   },
   mounted() {
       this.loadGreeting();
   }
}
Примечание:
- Параметры запросы захардкожены для того, чтобы просто посмотреть, как работает метод
- Функция загрузки и отрисовки данных (
loadGreeting()) вызывается сразу после загрузки страницы (mounted()) - мы импортировали AXIOS уже с нашими кастомными настройками из http-common
Подключение к базе данных
Теперь давайте рассмотрим процесс взаимодействия с базой данных на примере PostgreSQL и Spring Data.
Для начала создадим тестовую табличку:
CREATE TABLE public."person"
     (
          id serial NOT NULL,
          name character varying,
          PRIMARY KEY (id)
     );
и наполним её данными:
INSERT INTO person (name) VALUES ('John'), ('Griselda'), ('Bobby');<properties>
...
<postgresql.version>42.2.5</postgresql.version>
...
</properties>
...
<dependency>
<groupId>org.springframework.boot</groupId>
<artifactId>spring-boot-starter-data-jpa</artifactId>
</dependency>
<dependency>
<groupId>org.postgresql</groupId>
<artifactId>postgresql</artifactId>
<version>${postgresql.version}</version>
</dependency>
...
<plugin>
<groupId>org.jetbrains.kotlin</groupId>
<artifactId>kotlin-maven-plugin</artifactId>
<configuration>
<args>
<arg>-Xjsr305=strict</arg>
</args>
<compilerPlugins>
<plugin>spring</plugin>
<plugin>jpa</plugin>
</compilerPlugins>
</configuration>
...
<dependency>
<groupId>org.jetbrains.kotlin</groupId>
<artifactId>kotlin-maven-noarg</artifactId>
<version>${kotlin.version}</version>
</dependency>
Теперь дополним файл application.properties модуля бэкенда настройками подключения к БД:
spring.datasource.url=${SPRING_DATASOURCE_URL}
spring.datasource.username=${SPRING_DATASOURCE_USERNAME}
spring.datasource.password=${SPRING_DATASOURCE_PASSWORD}

spring.jpa.generate-ddl=true
spring.jpa.properties.hibernate.temp.use_jdbc_metadata_defaults = false
spring.jpa.database-platform=org.hibernate.dialect.PostgreSQL9Dialect
spring.jpa.properties.hibernate.jdbc.lob.non_contextual_creation=true
Примечание: в таком виде первые три параметра ссылаются на переменные среды. Я настоятельно рекомендую передавать конфиденциальные параметры через переменные среды или параметры запуска. Но, если вы точно уверены, что они не попадут в руки коварных злоумышленников, то можете задать их явно.
Создадим сущность (entity-класс) для объектно-реляционного отображения:
import javax.persistence.Column
import javax.persistence.Entity
import javax.persistence.GeneratedValue
import javax.persistence.GenerationType
import javax.persistence.Id
import javax.persistence.Table

@Entity
@Table (name="person")
data class Person(

       @Id
       @GeneratedValue(strategy = GenerationType.AUTO)
       val id: Long,

       @Column(nullable = false)
       val name: String
)
И CRUD-репозиторий для работы с нашей таблицей:
import com.kotlinspringvue.backend.jpa.Person
import org.springframework.stereotype.Repository
import org.springframework.data.repository.CrudRepository
import org.springframework.data.jpa.repository.JpaRepository
import org.springframework.data.repository.query.Param

@Repository
interface PersonRepository: CrudRepository<Person, Long> {}
Примечание: Мы будем пользоваться методом findAll(), который нет необходимости переопределять, поэтому оставим тело пустым.
И, наконец, обновим наш контроллер, чтобы увидеть работу с базой данных в действии:
import com.kotlinspringvue.backend.repository.PersonRepository
import org.springframework.beans.factory.annotation.Autowired

…

@Autowired
lateinit var personRepository: PersonRepository

…

@GetMapping("/persons")
fun getPersons() = personRepository.findAll()
Запустим приложение, перейдём по ссылке https://localhost:8080/api/persons, чтобы убедиться, что всё работает:
[{"id":1,"name":"John"},{"id":2,"name":"Griselda"},{"id":3,"name":"Bobby"}]Аутентификация
Теперь мы можем перейти к аутентификации — также одной из базовых функций приложений, где предусмотрено разграничение доступа к данным.
Рассмотрим реализацию собственного сервера авторизации с использованием JWT (JSON Web Token).
Почему не Basic Authentication?
- На мой взгляд, Basic Authentication не отвечает современному вызову угроз даже в относительно безопасной среде использования.
- На эту тему можно найти гораздо больше материалов.
Почему не OAuth из коробки Spring Security OAuth?
- Потому что по OAuth больше материалов.
- Такой подход может диктоваться внешними обстоятельствами: требованиями заказчика, прихотью архитектора и т.д.
- Если Вы начинающий разработчик, то в стратегической перспективе будет полезно поковыряться с функционалом безопасности более детально.
Бэкенд
Пусть в нашем приложении помимо гостей будет две группы пользователей — рядовые пользователи и администраторы. Создадим три таблицы: users — для хранения данных пользователей, roles — для хранения информации о ролях и users_roles — для связывания первых двух таблиц.
CREATE TABLE public.users
(
     id serial NOT NULL,
     username character varying,
     first_name character varying,
     last_name character varying,
     email character varying,
     password character varying,
     enabled boolean,
     PRIMARY KEY (id)
);

CREATE TABLE public.roles
(
     id serial NOT NULL,
     name character varying,
     PRIMARY KEY (id)
);

CREATE TABLE public.users_roles
(
     id serial NOT NULL,
     user_id integer,
     role_id integer,
     PRIMARY KEY (id)
);

ALTER TABLE public.users_roles
     ADD CONSTRAINT users_roles_users_fk FOREIGN KEY (user_id)
     REFERENCES public.users (id) MATCH SIMPLE
     ON UPDATE CASCADE
     ON DELETE CASCADE;

ALTER TABLE public.users_roles
     ADD CONSTRAINT users_roles_roles_fk FOREIGN KEY (role_id)
     REFERENCES public.roles (id) MATCH SIMPLE
     ON UPDATE CASCADE
     ON DELETE CASCADE;

INSERT INTO roles (name) VALUES ('ROLE_USER'), ('ROLE_ADMIN');
Создадим Entity-классы:
import javax.persistence.*

@Entity
@Table(name = "users")
data class User (

       @Id
       @GeneratedValue(strategy = GenerationType.AUTO)
       val id: Long? = 0,

       @Column(name="username")
       var username: String?=null,

       @Column(name="first_name")
       var firstName: String?=null,

       @Column(name="last_name")
       var lastName: String?=null,

       @Column(name="email")
       var email: String?=null,

       @Column(name="password")
       var password: String?=null,

       @Column(name="enabled")
       var enabled: Boolean = false,

       @ManyToMany(fetch = FetchType.EAGER)
       @JoinTable(
               name = "users_roles",
               joinColumns = [JoinColumn(name = "user_id", referencedColumnName = "id")],
               inverseJoinColumns = [JoinColumn(name = "role_id", referencedColumnName = "id")]
       )
       var roles: Collection<Role>? = null
)
Примечание: таблицы users и roles находятся в отношении «многие-ко-многим» — у одного пользователя может быть несколько ролей (например, рядовой пользователь и администратор), и одной ролью могут быть наделены несколько пользователей.
Информация к размышлению: Существует подход, когда пользователей наделяют отдельными полномочиями (authorities), в то время как роль подразумевает группы полномочий. Подробнее о разнице между ролями и полномочиями можно прочитать здесь: Granted Authority Versus Role in Spring Security.
import javax.persistence.*

@Entity
@Table(name = "roles")
data class Role (

       @Id
       @GeneratedValue(strategy = GenerationType.AUTO)
       val id: Long,

       @Column(name="name")
       val name: String

)
Создадим репозитории для работы с таблицами:
import java.util.Optional
import com.kotlinspringvue.backend.jpa.User
import org.springframework.data.repository.CrudRepository
import org.springframework.data.repository.query.Param
import org.springframework.data.jpa.repository.JpaRepository
import javax.transaction.Transactional

interface UserRepository: JpaRepository<User, Long> {

   fun existsByUsername(@Param("username") username: String): Boolean

   fun findByUsername(@Param("username") username: String): Optional<User>

   fun findByEmail(@Param("email") email: String): Optional<User>

   @Transactional
   fun deleteByUsername(@Param("username") username: String)

}
import com.kotlinspringvue.backend.jpa.Role
import org.springframework.data.repository.CrudRepository
import org.springframework.data.repository.query.Param
import org.springframework.data.jpa.repository.JpaRepository

interface RoleRepository : JpaRepository<Role, Long> {

   fun findByName(@Param("name") name: String): Role
}
Добавим новые зависимости в
<dependency>
     <groupId>org.springframework.boot</groupId>
     <artifactId>spring-boot-starter-security</artifactId>
</dependency>
<dependency>
     <groupId>com.fasterxml.jackson.module</groupId>
     <artifactId>jackson-module-kotlin</artifactId>
</dependency>
<dependency>
     <groupId>io.jsonwebtoken</groupId>
     <artifactId>jjwt</artifactId>
     <version>0.9.0</version>
</dependency>
<dependency>
     <groupId>io.jsonwebtoken</groupId>
     <artifactId>jjwt-api</artifactId>
     <version>0.10.6</version>
</dependency>
И добавим новые параметры для работы с токенами в application.properties:
assm.app.jwtSecret=jwtAssmSecretKey
assm.app.jwtExpiration=86400
Теперь создадим классы для хранения данных, приходящих с форм авторизации и регистрации:
class LoginUser : Serializable {

   @JsonProperty("username")
   var username: String? = null

   @JsonProperty("password")
   var password: String? = null

   constructor() {}

   constructor(username: String, password: String) {
       this.username = username
       this.password = password
   }

   companion object {
       private const val serialVersionUID = -1764970284520387975L
   }
}
import com.fasterxml.jackson.annotation.JsonProperty
import java.io.Serializable

class NewUser : Serializable {

   @JsonProperty("username")
   var username: String? = null

   @JsonProperty("firstName")
   var firstName: String? = null

   @JsonProperty("lastName")
   var lastName: String? = null

   @JsonProperty("email")
   var email: String? = null

   @JsonProperty("password")
   var password: String? = null

   constructor() {}

   constructor(username: String, firstName: String, lastName: String, email: String, password: String, recaptchaToken: String) {
       this.username = username
       this.firstName = firstName
       this.lastName = lastName
       this.email = email
       this.password = password
   }

   companion object {
       private const val serialVersionUID = -1764970284520387975L
   }
}
Сделаем специальные классы для ответов сервера — возвращающий токен аутентификации и универсальный (строка):
import org.springframework.security.core.GrantedAuthority

class JwtResponse(var accessToken: String?, var username: String?, val authorities:
     Collection<GrantedAuthority>) {
     var type = "Bearer"
}
class ResponseMessage(var message: String?)
Также нам понадобится исключение «User Already Exists»
class UserAlreadyExistException : RuntimeException {

     constructor() : super() {}

     constructor(message: String, cause: Throwable) : super(message, cause) {}

     constructor(message: String) : super(message) {}

     constructor(cause: Throwable) : super(cause) {}

     companion object {

          private val serialVersionUID = 5861310537366287163L

     }
}
Для определения ролей пользователей нам необходим дополнительный сервис, реализующий интерфейс UserDetailsService:
import com.kotlinspringvue.backend.repository.UserRepository

import org.springframework.beans.factory.annotation.Autowired
import org.springframework.security.core.userdetails.UserDetails
import org.springframework.security.core.userdetails.UserDetailsService
import org.springframework.security.core.userdetails.UsernameNotFoundException
import org.springframework.stereotype.Service
import org.springframework.security.core.GrantedAuthority
import org.springframework.security.core.authority.SimpleGrantedAuthority
import java.util.stream.Collectors

@Service
class UserDetailsServiceImpl: UserDetailsService {

   @Autowired
   lateinit var userRepository: UserRepository

   @Throws(UsernameNotFoundException::class)
   override fun loadUserByUsername(username: String): UserDetails {
       val user = userRepository.findByUsername(username).get()
               ?: throw UsernameNotFoundException("User '$username' not found")

       val authorities: List<GrantedAuthority> = user.roles!!.stream().map({ role -> SimpleGrantedAuthority(role.name)}).collect(Collectors.toList<GrantedAuthority>())

       return org.springframework.security.core.userdetails.User
               .withUsername(username)
               .password(user.password)
               .authorities(authorities)
               .accountExpired(false)
               .accountLocked(false)
               .credentialsExpired(false)
               .disabled(false)
               .build()
   }
}
Для работы с JWT нам потребуются три класса:
JwtAuthEntryPoint — для обработки ошибок авторизации и дальнейшего использования в настройках веб-безопасности:
import javax.servlet.ServletException
import javax.servlet.http.HttpServletRequest
import javax.servlet.http.HttpServletResponse

import org.slf4j.Logger
import org.slf4j.LoggerFactory
import org.springframework.security.core.AuthenticationException
import org.springframework.security.web.AuthenticationEntryPoint
import org.springframework.stereotype.Component

@Component
class JwtAuthEntryPoint : AuthenticationEntryPoint {

   @Throws(IOException::class, ServletException::class)
   override fun commence(request: HttpServletRequest,
                         response: HttpServletResponse,
                         e: AuthenticationException) {

       logger.error("Unauthorized error. Message - {}", e!!.message)
       response.sendError(HttpServletResponse.SC_UNAUTHORIZED, "Invalid credentials")
   }

   companion object {
       private val logger = LoggerFactory.getLogger(JwtAuthEntryPoint::class.java)
   }
}
JwtProvider — чтобы генерировать и валидировать токены, а также определять пользователя по его токену:
import io.jsonwebtoken.*
import org.springframework.beans.factory.annotation.Autowired
import org.slf4j.Logger
import org.slf4j.LoggerFactory
import org.springframework.beans.factory.annotation.Value
import org.springframework.security.core.Authentication
import org.springframework.stereotype.Component
import org.springframework.security.core.GrantedAuthority
import org.springframework.security.core.authority.SimpleGrantedAuthority
import com.kotlinspringvue.backend.repository.UserRepository
import java.util.Date


@Component
public class JwtProvider {

   private val logger: Logger = LoggerFactory.getLogger(JwtProvider::class.java)

   @Autowired
   lateinit var userRepository: UserRepository

   @Value("${assm.app.jwtSecret}")
   lateinit var jwtSecret: String

   @Value("${assm.app.jwtExpiration}")
   var jwtExpiration:Int?=0

   fun generateJwtToken(username: String): String {
       return Jwts.builder()
               .setSubject(username)
               .setIssuedAt(Date())
               .setExpiration(Date((Date()).getTime() + jwtExpiration!! * 1000))
               .signWith(SignatureAlgorithm.HS512, jwtSecret)
               .compact()
   }

   fun validateJwtToken(authToken: String): Boolean {
       try {
           Jwts.parser().setSigningKey(jwtSecret).parseClaimsJws(authToken)
           return true
       } catch (e: SignatureException) {
           logger.error("Invalid JWT signature -> Message: {} ", e)
       } catch (e: MalformedJwtException) {
           logger.error("Invalid JWT token -> Message: {}", e)
       } catch (e: ExpiredJwtException) {
           logger.error("Expired JWT token -> Message: {}", e)
       } catch (e: UnsupportedJwtException) {
           logger.error("Unsupported JWT token -> Message: {}", e)
       } catch (e: IllegalArgumentException) {
           logger.error("JWT claims string is empty -> Message: {}", e)
       }

       return false
   }

   fun getUserNameFromJwtToken(token: String): String {
       return Jwts.parser()
               .setSigningKey(jwtSecret)
               .parseClaimsJws(token)
               .getBody().getSubject()
   }
}
JwtAuthTokenFilter — чтобы аутентифицировать пользователей и фильтровать запросы:
import java.io.IOException

import javax.servlet.FilterChain
import javax.servlet.ServletException
import javax.servlet.http.HttpServletRequest
import javax.servlet.http.HttpServletResponse

import org.slf4j.LoggerFactory
import org.springframework.beans.factory.annotation.Autowired
import org.springframework.security.authentication.UsernamePasswordAuthenticationToken
import org.springframework.security.core.context.SecurityContextHolder
import org.springframework.security.core.userdetails.UserDetails
import org.springframework.security.web.authentication.WebAuthenticationDetailsSource
import org.springframework.web.filter.OncePerRequestFilter

import com.kotlinspringvue.backend.service.UserDetailsServiceImpl

class JwtAuthTokenFilter : OncePerRequestFilter() {

   @Autowired
   private val tokenProvider: JwtProvider? = null

   @Autowired
   private val userDetailsService: UserDetailsServiceImpl? = null

   @Throws(ServletException::class, IOException::class)
   override fun doFilterInternal(request: HttpServletRequest, response: HttpServletResponse, filterChain: FilterChain) {
       try {

           val jwt = getJwt(request)
           if (jwt != null && tokenProvider!!.validateJwtToken(jwt)) {
               val username = tokenProvider.getUserNameFromJwtToken(jwt)

               val userDetails = userDetailsService!!.loadUserByUsername(username)
               val authentication = UsernamePasswordAuthenticationToken(
                       userDetails, null, userDetails.getAuthorities())
               authentication.setDetails(WebAuthenticationDetailsSource().buildDetails(request))

               SecurityContextHolder.getContext().setAuthentication(authentication)
           }
       } catch (e: Exception) {
           logger.error("Can NOT set user authentication -> Message: {}", e)
       }

       filterChain.doFilter(request, response)
   }

   private fun getJwt(request: HttpServletRequest): String? {
       val authHeader = request.getHeader("Authorization")

       return if (authHeader != null && authHeader.startsWith("Bearer ")) {
           authHeader.replace("Bearer ", "")
       } else null
   }

   companion object {
       private val logger = LoggerFactory.getLogger(JwtAuthTokenFilter::class.java)
   }
}
Теперь мы можем сконфигурировать бин, ответственный за веб-безопасность:
import org.springframework.context.annotation.Bean
import org.springframework.context.annotation.Configuration
import org.springframework.beans.factory.annotation.Autowired
import org.springframework.security.web.authentication.UsernamePasswordAuthenticationFilter
import org.springframework.security.config.http.SessionCreationPolicy
import org.springframework.security.authentication.AuthenticationManager
import org.springframework.security.config.annotation.authentication.builders.AuthenticationManagerBuilder
import org.springframework.security.config.annotation.web.configuration.EnableWebSecurity
import org.springframework.security.config.annotation.method.configuration.EnableGlobalMethodSecurity
import org.springframework.security.config.annotation.web.builders.HttpSecurity
import org.springframework.security.config.annotation.web.configuration.WebSecurityConfigurerAdapter
import org.springframework.security.crypto.bcrypt.BCryptPasswordEncoder

import com.kotlinspringvue.backend.jwt.JwtAuthEntryPoint
import com.kotlinspringvue.backend.jwt.JwtAuthTokenFilter
import com.kotlinspringvue.backend.service.UserDetailsServiceImpl


@Configuration
@EnableWebSecurity
@EnableGlobalMethodSecurity(prePostEnabled = true)
class WebSecurityConfig : WebSecurityConfigurerAdapter() {

   @Autowired
   internal var userDetailsService: UserDetailsServiceImpl? = null

   @Autowired
   private val unauthorizedHandler: JwtAuthEntryPoint? = null

   @Bean
   fun bCryptPasswordEncoder(): BCryptPasswordEncoder {
       return BCryptPasswordEncoder()
   }

   @Bean
   fun authenticationJwtTokenFilter(): JwtAuthTokenFilter {
       return JwtAuthTokenFilter()
   }

   @Throws(Exception::class)
   override fun configure(authenticationManagerBuilder: AuthenticationManagerBuilder) {
       authenticationManagerBuilder
               .userDetailsService(userDetailsService)
               .passwordEncoder(bCryptPasswordEncoder())
   }

   @Bean
   @Throws(Exception::class)
   override fun authenticationManagerBean(): AuthenticationManager {
       return super.authenticationManagerBean()
   }

   @Throws(Exception::class)
   override protected fun configure(http: HttpSecurity) {
       http.csrf().disable().authorizeRequests()
               .antMatchers("/**").permitAll()
               .anyRequest().authenticated()
               .and()
               .exceptionHandling().authenticationEntryPoint(unauthorizedHandler).and()
               .sessionManagement().sessionCreationPolicy(SessionCreationPolicy.STATELESS)

       http.addFilterBefore(authenticationJwtTokenFilter(), UsernamePasswordAuthenticationFilter::class.java)
   }
}
Создадим контроллер для регистрации и авторизации:
import javax.validation.Valid
import java.util.*
import java.util.stream.Collectors

import org.springframework.security.core.Authentication
import org.springframework.beans.factory.annotation.Autowired
import org.springframework.http.HttpStatus
import org.springframework.http.ResponseEntity
import org.springframework.security.authentication.AuthenticationManager
import org.springframework.security.authentication.UsernamePasswordAuthenticationToken
import org.springframework.security.core.context.SecurityContextHolder
import org.springframework.security.core.userdetails.UserDetails
import org.springframework.security.crypto.password.PasswordEncoder
import org.springframework.security.access.prepost.PreAuthorize
import org.springframework.security.core.GrantedAuthority
import org.springframework.security.core.authority.SimpleGrantedAuthority
import org.springframework.web.bind.annotation.CrossOrigin
import org.springframework.web.bind.annotation.PostMapping
import org.springframework.web.bind.annotation.RequestBody
import org.springframework.web.bind.annotation.RequestMapping
import org.springframework.web.bind.annotation.RestController

import com.kotlinspringvue.backend.model.LoginUser
import com.kotlinspringvue.backend.model.NewUser
import com.kotlinspringvue.backend.web.response.JwtResponse
import com.kotlinspringvue.backend.web.response.ResponseMessage
import com.kotlinspringvue.backend.jpa.User
import com.kotlinspringvue.backend.repository.UserRepository
import com.kotlinspringvue.backend.repository.RoleRepository
import com.kotlinspringvue.backend.jwt.JwtProvider

@CrossOrigin(origins = ["*"], maxAge = 3600)
@RestController
@RequestMapping("/api/auth")
class AuthController() {

   @Autowired
   lateinit var authenticationManager: AuthenticationManager

   @Autowired
   lateinit var userRepository: UserRepository

   @Autowired
   lateinit var roleRepository: RoleRepository

   @Autowired
   lateinit var encoder: PasswordEncoder

   @Autowired
   lateinit var jwtProvider: JwtProvider


   @PostMapping("/signin")
   fun authenticateUser(@Valid @RequestBody loginRequest: LoginUser): ResponseEntity<*> {

       val userCandidate: Optional <User> = userRepository.findByUsername(loginRequest.username!!)

       if (userCandidate.isPresent) {
           val user: User = userCandidate.get()
           val authentication = authenticationManager.authenticate(
                   UsernamePasswordAuthenticationToken(loginRequest.username, loginRequest.password))
           SecurityContextHolder.getContext().setAuthentication(authentication)
           val jwt: String = jwtProvider.generateJwtToken(user.username!!)
           val authorities: List<GrantedAuthority> = user.roles!!.stream().map({ role -> SimpleGrantedAuthority(role.name)}).collect(Collectors.toList<GrantedAuthority>())
           return ResponseEntity.ok(JwtResponse(jwt, user.username, authorities))
       } else {
           return ResponseEntity(ResponseMessage("User not found!"),
                   HttpStatus.BAD_REQUEST)
       }
   }

   @PostMapping("/signup")
   fun registerUser(@Valid @RequestBody newUser: NewUser): ResponseEntity<*> {

       val userCandidate: Optional <User> = userRepository.findByUsername(newUser.username!!)

       if (!userCandidate.isPresent) {
           if (usernameExists(newUser.username!!)) {
               return ResponseEntity(ResponseMessage("Username is already taken!"),
                       HttpStatus.BAD_REQUEST)
           } else if (emailExists(newUser.email!!)) {
               return ResponseEntity(ResponseMessage("Email is already in use!"),
                       HttpStatus.BAD_REQUEST)
           }

           // Creating user's account
           val user = User(
                   0,
                   newUser.username!!,
                   newUser.firstName!!,
                   newUser.lastName!!,
                   newUser.email!!,
                   encoder.encode(newUser.password),
                   true
           )
           user!!.roles = Arrays.asList(roleRepository.findByName("ROLE_USER"))

           userRepository.save(user)

           return ResponseEntity(ResponseMessage("User registered successfully!"), HttpStatus.OK)
       } else {
           return ResponseEntity(ResponseMessage("User already exists!"),
                   HttpStatus.BAD_REQUEST)
       }
   }

   private fun emailExists(email: String): Boolean {
       return userRepository.findByUsername(email).isPresent
   }

   private fun usernameExists(username: String): Boolean {
       return userRepository.findByUsername(username).isPresent
   }

}
Мы реализовали два метода:
- signin — проверяет, существует ли пользователь и, если да, то возвращает сгенерированный токен, имя пользователя и его роли (вернее, authorities — полномочия)
- signup — проверяет, существует ли пользователь и, если нет, создаёт новую запись в таблице users с внешней ссылкой на роль ROLE_USER
И, наконец, дополним BackendController двумя методами: один будет возвращать данные, доступные только администратору (пользователь с полномочиями ROLE_USER и ROLE_ADMIN) и рядовому пользователю (ROLE_USER).
import org.springframework.security.access.prepost.PreAuthorize
import org.springframework.security.core.Authentication
import com.kotlinspringvue.backend.repository.UserRepository
import com.kotlinspringvue.backend.jpa.User

…

@Autowired
lateinit var userRepository: UserRepository

…

@GetMapping("/usercontent")
@PreAuthorize("hasRole('USER') or hasRole('ADMIN')")
@ResponseBody
     fun getUserContent(authentication: Authentication): String {
     val user: User = userRepository.findByUsername(authentication.name).get()
     return "Hello " + user.firstName + " " + user.lastName + "!"
}


@GetMapping("/admincontent")
@PreAuthorize("hasRole('ADMIN')")
@ResponseBody
     fun getAdminContent(): String {
     return "Admin's content"
}
Фронтенд
Создадим несколько новых компонентов:
- Home
- SignIn
- SignUp
- AdminPage
- UserPage
С шаблонным содержимым (для удобного копипаста начала):
<template>
     <div>
     </div>
</template>

<script>
</script>

<style>
</style>
Добавим id=«название_компонента» в каждый div внутри template и export default {name: ‘[component_name]’} в script.
Теперь добавим новые маршруты:
import Vue from 'vue'
import Router from 'vue-router'
import Home from '@/components/Home'
import SignIn from '@/components/SignIn'
import SignUp from '@/components/SignUp'
import AdminPage from '@/components/AdminPage'
import UserPage from '@/components/UserPage'

Vue.use(Router)

export default new Router({
   mode: 'history',
   routes: [
     {
       path: '/',
       name: 'Home',
       component: Home
     },
     {
       path: '/home',
       name: 'Home',
       component: Home
     },
     {
       path: '/login',
       name: 'SignIn',
       component: SignIn
     },
     {
       path: '/register',
       name: 'SignUp',
       component: SignUp
     },
     {
       path: '/user',
       name: 'UserPage',
       component: UserPage
     },
     {
       path: '/admin',
       name: 'AdminPage',
       component: AdminPage
     }
   ]
})
Для хранения токенов и использования их при запросах к серверу воспользуемся Vuex. Vuex — это паттерн управления состоянием + библиотека Vue.js. Он служит централизованным хранилищем данных для всех компонентов приложения с правилами, гарантирующими, что состояние может быть изменено только предсказуемым образом.
$ npm install --save vuexДобавим store в виде отдельного файла в src/store:
import Vue from 'vue';
import Vuex from 'vuex';

Vue.use(Vuex);

const state = {
 token: localStorage.getItem('user-token') || '',
 role: localStorage.getItem('user-role') || '',
 username: localStorage.getItem('user-name') || '',
 authorities: localStorage.getItem('authorities') || '',
};

const getters = {
 isAuthenticated: state => {
   if (state.token != null && state.token != '') {
     return true;
   } else {
     return false;
   }
 },
 isAdmin: state => {
   if (state.role === 'admin') {
     return true;
   } else {
     return false;
   }
 },
 getUsername: state => {
   return state.username;
 },
 getAuthorities: state => {
   return state.authorities;
 },
 getToken: state => {
   return state.token;
 }
};

const mutations = {
 auth_login: (state, user) => {
   localStorage.setItem('user-token', user.token);
   localStorage.setItem('user-name', user.name);
   localStorage.setItem('user-authorities', user.roles);
   state.token = user.token;
   state.username = user.username;
   state.authorities = user.roles;
   var isUser = false;
   var isAdmin = false;
   for (var i = 0; i < user.roles.length; i++) {
     if (user.roles[i].authority === 'ROLE_USER') {
       isUser = true;
     } else if (user.roles[i].authority === 'ROLE_ADMIN') {
       isAdmin = true;
     }
   }
   if (isUser) {
     localStorage.setItem('user-role', 'user');
     state.role = 'user';
   }
   if (isAdmin) {
     localStorage.setItem('user-role', 'admin');
     state.role = 'admin';
   }
 },
 auth_logout: () => {
   state.token = '';
   state.role = '';
   state.username = '';
   state.authorities = [];
   localStorage.removeItem('user-token');
   localStorage.removeItem('user-role');
   localStorage.removeItem('user-name');
   localStorage.removeItem('user-authorities');
 }
};

const actions = {
 login: (context, user) => {
   context.commit('auth_login', user)
 },
 logout: (context) => {
   context.commit('auth_logout');
 }
};

export const store = new Vuex.Store({
 state,
 getters,
 mutations,
 actions
});
Посмотрим, что у нас тут есть:
- store — собственно, данные для передачи между компонентами — имя пользователя, токен, полномочия и роль (в данном контексте роль — обещающая сущность для полномочий (authorities): посколько полномочия простого пользователя — это подмножество полномочий администратора, то мы можем просто сказать, что пользователь с полномочиями admin и user — администратор
- getters — функции для определения особых аспектов состояния
- mutations — функции для изменения состояния
- actions — функции для фиксации мутаций, они могут содержать асинхронные операции
Важно: использование мутаций (mutations) — это единственный правильный способ изменения состояния.
Внесём соответствующие изменения в
import { store } from './store';

...

new Vue({
     router,
     store,
     render: h => h(App)
}).$mount('#app')
Для того, чтобы интерфейс сразу выглядел красиво и опрятно даже в экспериментальном приложении я использую . Но это, как говорится, дело вкуса, и на базовую функциональность не влияет:
$ npm install --save bootstrap bootstrap-vueimport BootstrapVue from 'bootstrap-vue'
import 'bootstrap/dist/css/bootstrap.css'
import 'bootstrap-vue/dist/bootstrap-vue.css'
…
Vue.use(BootstrapVue)
Теперь поработаем над компонентом App:
- Добавим возможность «разлогинивания» для всех авторизованных пользователей
- Добавим автоматическую переадресацию на домашнюю страницу после выхода (logout)
- Будем показывать кнопки меню навигации «User» и «Logout» для всех авторизованных пользователей и «Login» — для неавторизованных
- Будем показывать кнопку «Admin» меню навигации только авторизованным администраторам
Для этого:
methods: {
     logout() {
          this.$store.dispatch('logout');
          this.$router.push('/')
     }
}
<template>
     <div id="app">
          <b-navbar style="width: 100%" type="dark" variant="dark">
               <b-navbar-brand id="nav-brand" href="#">Kotlin+Spring+Vue</b-navbar-brand>
               <router-link to="/"><img height="30px" src="./assets/img/kotlin-logo.png" alt="Kotlin+Spring+Vue"/></router-link>
               <router-link to="/"><img height="30px" src="./assets/img/spring-boot-logo.png" alt="Kotlin+Spring+Vue"/></router-link>
               <router-link to="/"><img height="30px" src="./assets/img/vuejs-logo.png" alt="Kotlin+Spring+Vue"/></router-link>
               <router-link to="/user" class="nav-link text-light" v-if="this.$store.getters.isAuthenticated">User</router-link>
               <router-link to="/admin" class="nav-link text-light" v-if="this.$store.getters.isAuthenticated && this.$store.getters.isAdmin">Admin</router-link>
               <router-link to="/register" class="nav-link text-light" v-if="!this.$store.getters.isAuthenticated">Register</router-link>
               <router-link to="/login" class="nav-link text-light" v-if="!this.$store.getters.isAuthenticated">Login</router-link>
               <a href="#" class="nav-link text-light" v-if="this.$store.getters.isAuthenticated" v-on:click="logout">Logout </a>
          </b-navbar>
          <router-view></router-view>
     </div>
</template>
Примечание:
- Через store мы получаем информацию о полномочиях пользователя и о том, авторизован ли он. В зависимости от этого принимаем решение, какие кнопки показывать, а какие скрывать («v-if»)
- В панель навигации я добавил логотипы Kotlin, Spring Boot и Vue.js, лежащие в /assets/img/. Их можно либо убрать совсем, либо взять из репозитория моего приложения (ссылка есть в конце статьи)
Обновим компоненты:
<template>
   <div div="home">
       <b-jumbotron>
       <template slot="header">Kotlin + Spring Boot + Vue.js</template>

       <template slot="lead">
         This is the demo web-application written in Kotlin using Spring Boot and Vue.js for frontend
       </template>

       <hr class="my-4" />

       <p v-if="!this.$store.getters.isAuthenticated">
         Login and start
       </p>

       <router-link to="/login" v-if="!this.$store.getters.isAuthenticated">
           <b-button variant="primary">Login</b-button>
       </router-link>

     </b-jumbotron>
   </div>
</template>

<script>
</script>

<style>
</style>
<template>
   <div div="signin">
       <div class="login-form">
           <b-card
             title="Login"
             tag="article"
             style="max-width: 20rem;"
             class="mb-2"
           >
           <div>
               <b-alert
                     :show="dismissCountDown"
                     dismissible
                     variant="danger"
                     @dismissed="dismissCountDown=0"
                     @dismiss-count-down="countDownChanged"
                   > {{ alertMessage }}
                   </b-alert>
           </div>
             <div>
                <b-form-input type="text" placeholder="Username" v-model="username" />
                <div class="mt-2"></div>

                <b-form-input type="password" placeholder="Password" v-model="password" />
                <div class="mt-2"></div>
             </div>

             <b-button v-on:click="login" variant="primary">Login</b-button>

             <hr class="my-4" />

             <b-button variant="link">Forget password?</b-button>
           </b-card>
         </div>
   </div>
</template>

<script>
import {AXIOS} from './http-common'
export default {
   name: 'SignIn',
   data() {
         return {
         username: '',
         password: '',
         dismissSecs: 5,
         dismissCountDown: 0,
         alertMessage: 'Request error',
     }
   },
   methods: {
     login() {
       AXIOS.post(`/auth/signin`, {'username': this.$data.username, 'password': this.$data.password})
         .then(response => {
           this.$store.dispatch('login', {'token': response.data.accessToken, 'roles': response.data.authorities, 'username': response.data.username});
           this.$router.push('/home')
         }, error => {
           this.$data.alertMessage = (error.response.data.message.length < 150) ? error.response.data.message : 'Request error. Please, report this error website owners';
           console.log(error)
         })
         .catch(e => {
           console.log(e);
           this.showAlert();
         })
     },
     countDownChanged(dismissCountDown) {
         this.dismissCountDown = dismissCountDown
     },
     showAlert() {
         this.dismissCountDown = this.dismissSecs
     },
   }
 }
</script>

<style>
.login-form {
   margin-left: 38%;
   margin-top: 50px;
}
</style>
Что тут происходит:
- Запрос авторизации отправляется на сервер с помощью POST-запроса
- От сервера мы получаем токен и сохраняем его в storage
- Показываем «красивое» сообщение от Bootstrap об ошибке в случае ошибки
- Если авторизация проходит успешно, переадресовываем пользователя на /home
<template>
   <div div="signup">
       <div class="login-form">
       <b-card
             title="Register"
             tag="article"
             style="max-width: 20rem;"
             class="mb-2"
           >
           <div>
               <b-alert
                     :show="dismissCountDown"
                     dismissible
                     variant="danger"
                     @dismissed="dismissCountDown=0"
                     @dismiss-count-down="countDownChanged"
                   > {{ alertMessage }}
                   </b-alert>
           </div>
           <div>
             <b-alert variant="success" :show="successfullyRegistered">
               You have been successfully registered! Now you can login with your credentials
               <hr />
               <router-link to="/login">
                    <b-button variant="primary">Login</b-button>
               </router-link>
             </b-alert>
           </div>
             <div>
                <b-form-input type="text" placeholder="Username" v-model="username" />
                <div class="mt-2"></div>

                <b-form-input type="text" placeholder="First Name" v-model="firstname" />
                <div class="mt-2"></div>

                <b-form-input type="text" placeholder="Last name" v-model="lastname" />
                <div class="mt-2"></div>

                <b-form-input type="text" placeholder="Email" v-model="email" />
                <div class="mt-2"></div>

                <b-form-input type="password" placeholder="Password" v-model="password" />
                <div class="mt-2"></div>

               <b-form-input type="password" placeholder="Confirm Password" v-model="confirmpassword" />
                <div class="mt-2"></div>
             </div>

             <b-button v-on:click="register" variant="primary">Register</b-button>

           </b-card>
       </div>
   </div>
</template>

<script>
import {AXIOS} from './http-common'
export default {
   name: 'SignUp',
   data () {
       return {
           username: '',
           firstname: '',
           lastname: '',
           email: '',
           password: '',
           confirmpassword: '',
           dismissSecs: 5,
           dismissCountDown: 0,
           alertMessage: '',
           successfullyRegistered: false
       }
   },
   methods: {
       register: function () {
           if (this.$data.username === '' || this.$data.username == null) {
               this.$data.alertMessage = 'Please, fill "Username" field';
               this.showAlert();
           } else if (this.$data.firstname === '' || this.$data.firstname == null) {
               this.$data.alertMessage = 'Please, fill "First name" field';
               this.showAlert();
           } else if (this.$data.lastname === '' || this.$data.lastname == null) {
               this.$data.alertMessage = 'Please, fill "Last name" field';
               this.showAlert();
           } else if (this.$data.email === '' || this.$data.email == null) {
               this.$data.alertMessage = 'Please, fill "Email" field';
               this.showAlert();
           } else if (!this.$data.email.includes('@')) {
               this.$data.alertMessage = 'Email is incorrect';
               this.showAlert();
           } else if (this.$data.password === '' || this.$data.password == null) {
               this.$data.alertMessage = 'Please, fill "Password" field';
               this.showAlert();
           } else if (this.$data.confirmpassword === '' || this.$data.confirmpassword == null) {
               this.$data.alertMessage = 'Please, confirm password';
               this.showAlert();
           } else if (this.$data.confirmpassword !== this.$data.password) {
               this.$data.alertMessage = 'Passwords are not match';
               this.showAlert();
           } else {
               var newUser = {
                   'username': this.$data.username,
                   'firstName': this.$data.firstname,
                   'lastName': this.$data.lastname,
                   'email': this.$data.email,
                   'password': this.$data.password
               };
               AXIOS.post('/auth/signup', newUser)
               .then(response => {
                   console.log(response);
                   this.successAlert();
               }, error => {
                   this.$data.alertMessage = (error.response.data.message.length < 150) ? error.response.data.message : 'Request error. Please, report this error website owners'
                   this.showAlert();
               })
                .catch(error => {
                   console.log(error);
                   this.$data.alertMessage = 'Request error. Please, report this error website owners';
                   this.showAlert();
                });
           }
       },
       countDownChanged(dismissCountDown) {
           this.dismissCountDown = dismissCountDown
       },
       showAlert() {
           this.dismissCountDown = this.dismissSecs
       },
       successAlert() {
           this.username = '';
           this.firstname = '';
           this.lastname = '';
           this.email = '';
           this.password = '';
           this.confirmpassword = '';
           this.successfullyRegistered = true;
       }
   }
}
</script>

<style>
.login-form {
   margin-left: 38%;
   margin-top: 50px;
}
</style>
Что тут происходит:
- Данные с формы регистрации передаются на сервер с помощью POST-запроса
- Показывается сообщение об ошибке от Bootstrap в случае ошибки
- Если регистрация прошла успешно, выводим Bootstrap-овское сообщение с предложением авторизоваться
- Перед отправкой запроса происходит валидация полей
<template>
   <div div="userpage">
       <h2>{{ pageContent }}</h2>
   </div>
</template>

<script>
import {AXIOS} from './http-common'
export default {
   name: 'UserPage',
   data() {
       return {
           pageContent: ''
       }
   },
   methods: {
       loadUserContent() {
           const header = {'Authorization': 'Bearer ' + this.$store.getters.getToken};
           AXIOS.get('/usercontent', { headers: header })
           .then(response => {
               this.$data.pageContent = response.data;
           })
           .catch(error => {
               console.log('ERROR: ' + error.response.data);
           })
       }
   },
   mounted() {
       this.loadUserContent();
   }
}
</script>

<style>
</style>
Что тут происходит:
- Загрузка данных с сервера происходит сразу после загрузки страницы
- Вместе с запросом мы передаём токен, хранящийся в storage
- Полученные данные мы отрисовываем на странице
<template>
   <div div="adminpage">
       <h2>{{ pageContent }}</h2>
   </div>
</template>

<script>
import {AXIOS} from './http-common'
export default {
   name: 'AdminPage',
   data() {
       return {
           pageContent: ''
       }
   },
   methods: {
       loadUserContent() {
           const header = {'Authorization': 'Bearer ' + this.$store.getters.getToken};
           AXIOS.get('/admincontent', { headers: header })
           .then(response => {
               this.$data.pageContent = response.data;
           })
           .catch(error => {
               console.log('ERROR: ' + error.response.data);
           })
       }
   },
   mounted() {
       this.loadUserContent();
   }
}
</script>

<style>
</style>
Здесь происходит всё то же самое, что и в UserPage.
Запуск приложения
Зарегистрируем нашего первого администратора:
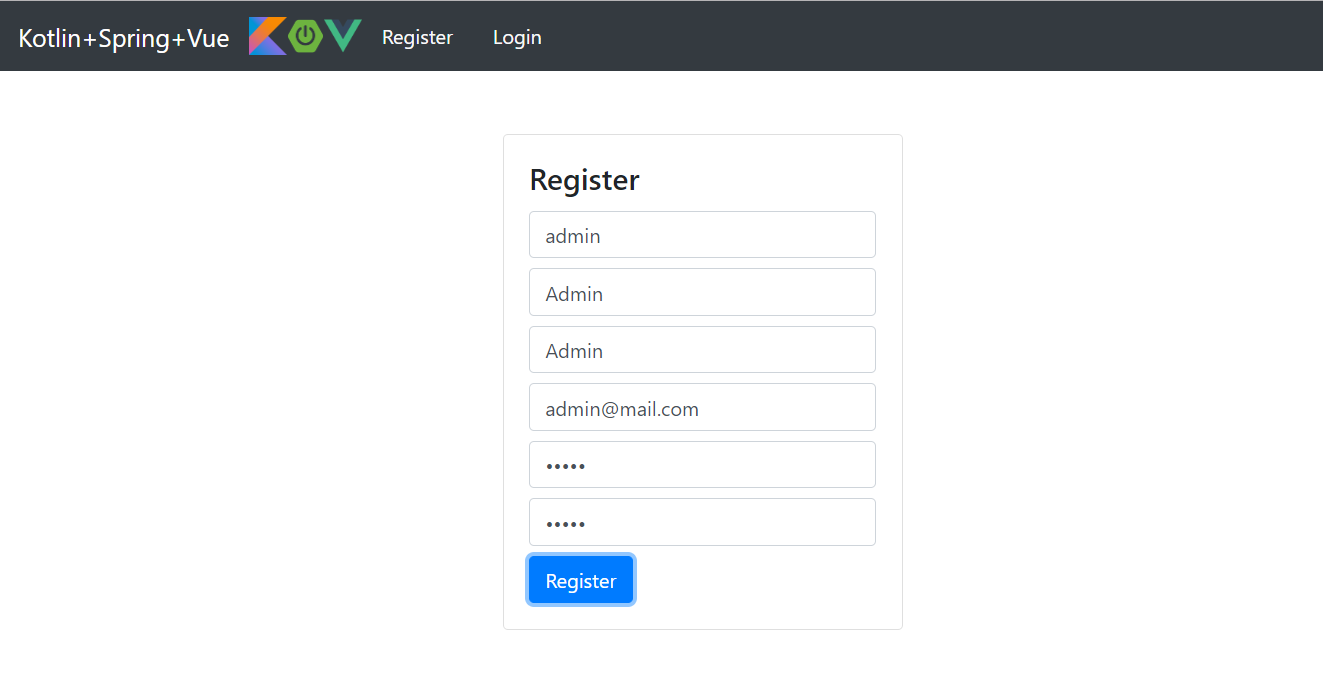
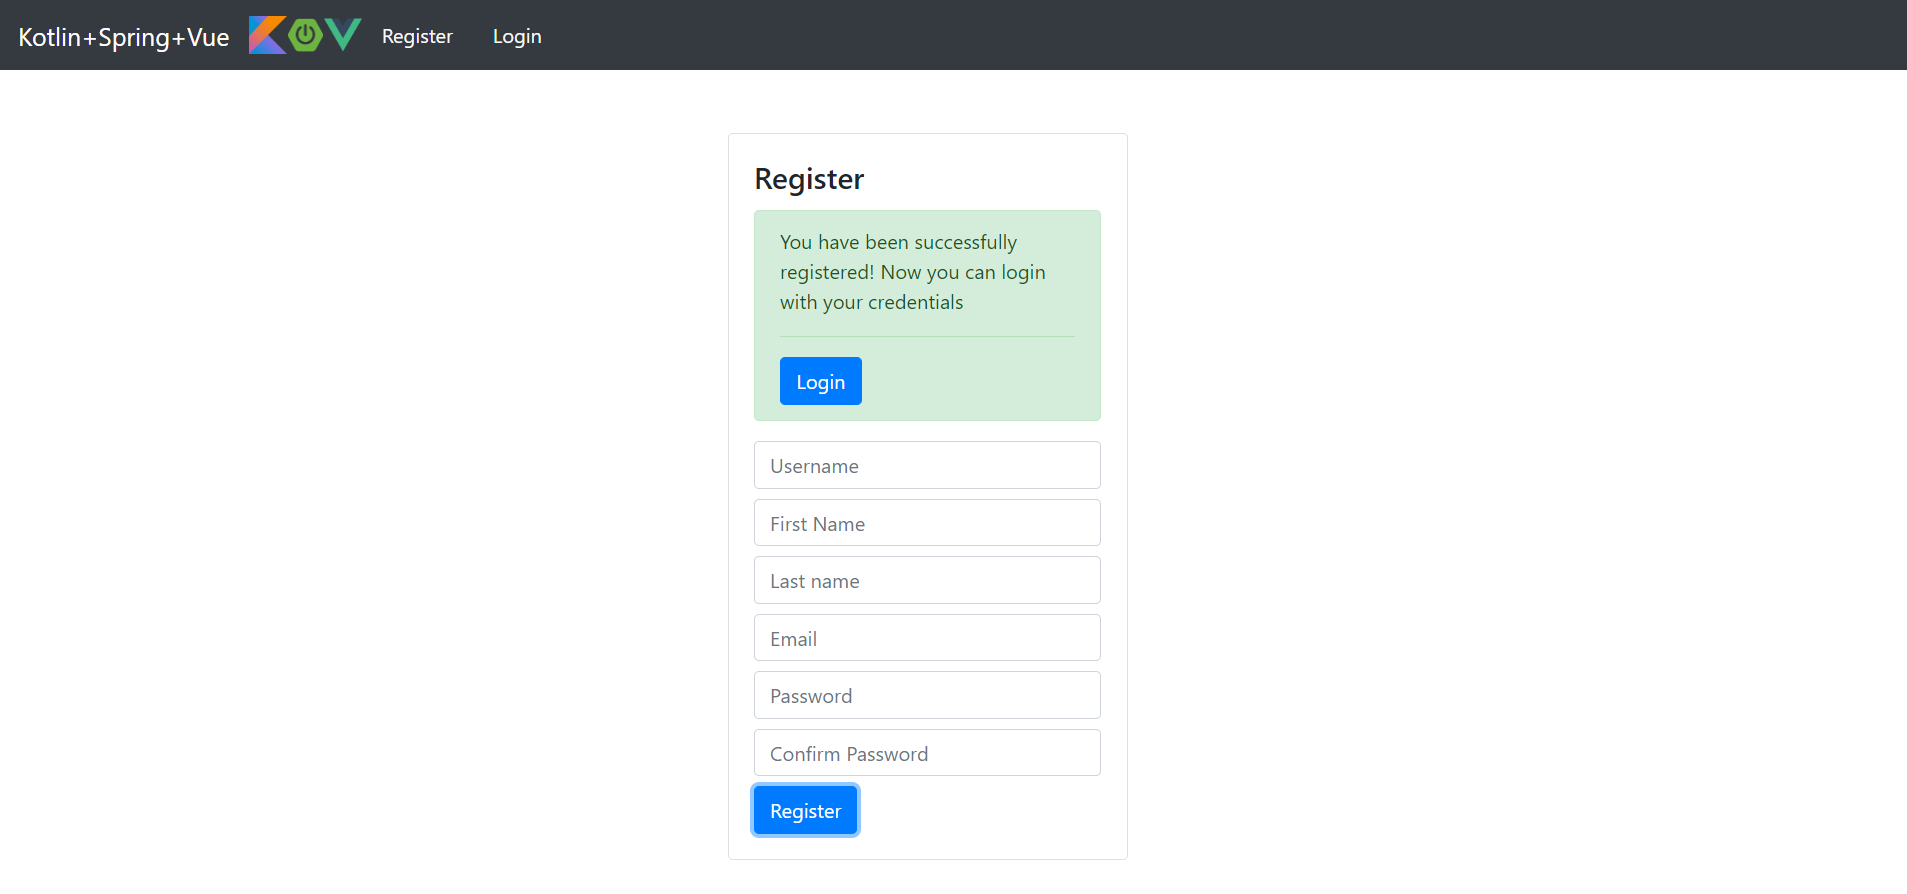
Важно: по умолчанию все новые пользователи — обычные. Дадим первому администратору его полномочия:
INSERT INTO users_roles (user_id, role_id) VALUES (1, 2);
Затем:
- Зайдём под учётной записью администратора
- Проверим страницу User:
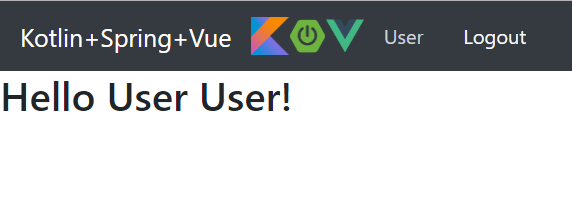
- Проверим страницу Admin:

- Выйдем из администраторской учётной записи
- Зарегистрируем аккаунт обычного пользователя
- Проверим доступность страницы User
- Попробуем получить администраторские данные, используя REST API: http://localhost:8080/api/admincontent
ERROR 77100 --- [nio-8080-exec-2] c.k.backend.jwt.JwtAuthEntryPoint : Unauthorized error. Message - Full authentication is required to access this resource
Пути улучшения
Вообще говоря, их в любом деле всегда очень много. Перечислю самые очевидные:
- Использовать для сборки Gradle (если считать это улучшением)
- Сразу покрывать код модульными тестами (это уже, без сомнения, хорошая практика)
- С самого начала выстраивать CI/CD Pipeline: размещать код в репозитории, контейнизировать приложение, автоматизировать сборку и деплой
- Добавить PUT и DELETE запросы (например, обновление данных пользователей и удаление учётных записей)
- Реализовать активацию/деактивацию уча юных записей
- Не использовать local storage для хранения токена — это не безопасно
- Использовать OAuth
- Верифицировать адреса электронной почты при регистрации нового пользователя
- Использовать защиту от спама, например, reCAPTCHA
Полезные ссылки
- То же самое руководство, только более подробное, где также рассматривается разворачивание приложения в Heroku, reCAPTCHA и работа с почтой. На английском языке, зато с картинками
- GitHub репозиторий
- Готовое приложение
- Отдельное спасибо — этот материал вдохновил меня на написание данной статьи
- Vue.js, Spring Boot, Kotlin, and GraphQL: Building Modern Apps
- Baeldung — Java, Spring and Web Development tutorials
- Vue.js Frontend with a Spring Boot Backend
- Creating a RESTful Web Service with Spring Boot (Kotlin)
- Data Classes (Kotlin)
- Data Classes in Kotlin
- JWT authentication: When and how to use it
- What is Vuex?
- Managing state in Vue.js with Vuex
Автор: Вадим

