Пожалуй, самой закрытой технологией в пользовательском сегменте является сотовая связь. Очень немногие знают о том, как на самом деле работают телефоны и модемы, отчего им часто приписывают всякие мифические свойства. Как насчёт попробовать запустить полностью открытую реализацию модема стандарта 4G? Именно этим я и предлагаю заняться.
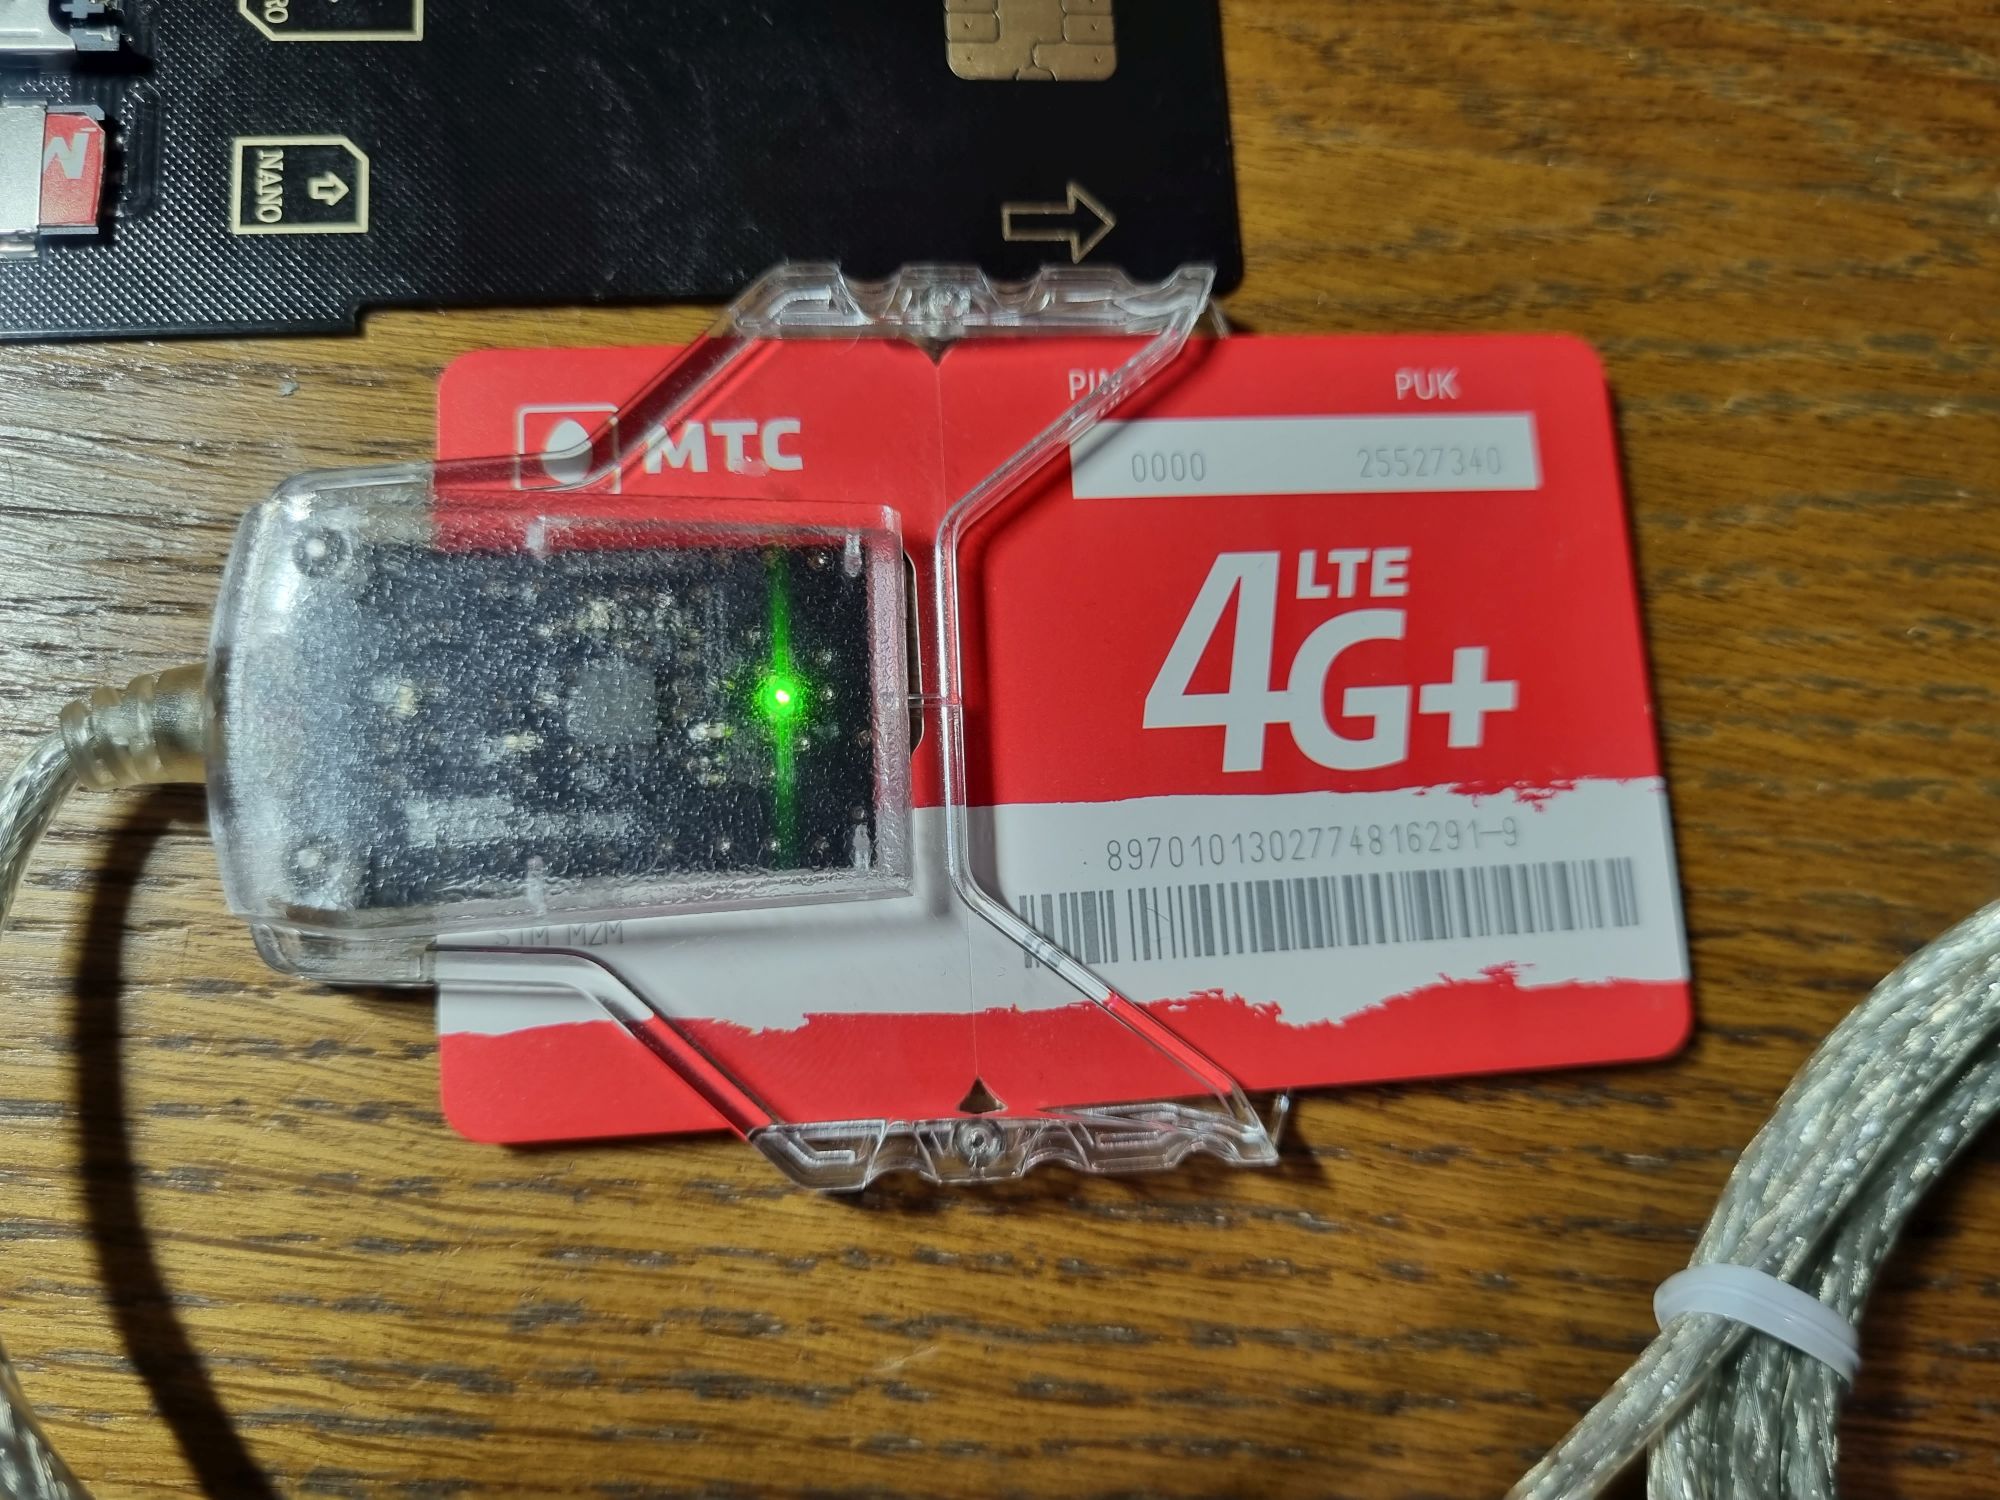
Итак, в сегодняшней статье поговорим о том, как взаимодействовать с мобильной сетью при помощи SDR. Попутно узнаем, какой софт для этого существует, и соберём самый дорогой 4G-модем в истории.
Традиционно будет много интересного.
❯ Суть такова
В начале года я рассматривал запуск домашней сети 4G на базе софта srsRAN и подключал к ней обычные телефоны. Сегодня мы посмотрим на эту задачу с противоположной стороны — создадим устройство, которое будет видеть сеть оператора и получать от неё данные. А заодно и подключим компьютер к мобильному интернету без использования заводского телефона или модема.
❯ Что за софт мы будем использовать?
Как я уже говорил, открытая реализация 4G не одна. Но по части «пользовательских» устройств всё несколько беднее — есть софт GR-LTE (который, правда, служит для декодирования сигналов LTE, а не для работы с сетью), а также srsUE от всё того же Software Radio Systems (srsRAN). Последний нам и нужен: это полноценная софтовая реализация LTE-модема. Изначально это ПО предназначалось для совместной работы с srsENB, то есть предполагалось, что у вас есть два ПК, на одном из которых запущена БС (eNodeB), а на другом — абонентское устройство (User Equipment). Такая связка позволяет анализировать всю работу сети полностью. Но второго SDR у меня нет, так что поговорим о самом интересном: как подключиться при помощи этого софта к обычной сети и, на этот раз, раздать интернет на компьютер.
Если у вас нет SDR, то можно воспользоваться эмулятором БС, который также описан на сайте srsRAN.
Внимание!
В данной статье описывается взаимодействие с коммерческими сотовыми сетями. Правильно настроенный софт никак не мешает их работе, но вы в любом случае должны иметь представление о том, что собираетесь сделать.
❯ Что нужно, чтобы запустить эмулятор модема?
Самое время определиться с оборудованием. Итак, для проведения опытов понадобится примерно следующий набор:
- Компьютер с Linux. Как и в прошлых опытах, машина должна быть достаточно мощной, чтобы обрабатывать данные с SDR. Также обязателен порт USB 3.0.
- SDR. Именно из-за него статья имеет класс «Сложный», так как подобные устройства весьма дороги и есть не у всех. Подойдут всё те же модели, что годятся для eNodeB: USRP, BladeRF или любой другой, совместимый с драйвером SoapySDR. Также srsRAN можно пересобрать под LimeSDR, но ввиду того, что такого девайса у меня нет, я не интересовался, как это сделать.
- Антенны для SDR. В идеале — те, которые специально рассчитаны на использование в сетях 3G/4G.
- Симка. Лучше, если их будет несколько, разных операторов, так как с какими-то работает стабильно, а с какими-то — не очень. Само собой, карта должна быть живая и с ненулевым балансом.
- Считыватель смарт-карт. Обязательно совместимый со стандартом PC/SC, иначе работать не будет. Всякие китайские «SIM card reader» с проприетарным софтом не подойдут.
- Телефон. Непосредственно в запуске он участия принимать не будет, но для подготовки понадобится.
GPS-DO или другой подобный источник стабильной частоты, в отличие от БС, использовать необязательно.
❯ Обзор оборудования
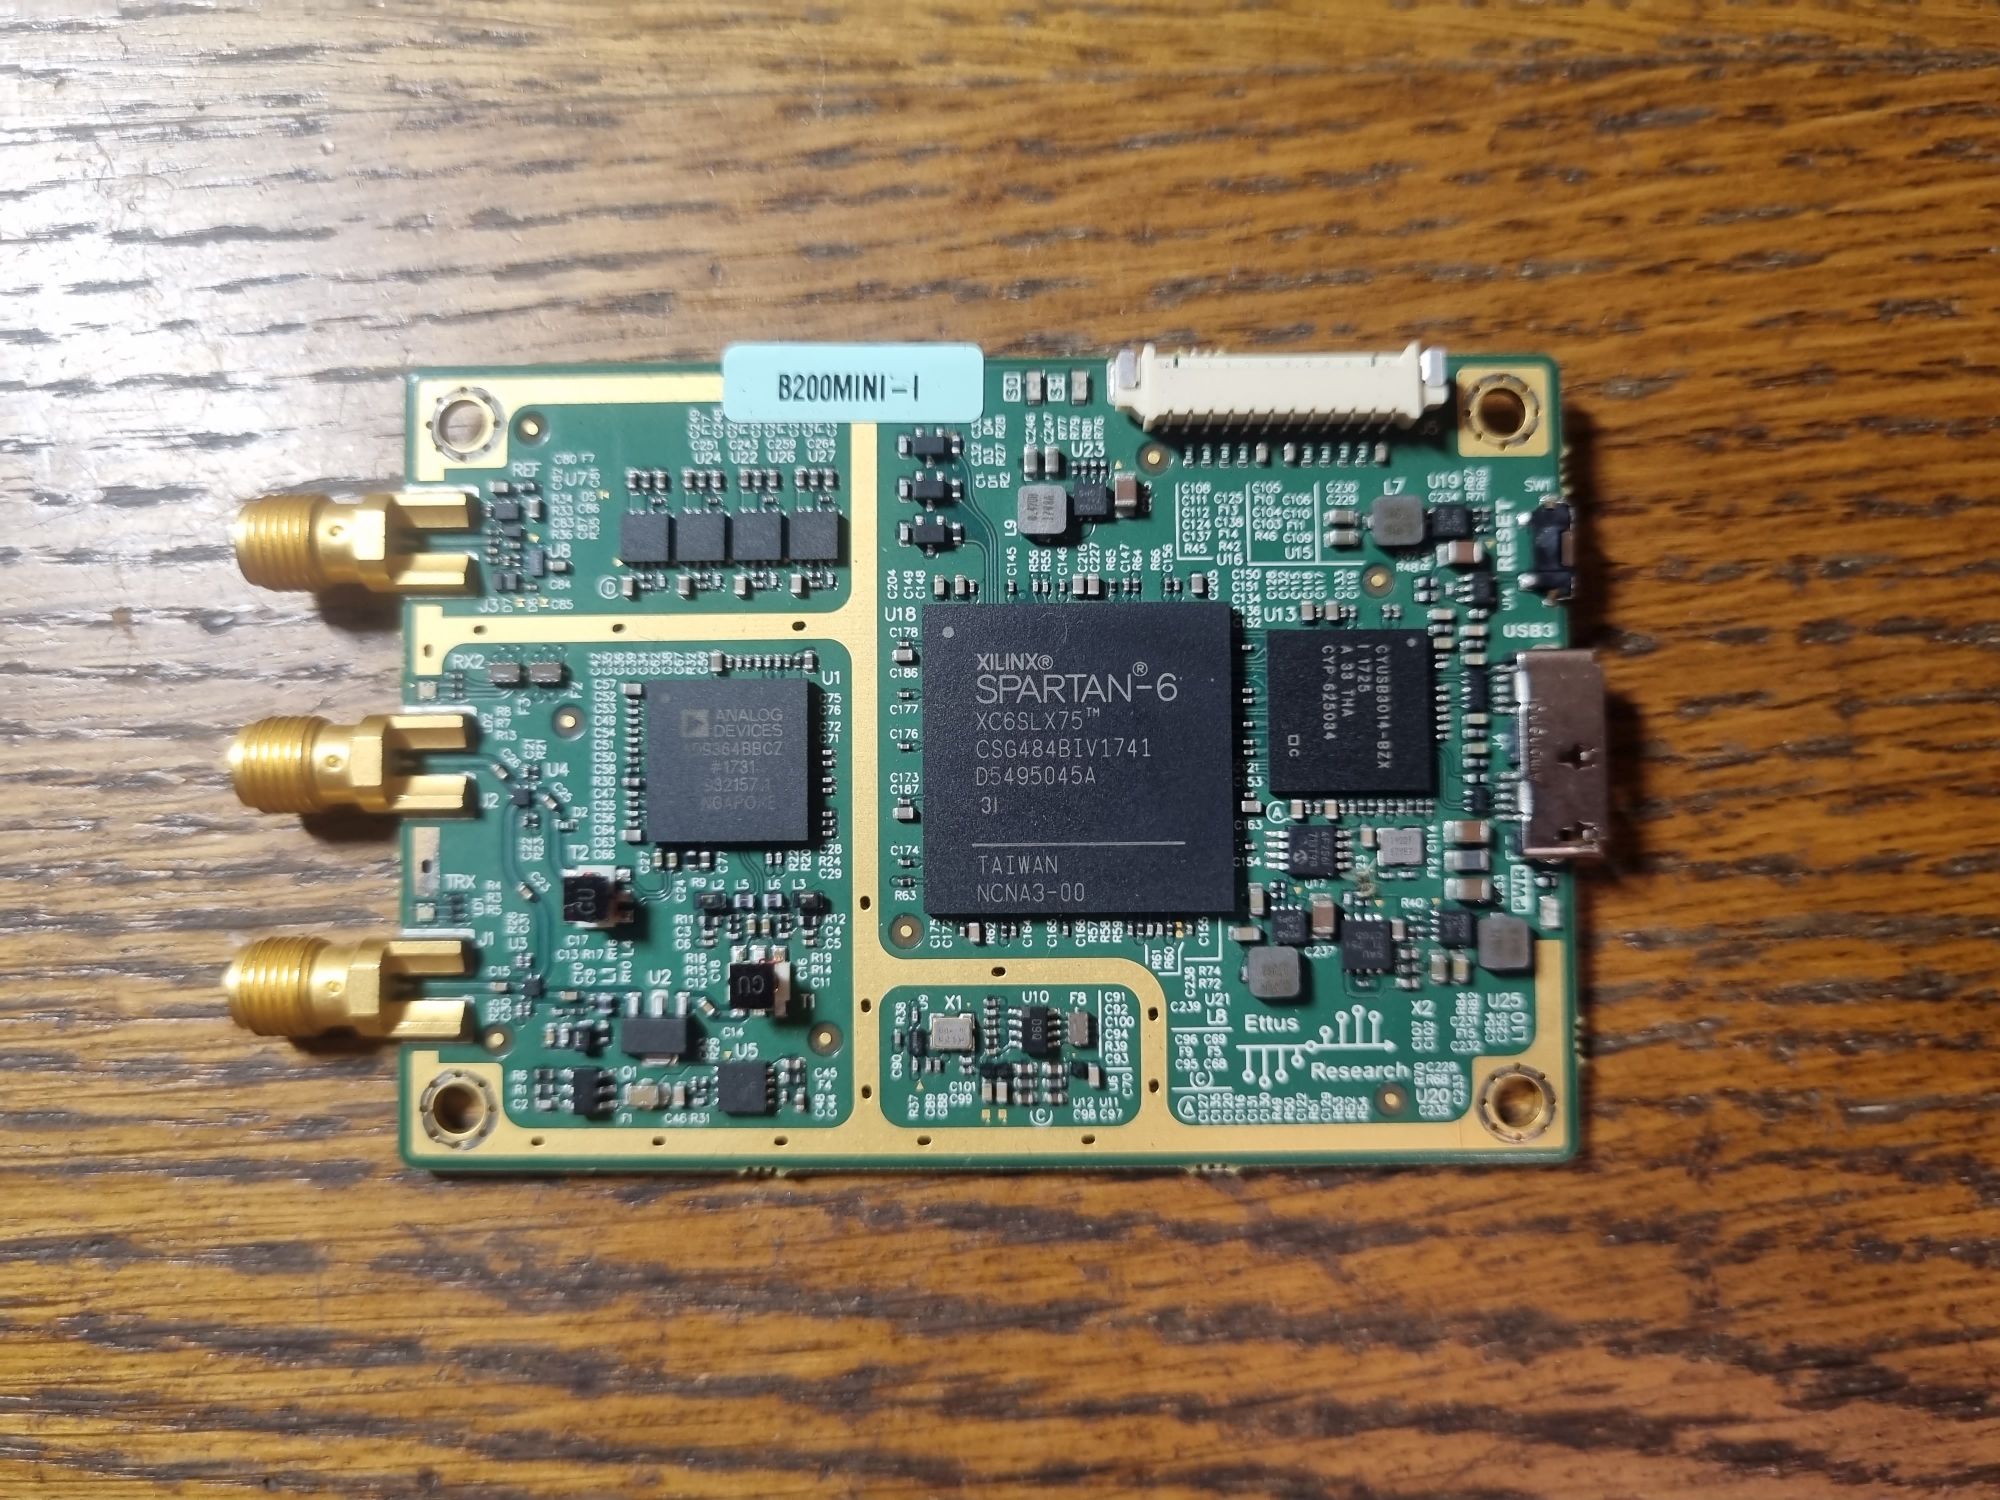
Перво-наперво идёт, конечно, сам SDR — USRP B200mini-i и комплект антенн к нему.
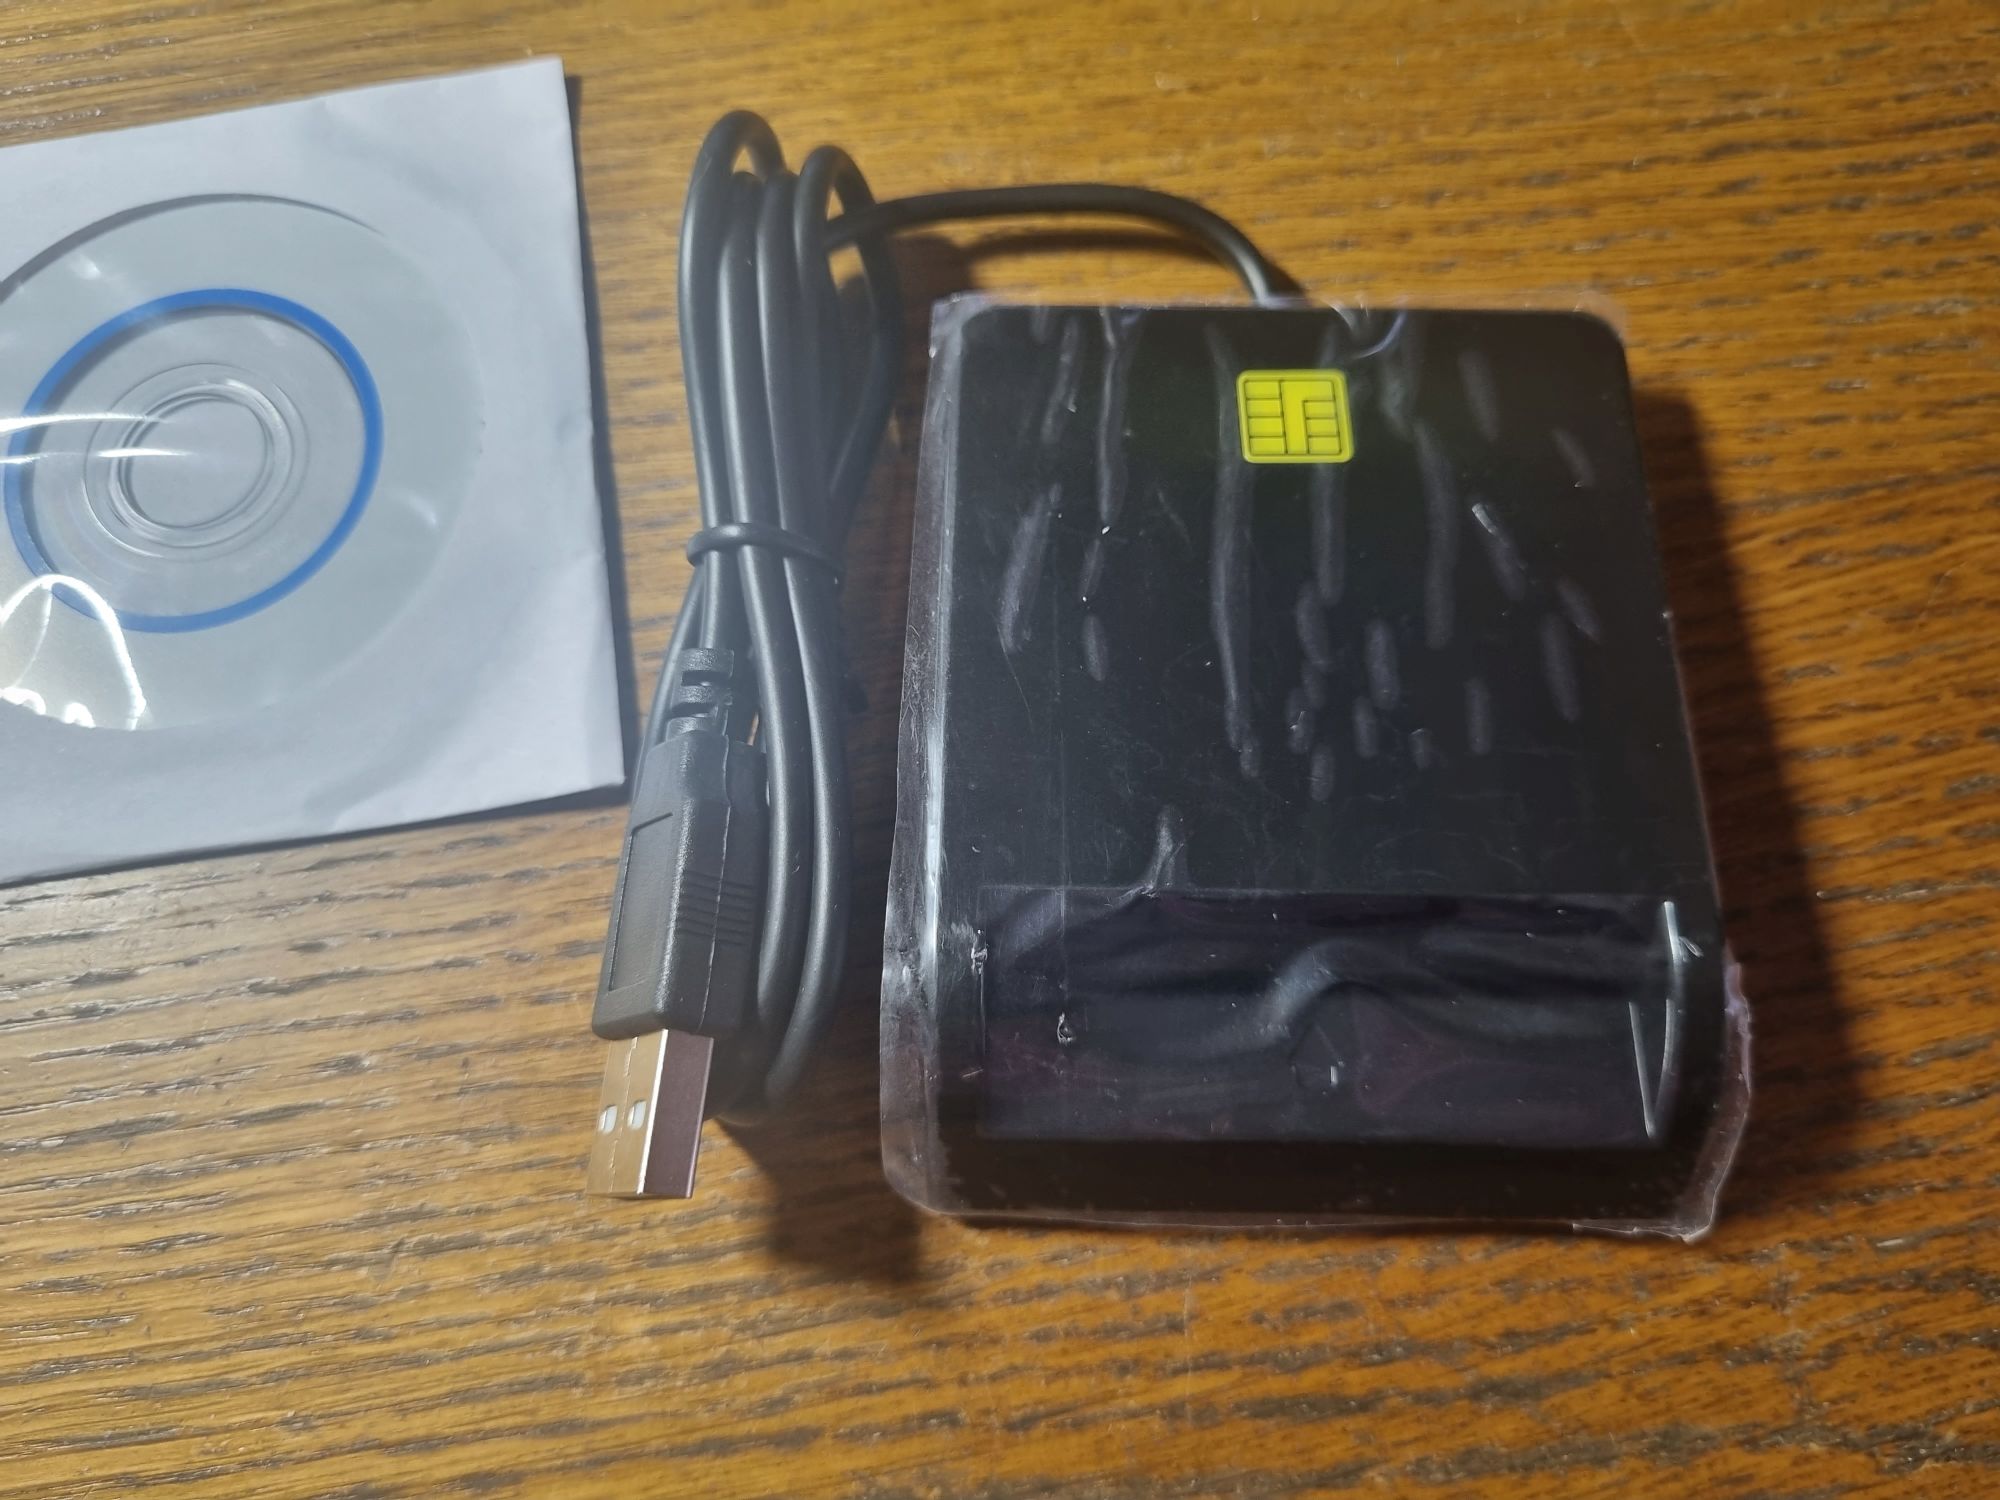
Считыватель.
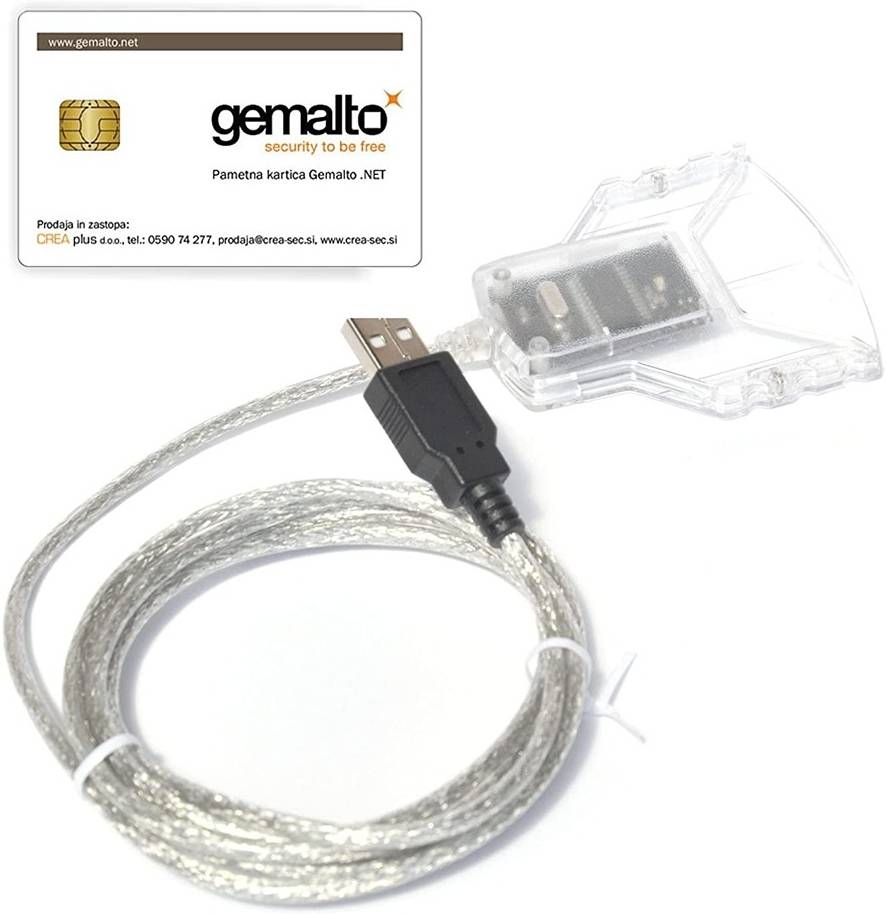
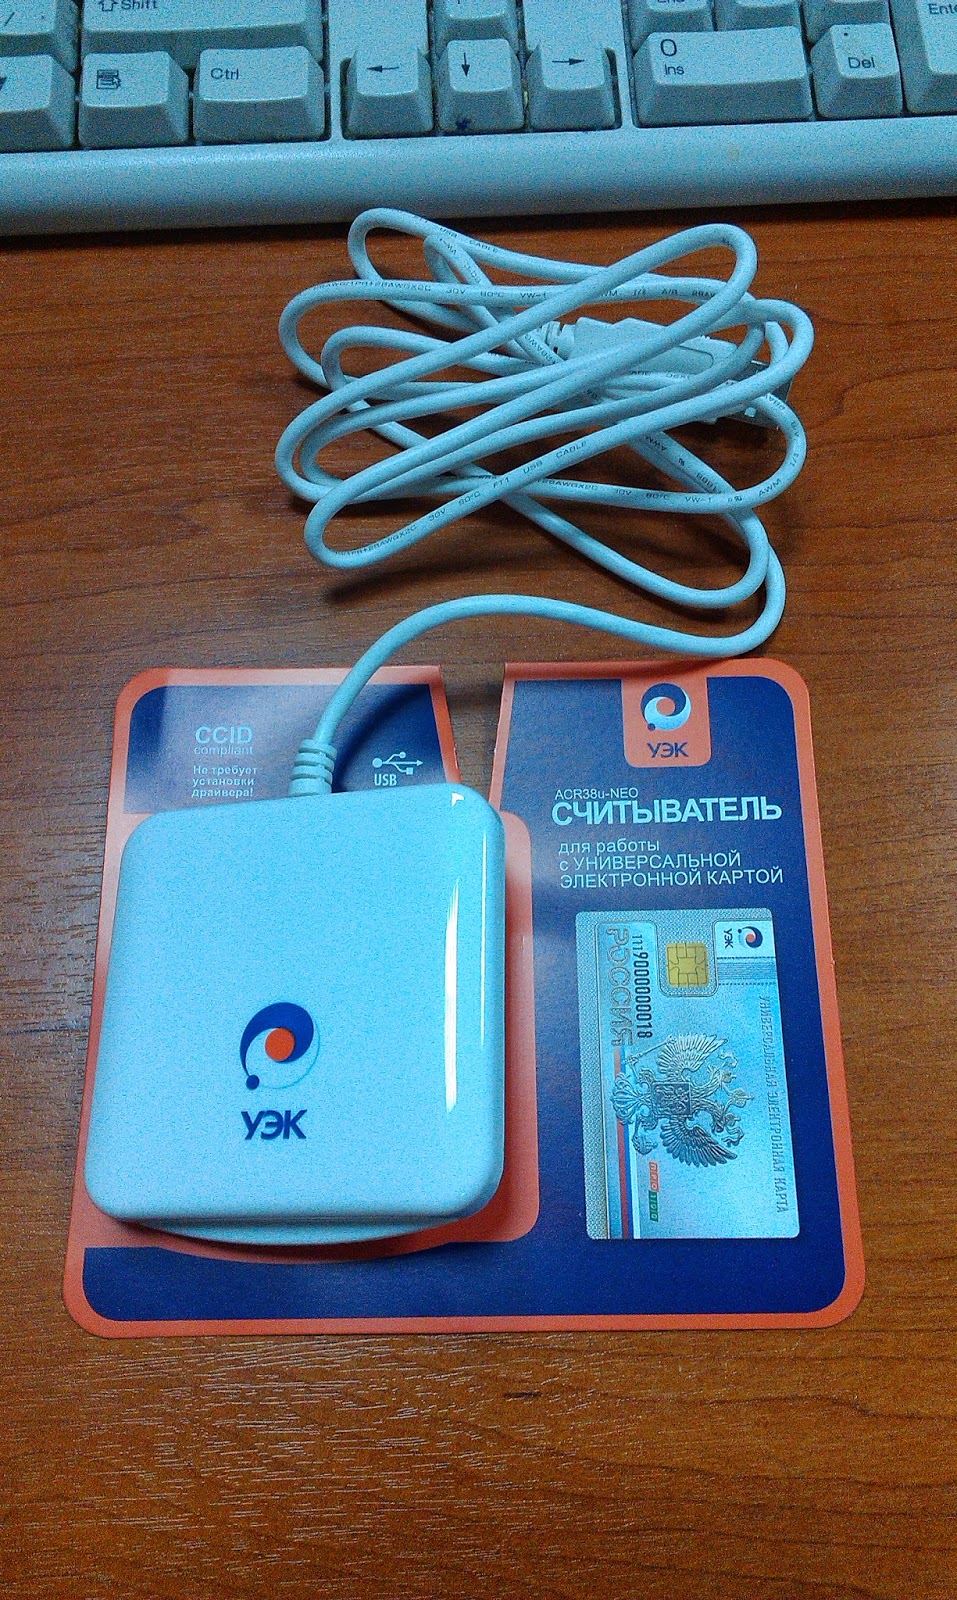
Такой экземпляр можно встретить в любом месте, где есть какие-то СКЗИ или авторизация по смарт-карте, то есть практически повсеместно. Если под рукой такого нет, его можно легко купить, благо стоит он всего-ничего.
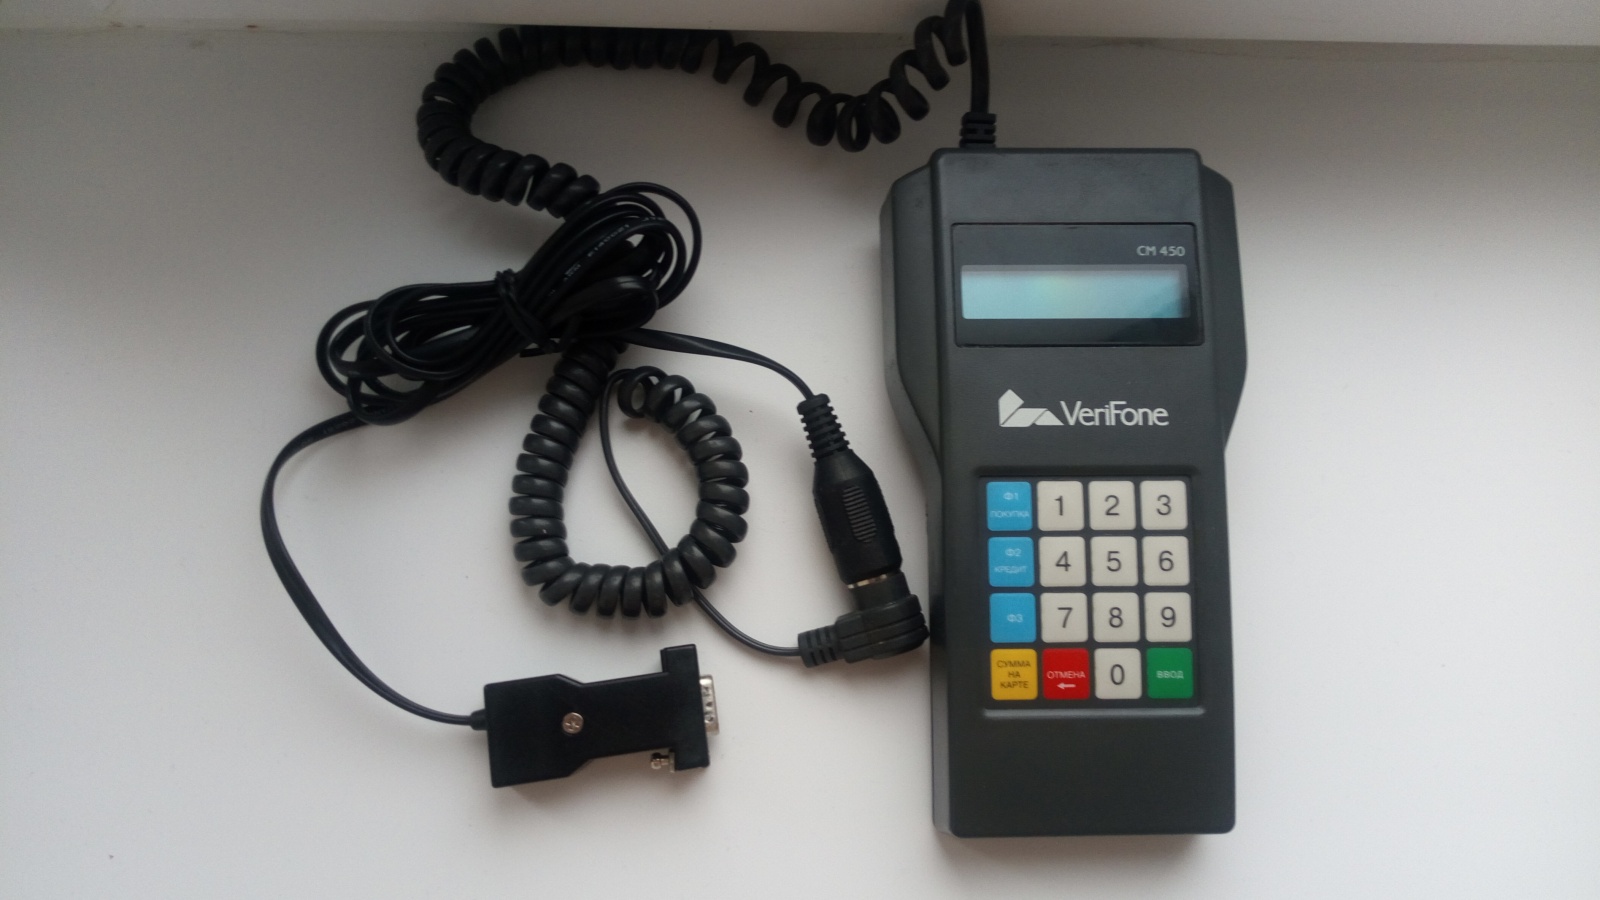
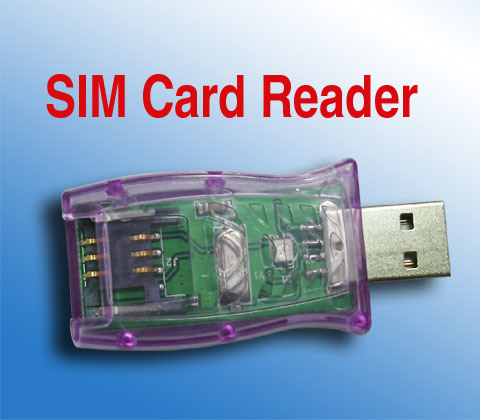
А вот пример тех, которые не подойдут — пин-пады со считывателями карт, а также проприетарные девайсы.
В общем-то, больше ничего примечательного сегодня не потребуется.
❯ Ставим софт
По умолчанию srsUE не поддерживает работу со считывателем смарт-карт, поэтому его необходимо пересобрать из исходников. Именно этим мы сейчас и займёмся.
Для начала устанавливаем зависимости:
sudo apt-get install build-essential cmake libfftw3-dev libmbedtls-dev libboost-program-options-dev libconfig++-dev libsctp-dev
sudo apt-get install libpcsclite-dev pcscd pcsc-tools
Для запуска я рекомендую использовать дистрибутив DragonOS. Там уже установлены все необходимые зависимости. В случае использования именно его первую строчку надо пропустить. Второй строчкой устанавливаем библиотеки и софт для работы со смарт-картами.
Теперь клонируем и собираем:
git clone https://github.com/srsRAN/srsRAN_4G.git
cd srsRAN_4G
mkdir build
cd build
cmake ../
make
sudo make install
srsran_install_configs.sh user
Если у вас уже есть какие-то файлы конфигурации (в частности, по пути /etc/srsran), то перед началом опытов их надо снести. Как обычно, на случай, если у вас вдруг возникнут проблемы при компиляции, ссылку на уже готовый софт я оставлю тут.
Теперь подключаем к компьютеру SDR и делаем тестовый запуск:
cd srsue/src
sudo ./srsue
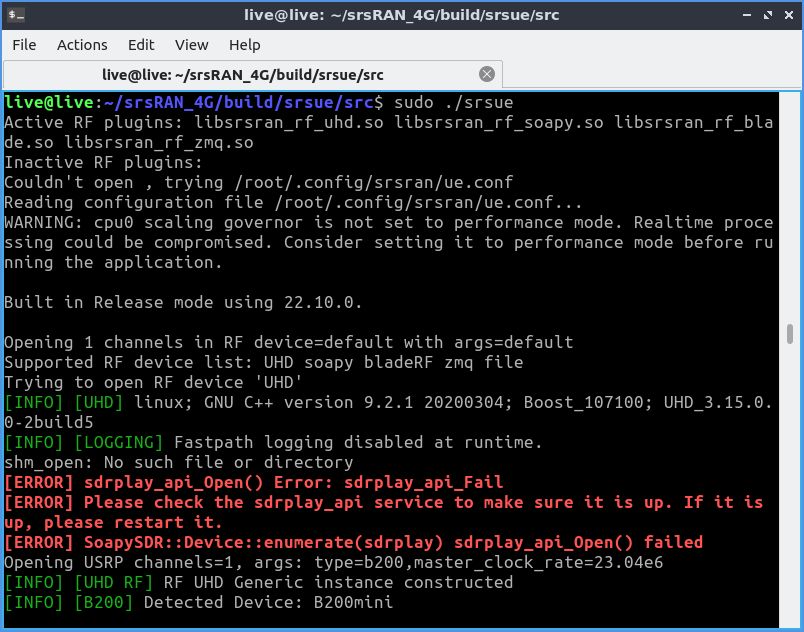
Если после этого софт не вылетел, а в консоли появилось «Attaching UE...», значит, мы на правильном пути.
❯ Конфигурация
На сайте srsRAN всё описывается просто — запустить ПО с единственным параметром, и в путь. На деле этого недостаточно: если в srsEPC имеются некоторые допущения, то коммерческая сеть ошибок не прощает и криво сконфигурированный UE принимать не будет. Так что перед тем, как приступить к «боевому» запуску, нужно настроить параметры конфигурации. Лежат они по пути /root/.config/srsran/ue.conf.
Открываем этот файл и приводим его к следующему виду:
#####################################################################
#                   srsUE configuration file
#####################################################################

#####################################################################
# RF configuration
#
# freq_offset: Uplink and Downlink optional frequency offset (in Hz)
# tx_gain: Transmit gain (dB).
# rx_gain: Optional receive gain (dB). If disabled, AGC if enabled
# srate: Optional fixed sampling rate (Hz), corresponding to cell bandwidth. Must be set for 5G-SA.
#
# nof_antennas:       Number of antennas per carrier (all carriers have the same number of antennas)
# device_name:        Device driver family. Supported options: "auto" (uses first found), "UHD" or "bladeRF"
# device_args:        Arguments for the device driver. Options are "auto" or any string.
#                     Default for UHD: "recv_frame_size=9232,send_frame_size=9232"
#                     Default for bladeRF: ""
# device_args_2:      Arguments for the RF device driver 2.
# device_args_3:      Arguments for the RF device driver 3.
# time_adv_nsamples:  Transmission time advance (in number of samples) to compensate for RF delay
#                     from antenna to timestamp insertion.
#                     Default "auto". B210 USRP: 100 samples, bladeRF: 27.
# continuous_tx:      Transmit samples continuously to the radio or on bursts (auto/yes/no).
#                     Default is auto (yes for UHD, no for rest)
#####################################################################
[rf]
freq_offset = 0
tx_gain = 80
rx_gain = 40
srate = 23.04e6

#nof_antennas = 1

# For best performance in 2x2 MIMO and >= 15 MHz use the following device_args settings:
#     USRP B210: num_recv_frames=64,num_send_frames=64

# For best performance when BW<5 MHz (25 PRB), use the following device_args settings:
#     USRP B210: send_frame_size=512,recv_frame_size=512

#device_args = auto
#time_adv_nsamples = auto
#continuous_tx     = auto

# Example for ZMQ-based operation with TCP transport for I/Q samples
#device_name = zmq
#device_args = tx_port=tcp://*:2001,rx_port=tcp://localhost:2000,id=ue,base_srate=23.04e6

#####################################################################
# EUTRA RAT configuration
#
# dl_earfcn:   Downlink EARFCN list.
#
# Optional parameters:
# dl_freq:            Override DL frequency corresponding to dl_earfcn
# ul_freq:            Override UL frequency corresponding to dl_earfcn
# nof_carriers:       Number of carriers
#####################################################################
[rat.eutra]
dl_earfcn = 3250
#nof_carriers = 1

#####################################################################
# NR RAT configuration
#
# Optional parameters:
# bands:           List of support NR bands seperated by a comma (default 78)
# nof_carriers:    Number of NR carriers (must be at least 1 for NR support)
#####################################################################
[rat.nr]
# bands = 78
# nof_carriers = 0

#####################################################################
# Packet capture configuration
#
# Packet capture is supported at the MAC, MAC_NR, and NAS layer.
# MAC-layer packets are captured to file a the compact format decoded
# by the Wireshark. For decoding, use the UDP dissector and the UDP
# heuristic dissection. Edit the preferences (Edit > Preferences >
# Protocols > DLT_USER) for DLT_USER to add an entry for DLT=149 with
# Protocol=udp. Further, enable the heuristic dissection in UDP under:
# Analyze > Enabled Protocols > MAC-LTE > mac_lte_udp and MAC-NR > mac_nr_udp
# For more information see: https://wiki.wireshark.org/MAC-LTE
# Using the same filename for mac_filename and mac_nr_filename writes both
# MAC-LTE and MAC-NR to the same file allowing a better analysis.
# NAS-layer packets are dissected with DLT=148, and Protocol = nas-eps.
#
# enable:            Enable packet captures of layers (mac/mac_nr/nas/none) multiple option list
# mac_filename:      File path to use for MAC packet capture
# mac_nr_filename:   File path to use for MAC NR packet capture
# nas_filename:      File path to use for NAS packet capture
#####################################################################
[pcap]
enable = none
mac_filename = /tmp/ue_mac.pcap
mac_nr_filename = /tmp/ue_mac_nr.pcap
nas_filename = /tmp/ue_nas.pcap

#####################################################################
# Log configuration
#
# Log levels can be set for individual layers. "all_level" sets log
# level for all layers unless otherwise configured.
# Format: e.g. phy_level = info
#
# In the same way, packet hex dumps can be limited for each level.
# "all_hex_limit" sets the hex limit for all layers unless otherwise
# configured.
# Format: e.g. phy_hex_limit = 32
#
# Logging layers: rf, phy, mac, rlc, pdcp, rrc, nas, gw, usim, stack, all
# Logging levels: debug, info, warning, error, none
#
# filename: File path to use for log output. Can be set to stdout
#           to print logs to standard output
# file_max_size: Maximum file size (in kilobytes). When passed, multiple files are created.
#                If set to negative, a single log file will be created.
#####################################################################
[log]
all_level = warning
phy_lib_level = none
all_hex_limit = 32
filename = /tmp/ue.log
file_max_size = -1

#####################################################################
# USIM configuration
#
# mode:   USIM mode (soft/pcsc)
# algo:   Authentication algorithm (xor/milenage)
# op/opc: 128-bit Operator Variant Algorithm Configuration Field (hex)
#         - Specify either op or opc (only used in milenage)
# k:      128-bit subscriber key (hex)
# imsi:   15 digit International Mobile Subscriber Identity
# imei:   15 digit International Mobile Station Equipment Identity
# pin:    PIN in case real SIM card is used
# reader: Specify card reader by it's name as listed by 'pcsc_scan'. If empty, try all available readers.
#####################################################################
[usim]
mode = pcsc
#reader =
pin = 0000
imei = 352406718839858

#####################################################################
# RRC configuration
#
# ue_category:          Sets UE category (range 1-5). Default: 4
# release:              UE Release (8 to 15)
# feature_group:        Hex value of the featureGroupIndicators field in the
#                       UECapabilityInformation message. Default 0xe6041000
# mbms_service_id:      MBMS service id for autostarting MBMS reception
#                       (default -1 means disabled)
# mbms_service_port:    Port of the MBMS service
# nr_measurement_pci:   NR PCI for the simulated NR measurement. Default: 500
# nr_short_sn_support:  Announce PDCP short SN support. Default: true
#####################################################################
[rrc]
ue_category       = 1
#release           = 8
#feature_group     = 0xe6041000
#mbms_service_id   = -1
#mbms_service_port = 4321

#####################################################################
# NAS configuration
#
# apn:               Set Access Point Name (APN)
# apn_protocol:      Set APN protocol (IPv4, IPv6 or IPv4v6.)
# user:              Username for CHAP authentication
# pass:              Password for CHAP authentication
# force_imsi_attach: Whether to always perform an IMSI attach
# eia:               List of integrity algorithms included in UE capabilities
#                      Supported: 1 - Snow3G, 2 - AES, 3 - ZUC
# eea:               List of ciphering algorithms included in UE capabilities
#                      Supported: 0 - NULL, 1 - Snow3G, 2 - AES, 3 - ZUC
#####################################################################
[nas]
apn = internet.mts.ru
apn_protocol = ipv4
user = mts
pass = mts
#force_imsi_attach = false
#eia = 1,2,3
#eea = 0,1,2,3

#####################################################################
# Slice configuration
#
# enable:           Enable a specific slice
# nssai-sst:        Specfic Slice Type
# nssai-sd:         Slice diffentiator
#####################################################################
[slicing]
#enable = false
#nssai-sst = 1
#nssai-sd = 1

#####################################################################
# GW configuration
#
# netns:                Network namespace to create TUN device. Default: empty
# ip_devname:           Name of the tun_srsue device. Default: tun_srsue
# ip_netmask:           Netmask of the tun_srsue device. Default: 255.255.255.0
#####################################################################
[gw]
#netns =
#ip_devname = tun_srsue
#ip_netmask = 255.255.255.0

#####################################################################
# GUI configuration
#
# Simple GUI displaying PDSCH constellation and channel freq response.
# (Requires building with srsGUI)
# enable:               Enable the graphical interface (true/false)
#####################################################################
[gui]
enable = false

#####################################################################
# Channel emulator options:
# enable:            Enable/Disable internal Downlink/Uplink channel emulator
#
# -- AWGN Generator
# awgn.enable:       Enable/disable AWGN generator
# awgn.snr:          SNR in dB
# awgn.signal_power: Received signal power in decibels full scale (dBfs)
#
# -- Fading emulator
# fading.enable:     Enable/disable fading simulator
# fading.model:      Fading model + maximum doppler (E.g. none, epa5, eva70, etu300, etc)
#
# -- Delay Emulator     delay(t) = delay_min + (delay_max - delay_min) * (1 + sin(2pi*t/period)) / 2
#                       Maximum speed [m/s]: (delay_max - delay_min) * pi * 300 / period
# delay.enable:      Enable/disable delay simulator
# delay.period_s:    Delay period in seconds.
# delay.init_time_s: Delay initial time in seconds.
# delay.maximum_us:  Maximum delay in microseconds
# delay.minumum_us:  Minimum delay in microseconds
#
# -- Radio-Link Failure (RLF) Emulator
# rlf.enable:        Enable/disable RLF simulator
# rlf.t_on_ms:       Time for On state of the channel (ms)
# rlf.t_off_ms:      Time for Off state of the channel (ms)
#
# -- High Speed Train Doppler model simulator
# hst.enable:        Enable/Disable HST simulator
# hst.period_s:      HST simulation period in seconds
# hst.fd_hz:         Doppler frequency in Hz
# hst.init_time_s:   Initial time in seconds
#####################################################################
[channel.dl]
#enable        = false

[channel.dl.awgn]
#enable        = false
#snr           = 30

[channel.dl.fading]
#enable        = false
#model         = none

[channel.dl.delay]
#enable        = false
#period_s      = 3600
#init_time_s   = 0
#maximum_us    = 100
#minimum_us    = 10

[channel.dl.rlf]
#enable        = false
#t_on_ms       = 10000
#t_off_ms      = 2000

[channel.dl.hst]
#enable        = false
#period_s      = 7.2
#fd_hz         = 750.0
#init_time_s   = 0.0

[channel.ul]
#enable        = false

[channel.ul.awgn]
#enable        = false
#n0            = -30

[channel.ul.fading]
#enable        = false
#model         = none

[channel.ul.delay]
#enable        = false
#period_s      = 3600
#init_time_s   = 0
#maximum_us    = 100
#minimum_us    = 10

[channel.ul.rlf]
#enable        = false
#t_on_ms       = 10000
#t_off_ms      = 2000

[channel.ul.hst]
#enable        = false
#period_s      = 7.2
#fd_hz         = -750.0
#init_time_s   = 0.0

#####################################################################
# PHY configuration options
#
# rx_gain_offset:       RX Gain offset to add to rx_gain to calibrate RSRP readings
# prach_gain:           PRACH gain (dB). If defined, forces a gain for the tranmsission of PRACH only.,
#                       Default is to use tx_gain in [rf] section.
# cqi_max:              Upper bound on the maximum CQI to be reported. Default 15.
# cqi_fixed:            Fixes the reported CQI to a constant value. Default disabled.
# snr_ema_coeff:        Sets the SNR exponential moving average coefficient (Default 0.1)
# snr_estim_alg:        Sets the noise estimation algorithm. (Default refs)
#                          Options: pss:   use difference between received and known pss signal,
#                                   refs:  use difference between noise references and noiseless (after filtering)
#                                   empty: use empty subcarriers in the boarder of pss/sss signal
# pdsch_max_its:        Maximum number of turbo decoder iterations (Default 4)
# pdsch_meas_evm:       Measure PDSCH EVM, increases CPU load (default false)
# nof_phy_threads:      Selects the number of PHY threads (maximum 4, minimum 1, default 3)
# equalizer_mode:       Selects equalizer mode. Valid modes are: "mmse", "zf" or any
#                       non-negative real number to indicate a regularized zf coefficient.
#                       Default is MMSE.
# correct_sync_error:   Channel estimator measures and pre-compensates time synchronization error. Increases CPU usage,
#                       improves PDSCH decoding in high SFO and high speed UE scenarios.
# sfo_ema:              EMA coefficient to average sample offsets used to compute SFO
# sfo_correct_period:   Period in ms to correct sample time to adjust for SFO
# sss_algorithm:        Selects the SSS estimation algorithm. Can choose between
#                       {full, partial, diff}.
# estimator_fil_auto:   The channel estimator smooths the channel estimate with an adaptative filter.
# estimator_fil_stddev: Sets the channel estimator smooth gaussian filter standard deviation.
# estimator_fil_order:  Sets the channel estimator smooth gaussian filter order (even values perform better).
#                       The taps are [w, 1-2w, w]
#
# snr_to_cqi_offset:    Sets an offset in the SNR to CQI table. This is used to adjust the reported CQI.
#
# interpolate_subframe_enabled: Interpolates in the time domain the channel estimates within 1 subframe. Default is to average.
#
# pdsch_csi_enabled:     Stores the Channel State Information and uses it for weightening the softbits. It is only
#                        used in TM1. It is True by default.
#
# pdsch_8bit_decoder:    Use 8-bit for LLR representation and turbo decoder trellis computation (Experimental)
# force_ul_amplitude:    Forces the peak amplitude in the PUCCH, PUSCH and SRS (set 0.0 to 1.0, set to 0 or negative for disabling)
#
# in_sync_rsrp_dbm_th:    RSRP threshold (in dBm) above which the UE considers to be in-sync
# in_sync_snr_db_th:      SNR threshold (in dB) above which the UE considers to be in-sync
# nof_in_sync_events:     Number of PHY in-sync events before sending an in-sync event to RRC
# nof_out_of_sync_events: Number of PHY out-sync events before sending an out-sync event to RRC
#
# force_N_id_2: Force using a specific PSS (set to -1 to allow all PSSs).
# force_N_id_1: Force using a specific SSS (set to -1 to allow all SSSs).
#
#####################################################################
[phy]
#rx_gain_offset      = 62
#prach_gain          = 30
#cqi_max             = 15
#cqi_fixed           = 10
#snr_ema_coeff       = 0.1
#snr_estim_alg       = refs
#pdsch_max_its       = 8    # These are half iterations
#pdsch_meas_evm      = false
#nof_phy_threads     = 3
#equalizer_mode      = mmse
#correct_sync_error  = false
#sfo_ema             = 0.1
#sfo_correct_period  = 10
#sss_algorithm       = full
#estimator_fil_auto  = false
#estimator_fil_stddev  = 1.0
#estimator_fil_order  = 4
#snr_to_cqi_offset   = 0.0
#interpolate_subframe_enabled = false
#pdsch_csi_enabled  = true
#pdsch_8bit_decoder = false
#force_ul_amplitude = 0
#detect_cp          = false

#in_sync_rsrp_dbm_th    = -130.0
#in_sync_snr_db_th      = 3.0
#nof_in_sync_events     = 10
#nof_out_of_sync_events = 20

#force_N_id_2           = 1
#force_N_id_1           = 10

#####################################################################
# PHY NR specific configuration options
#
# store_pdsch_ko:       Dumps the PDSCH baseband samples into a file on KO reception
#
#####################################################################
[phy.nr]
#store_pdsch_ko = false

#####################################################################
# CFR configuration options
#
# The CFR module provides crest factor reduction for the transmitted signal.
#
# enable:           Enable or disable the CFR. Default: disabled
#
# mode:             manual:   CFR threshold is set by cfr_manual_thres (default).
#                   auto_ema: CFR threshold is adaptive based on the signal PAPR. Power avg. with Exponential Moving Average.
#                             The time constant of the averaging can be tweaked with the ema_alpha parameter.
#                   auto_cma: CFR threshold is adaptive based on the signal PAPR. Power avg. with Cumulative Moving Average.
#                             Use with care, as CMA's increasingly slow response may be unsuitable for most use cases.
#
# strength:         Ratio between amplitude-limited vs unprocessed signal (0 to 1). Default: 1
# manual_thres:     Fixed manual clipping threshold for CFR manual mode. Default: 2
# auto_target_papr: Signal PAPR target (in dB) in CFR auto modes. output PAPR can be higher due to peak smoothing. Default: 7
# ema_alpha:        Alpha coefficient for the power average in auto_ema mode. Default: 1/7
#
#####################################################################
[cfr]
#enable           = false
#mode             = manual
#manual_thres     = 2.0
#strength         = 1.0
#auto_target_papr = 7.0
#ema_alpha        = 0.0143

#####################################################################
# Simulation configuration options
#
# The UE simulation supports turning on and off airplane mode in the UE.
# The actions are carried periodically until the UE is stopped.
#
# airplane_t_on_ms:   Time to leave airplane mode turned on (in ms)
#
# airplane_t_off_ms:  Time to leave airplane mode turned off (in ms)
#
#####################################################################
[sim]
#airplane_t_on_ms  = -1
#airplane_t_off_ms = -1

#####################################################################
# General configuration options
#
# metrics_csv_enable:    Write UE metrics to CSV file.
#
# metrics_period_secs:   Sets the period at which metrics are requested from the UE.
#
# metrics_csv_filename:  File path to use for CSV metrics.
#
# tracing_enable:        Write source code tracing information to a file.
#
# tracing_filename:      File path to use for tracing information.
#
# tracing_buffcapacity:  Maximum capacity in bytes the tracing framework can store.
#
# have_tti_time_stats:   Calculate TTI execution statistics using system clock
#
# metrics_json_enable:   Write UE metrics to JSON file.
#
# metrics_json_filename: File path to use for JSON metrics.
#
#####################################################################
[general]
#metrics_csv_enable    = false
#metrics_period_secs   = 1
#metrics_csv_filename  = /tmp/ue_metrics.csv
#have_tti_time_stats   = true
#tracing_enable        = true
#tracing_filename      = /tmp/ue_tracing.log
#tracing_buffcapacity  = 1000000
#metrics_json_enable   = false
#metrics_json_filename = /tmp/ue_metrics.json
Разберёмся с параметрами, которые нужно изменить.
- srate — частота дискретизации SDR. Ставим максимальную поддерживаемую для вашего устройства.
- dl_earfcn — номер канала, на котором UE будет искать вышку.
- mode — тип SIM-карты (soft — виртуальная, pcsc — настоящая). Устанавливаем pcsc.
- reader — считыватель. Если значение пусто, то будут проверены все имеющиеся.
- pin — PIN симки.
- imei — IMEI, которым будет представляться UE.
- apn — APN вашей точки доступа.
- login — логин.
- pass — пароль.
srsUE не проходится по всем доступным ему каналам, как это делает телефон. Поэтому для работы необходимо указать EARFCN, на котором работает вышка оператора.
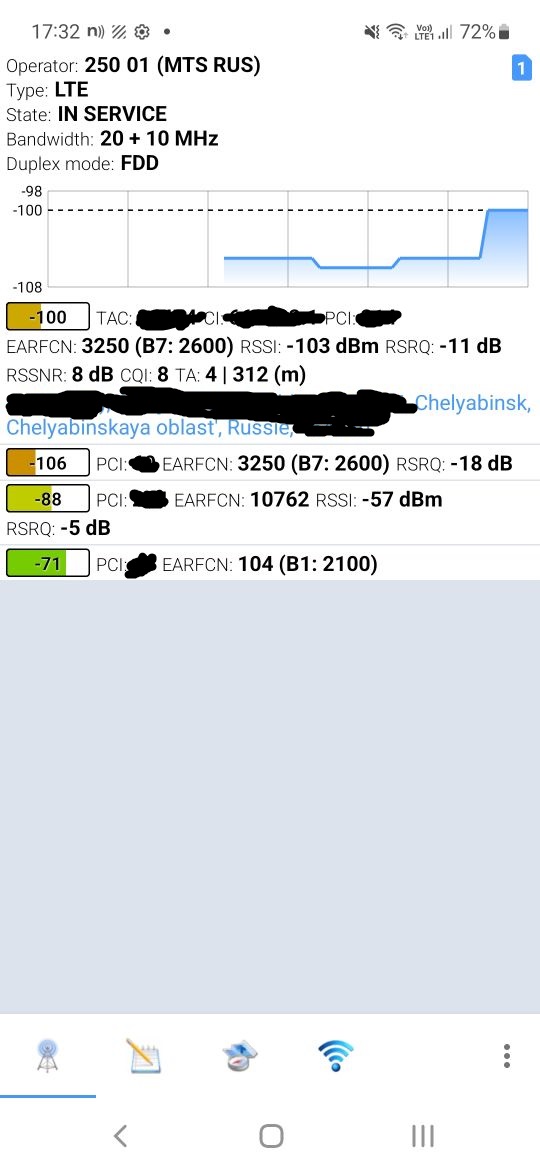
На телефоне открываем Net Monitor и запоминаем номер канала от БС с хорошим сигналом, после чего заносим его в качестве значения параметра. Также надо отрубить запрос ПИНа у симки, либо указать ПИН в соответствующем поле в конфиге.
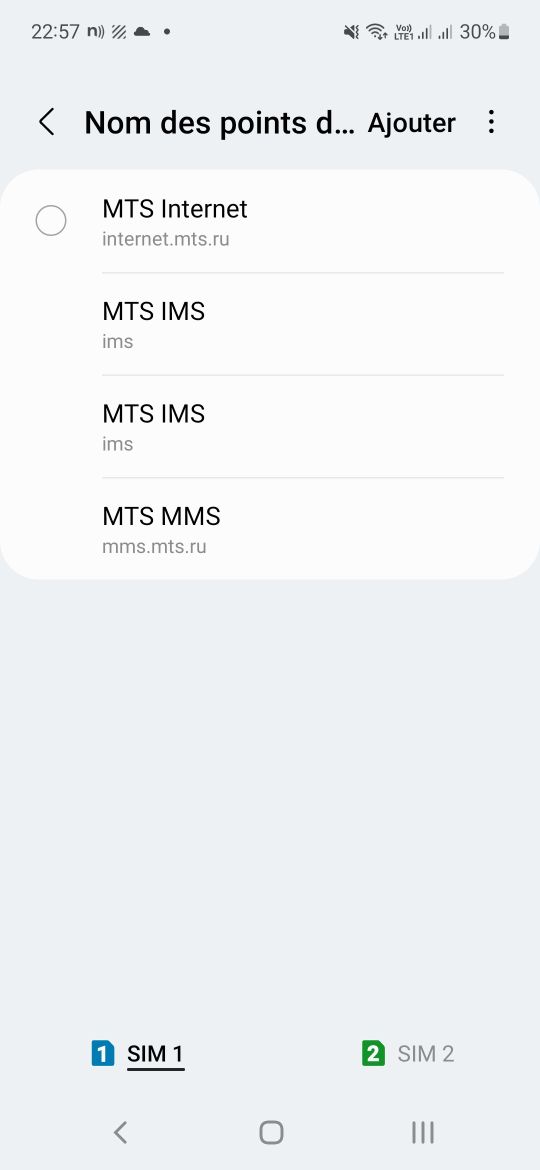
Далее в телефоне открываем раздел «Точки доступа». Нас интересует APN, логин и пароль, которые тоже необходимо узнать и забить.
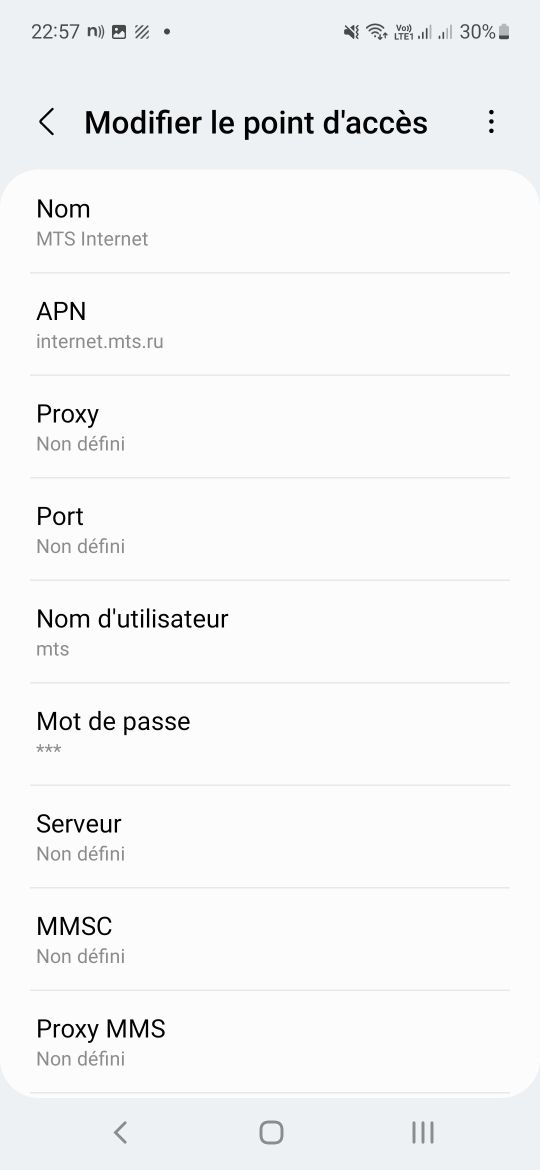
В моём случае параметры оказались такие: APN — internet.mts.ru, логин — mts, пароль — mts.
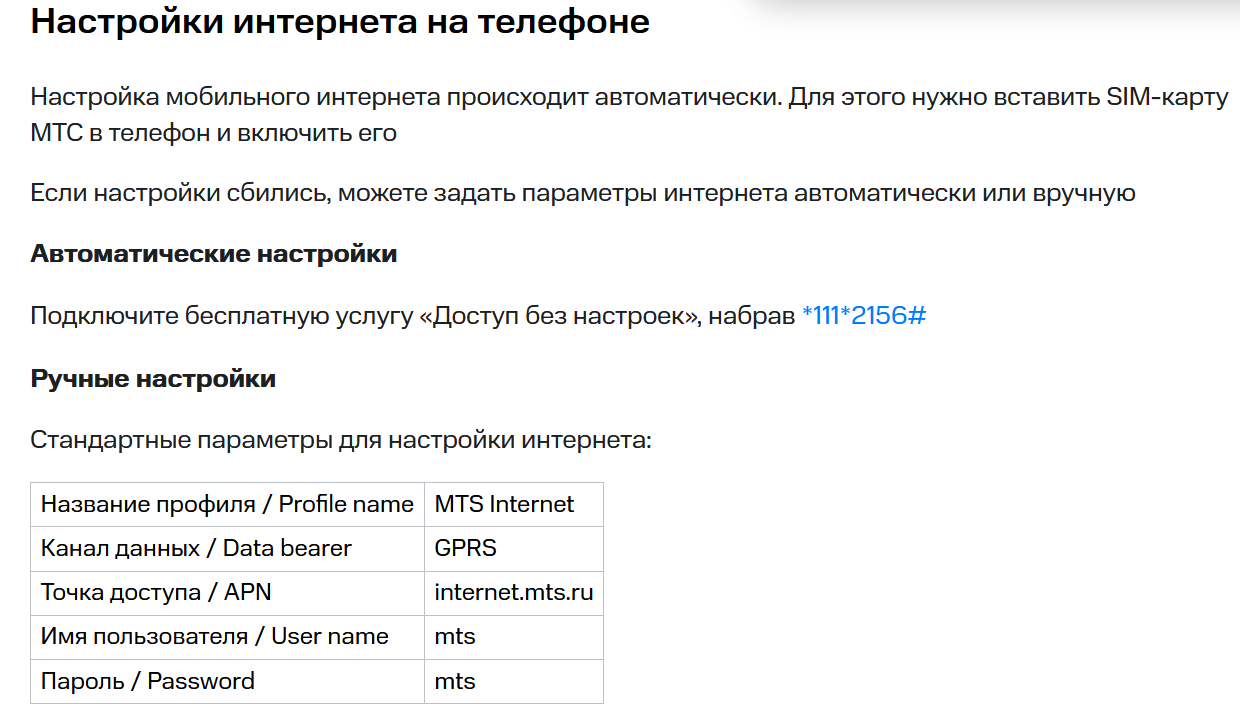
Также эти данные можно найти в интернете, они есть на сайте любого оператора.

Отдельным пунктом стоит упомянуть IMEI. Обычно он прошивается на заводе и не меняется (либо вообще, либо только с помощью специального софта). Но, как нетрудно догадаться, srsUE является этаким «сферическим в вакууме» девайсом, поэтому IMEI нужно задать самому, например, сгенерировать случайный для любой понравившейся модели телефона.
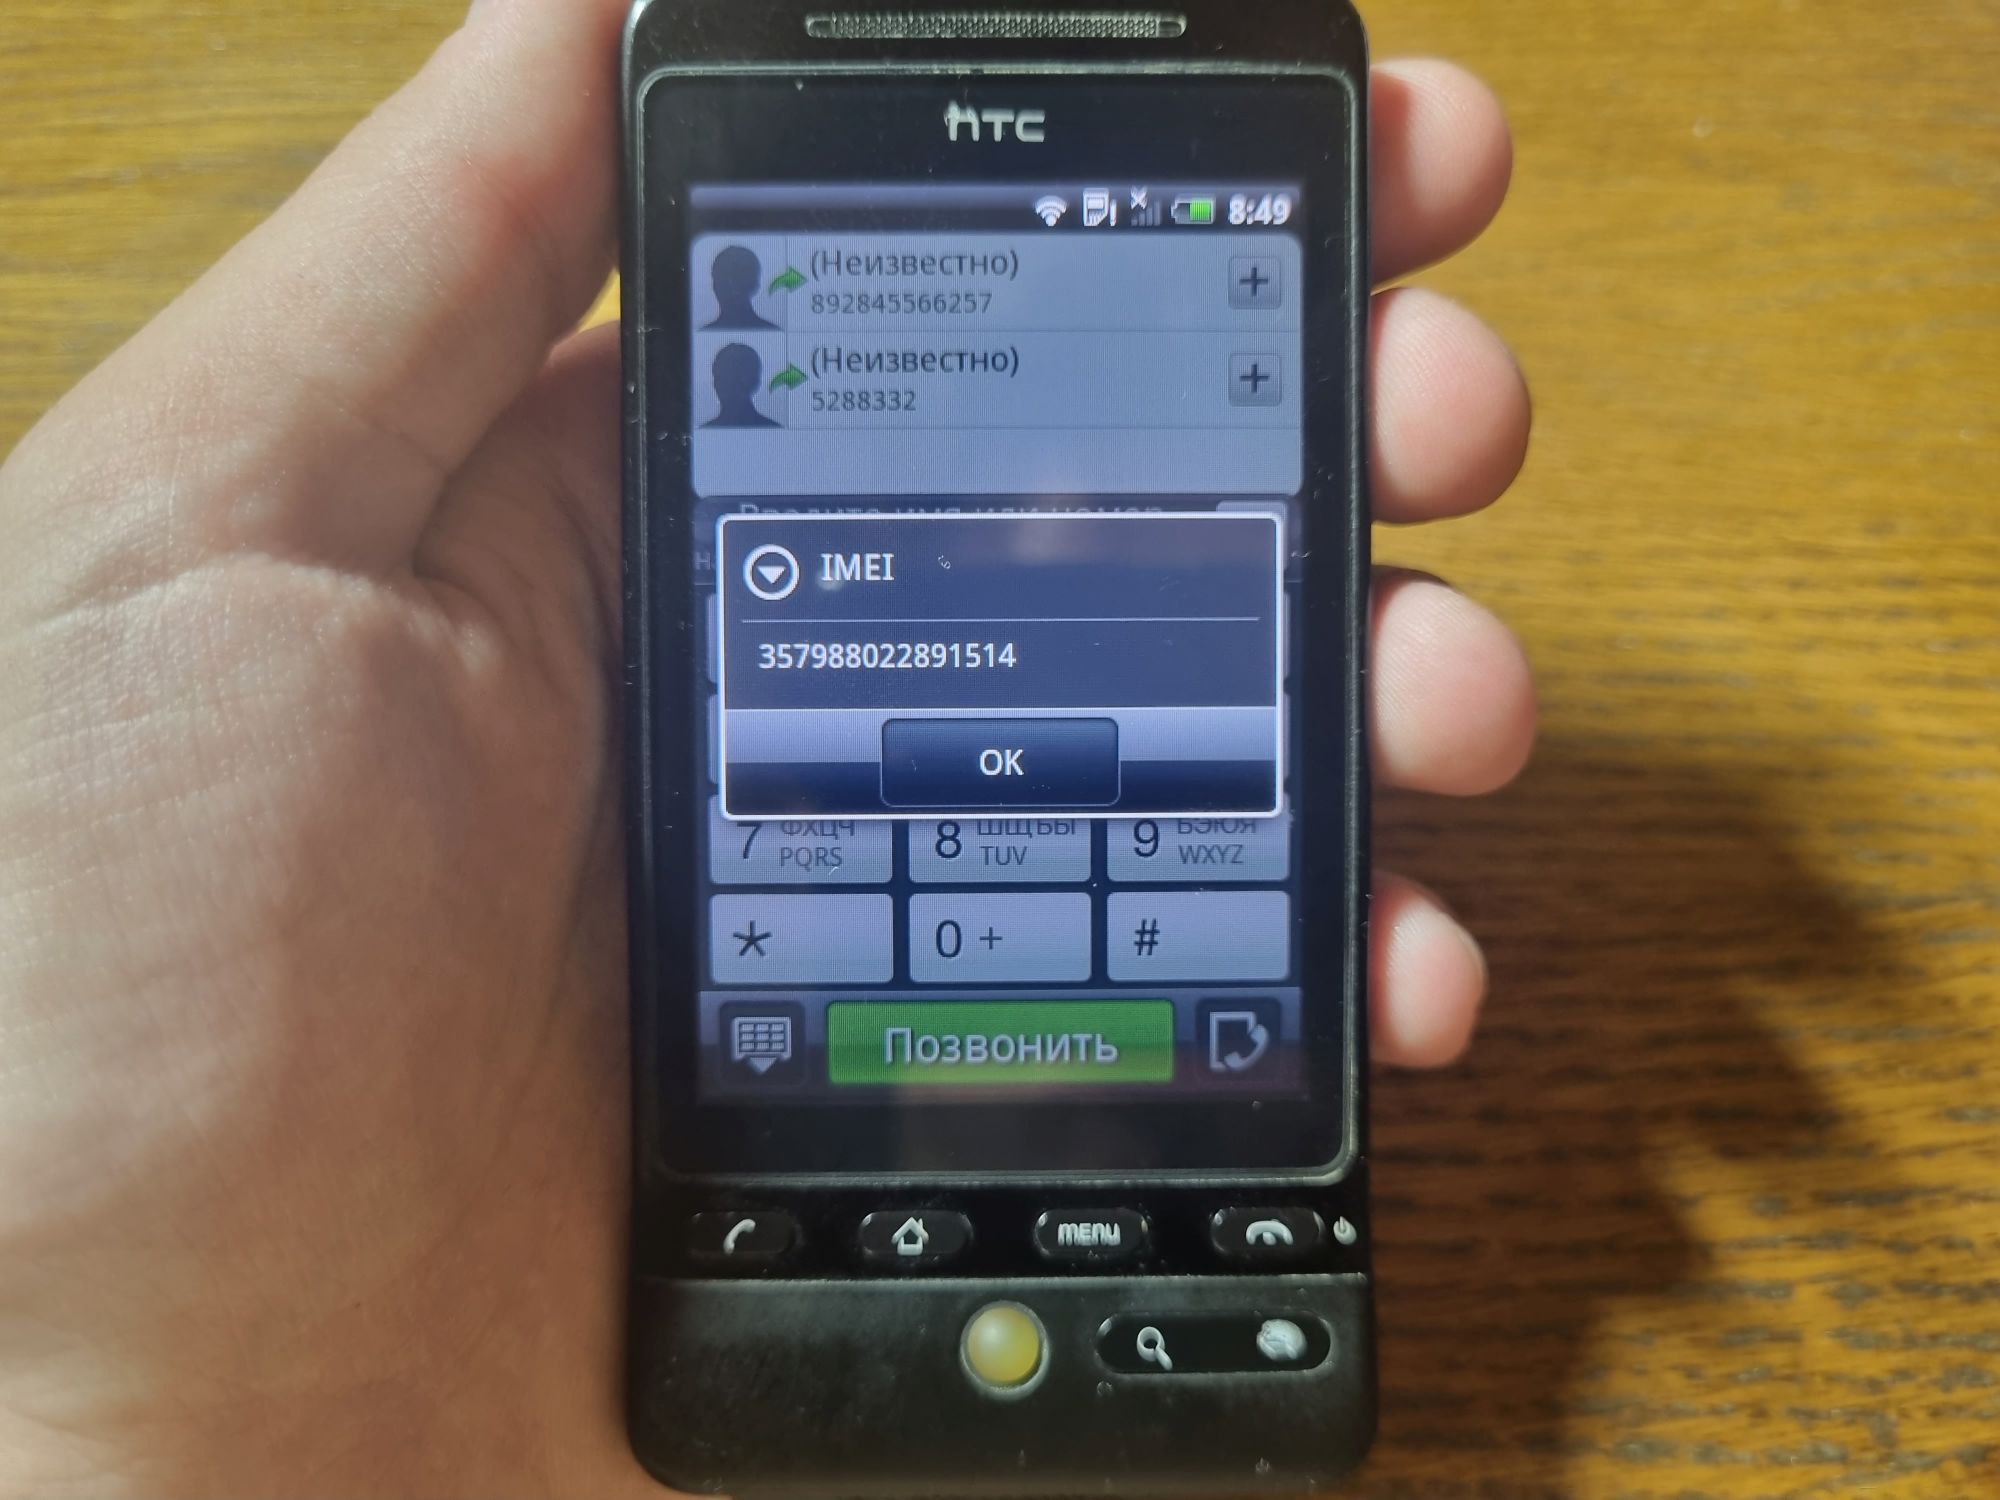
Другим вариантом будет использование IMEI от настоящего телефона. Набираем код *#06#, и на экране появляются заветные цифры. Очень важно: никогда не допускайте одновременной работы srsUE и телефона, IMEI которого вы взяли!
❯ Считыватель
Теперь разберёмся с подключением симки к компьютеру. Для этого понадобится ранее показанный считыватель смарт-карт.
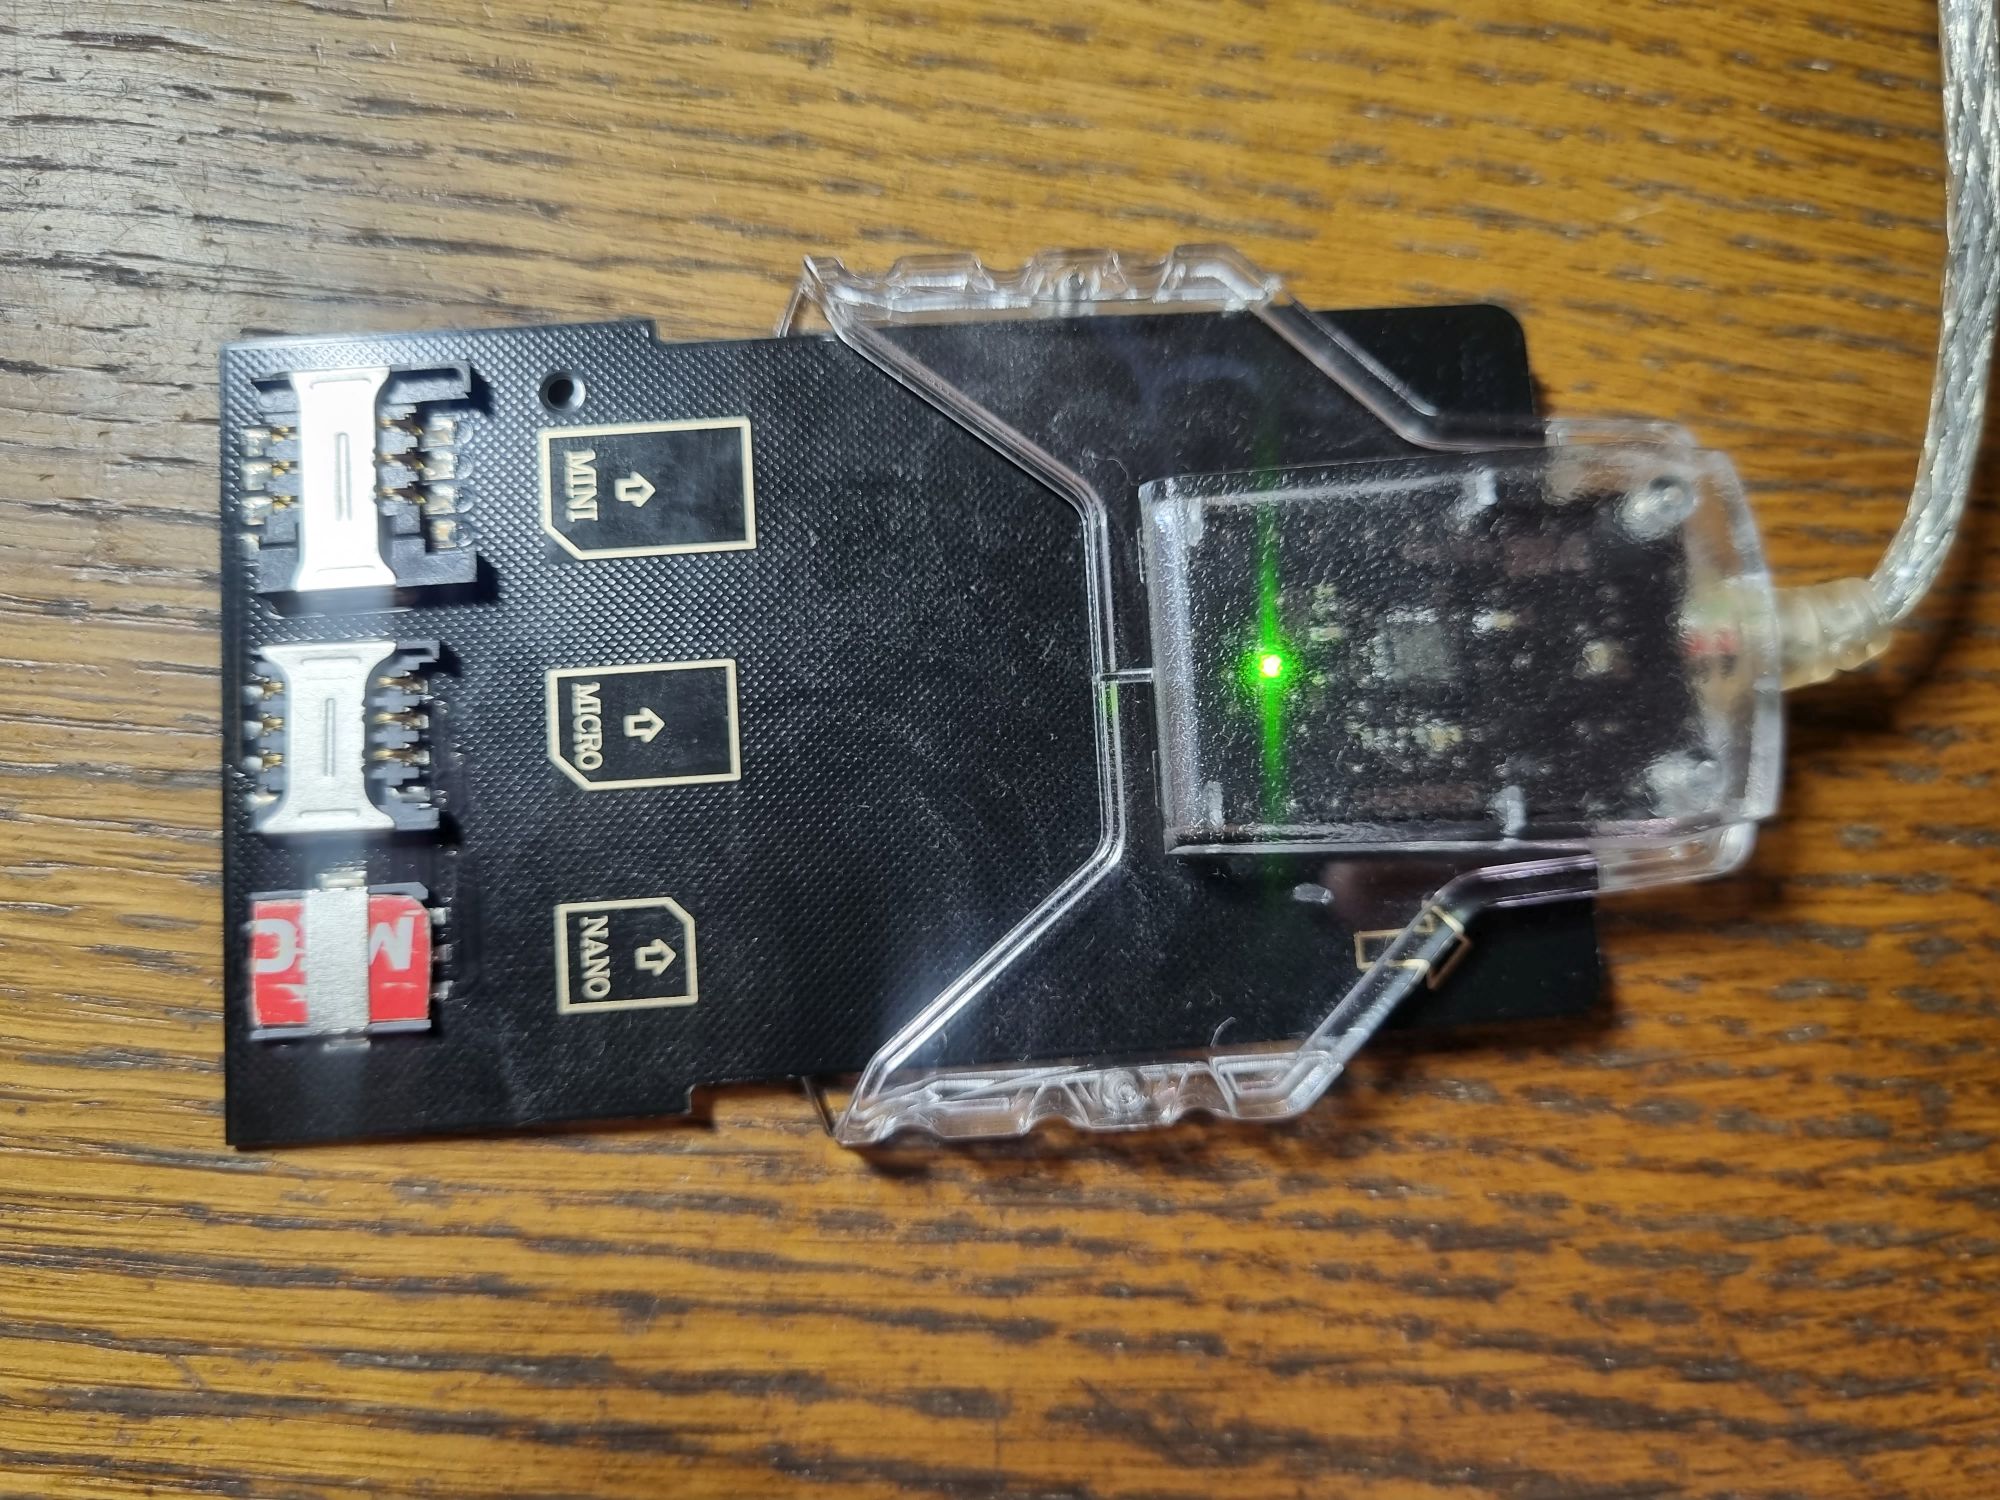
Но есть один нюанс — большинство из них предназначены для полноразмерных карт, отчего потребуется специальный переходник, чтобы вставить в него симку. Если его нет, то берём новую симку и засовываем её вместе с пластмассовой картой.
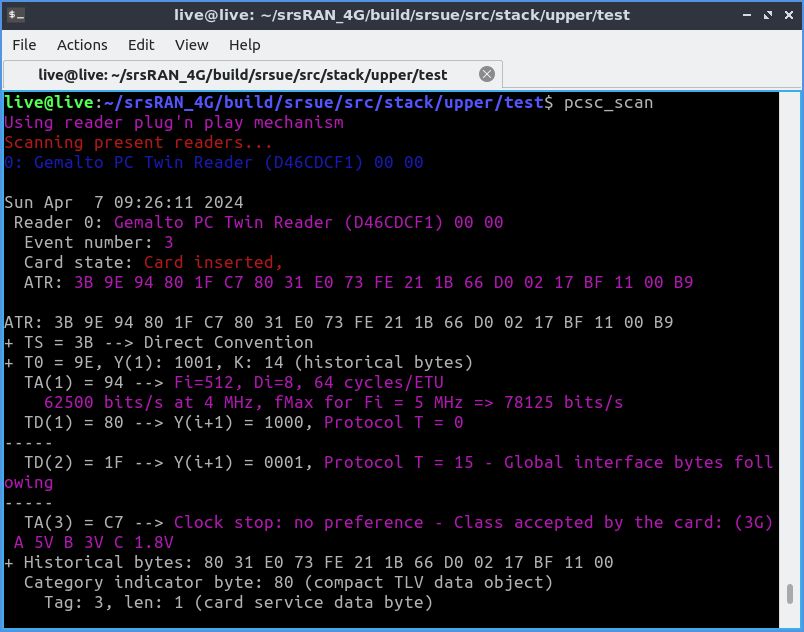
Теперь подключаем считыватель к компу и выполняем следующую команду:
pcsc_scanЕсли софт для работы со смарт-картами установлен правильно, а симка установлена в считыватель, то на экране отобразится примерно следующее:
Двигаемся дальше. Убедимся, что симка работает корректно и читается, для чего переходим в папку с собранным srsRAN и выполняем команды:
cd srsue/src/stack/upper/test
./pcsc_usim_test
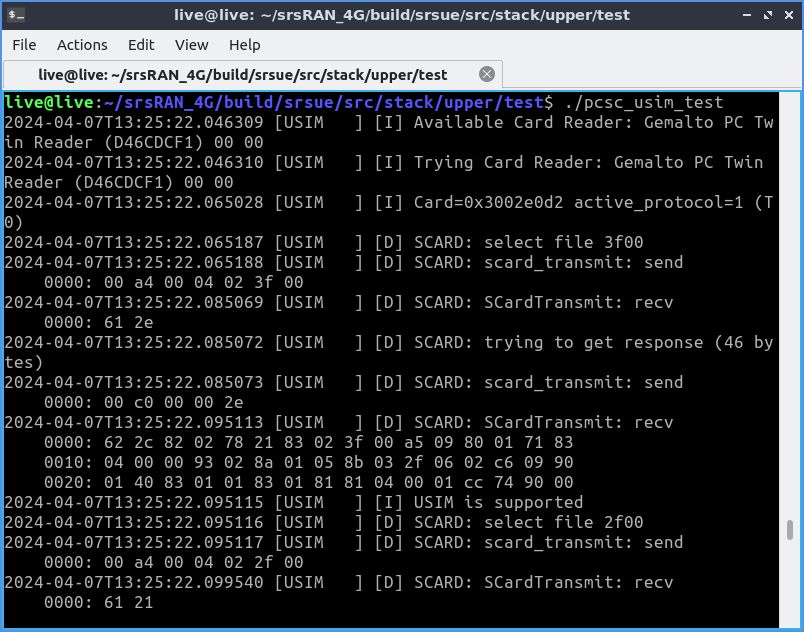
В консоли можно будет увидеть обмен данных с симкой.
❯ Запускаем
Ну что, самое время пробовать. На компьютере отрубаем Wi-Fi и LAN, после чего подключаем SDR и запускаем софт:
cd srsue/src
sudo ./srsue
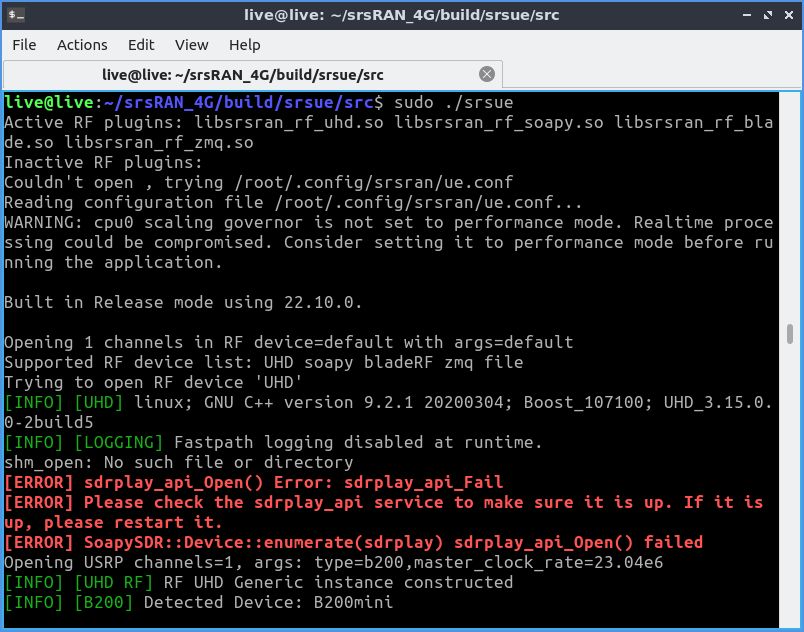
Начнётся стандартная процедуза загрузки прошивки в оперативную память SDR.
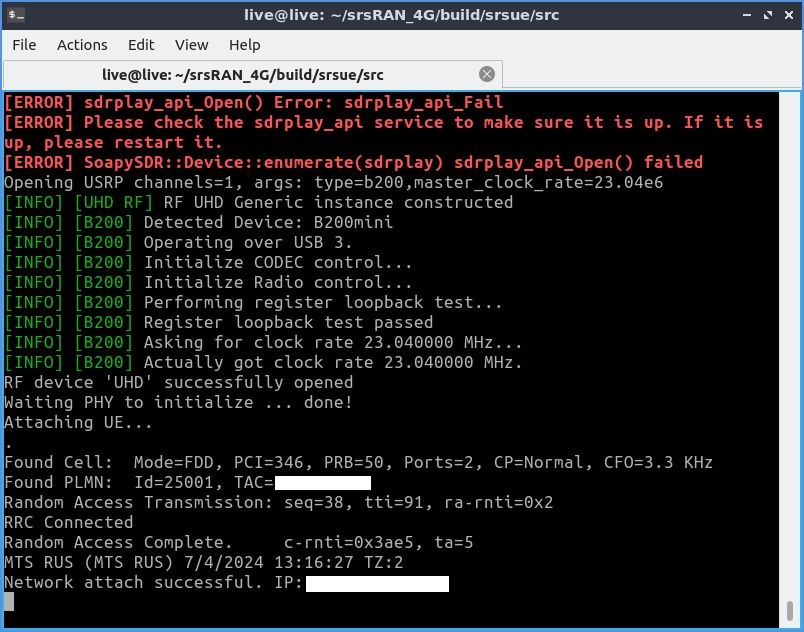
После этого srsUE перейдёт в рабочий режим. И, если всё было сделано правильно, через несколько секунд софт найдёт сеть, а компьютер получит IP-адрес. При этом ОС выдаст уведомление о новом подключении.
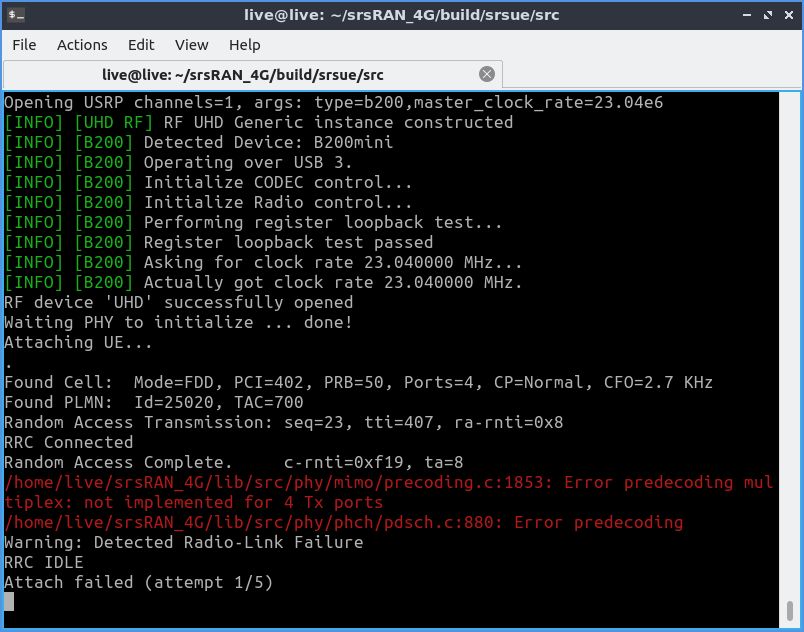
При подключении может возникнуть проблема, что при попытке подключения сеть отваливается. Мне неведомо, с чем это связано, в некоторых источниках удалось выяснить, что причина этому — нехватка пропускной способности SDR. В таком случае нужно попробовать другую вышку или другого оператора (по закону подлости МТС, с которого я только звоню, у меня подключался стабильно, а Теле2, симка которого у меня с пакетом гигабайт, только через раз).
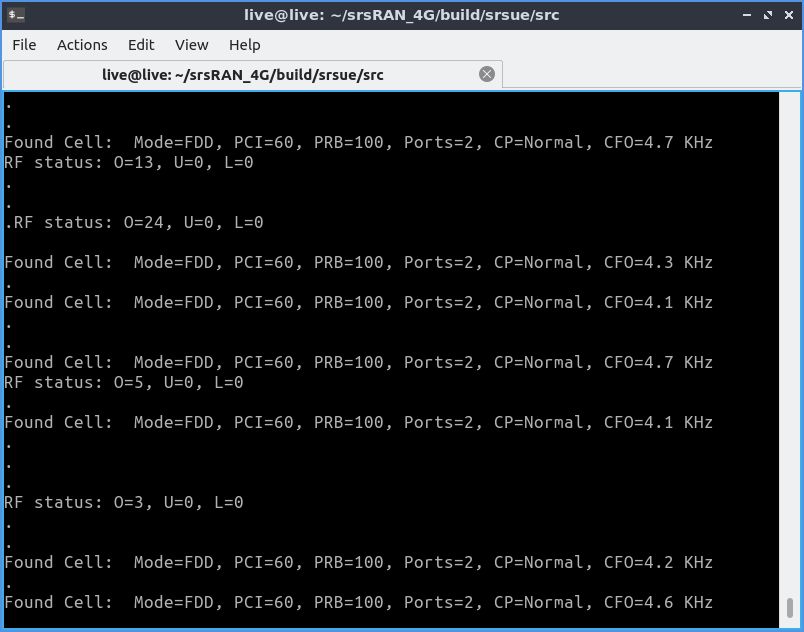
Если в консоли сыпется бесконечное «Found cell...», значит, не проходит аутентификация. В моём случае это было вызвано специально — для проверки я вставил в считыватель дохлую симку.
❯ Доступ в интернет
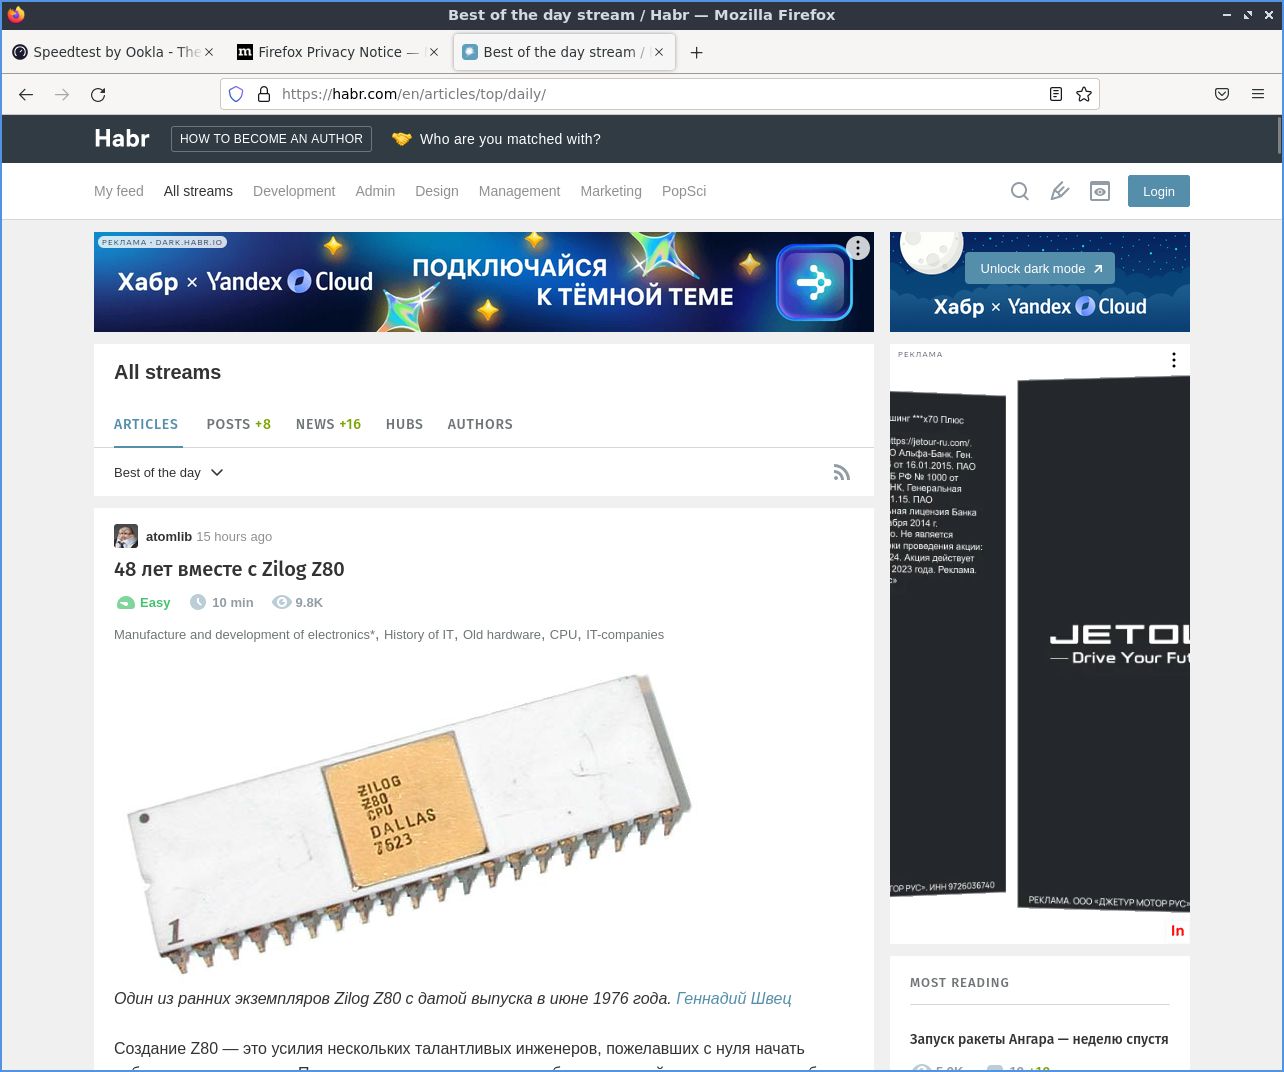
Теперь, когда подключение работает, можно выйти в сеть.
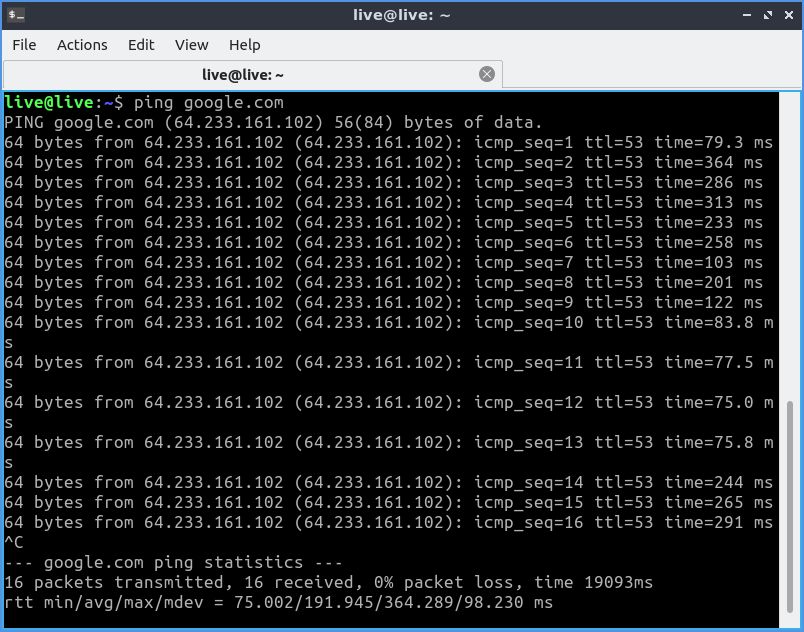
Ping работает успешно.
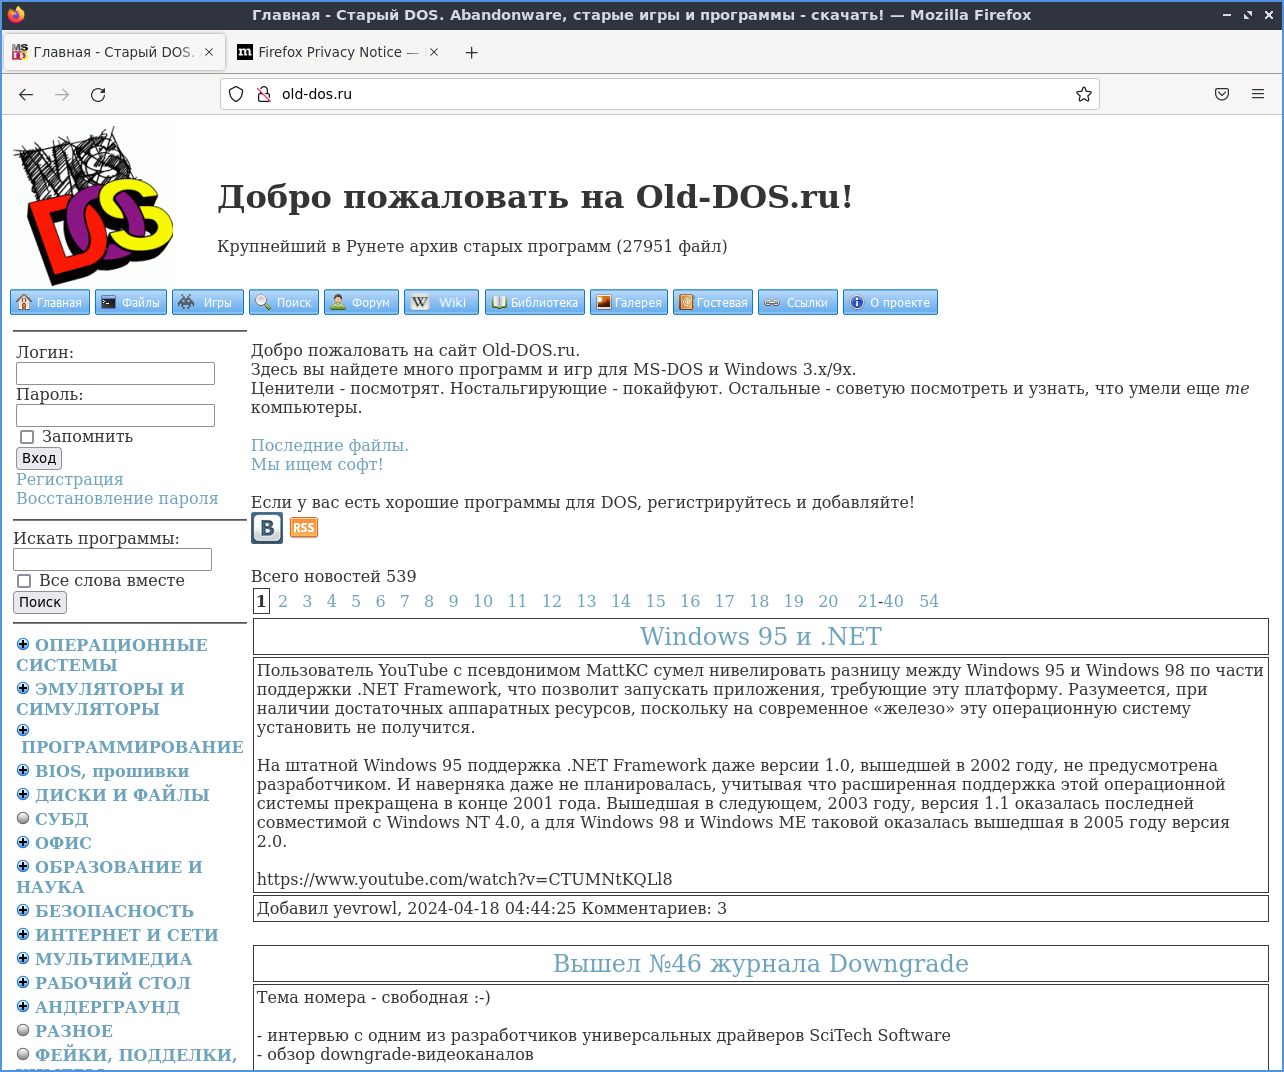
Да и страницы тоже открываются отлично.
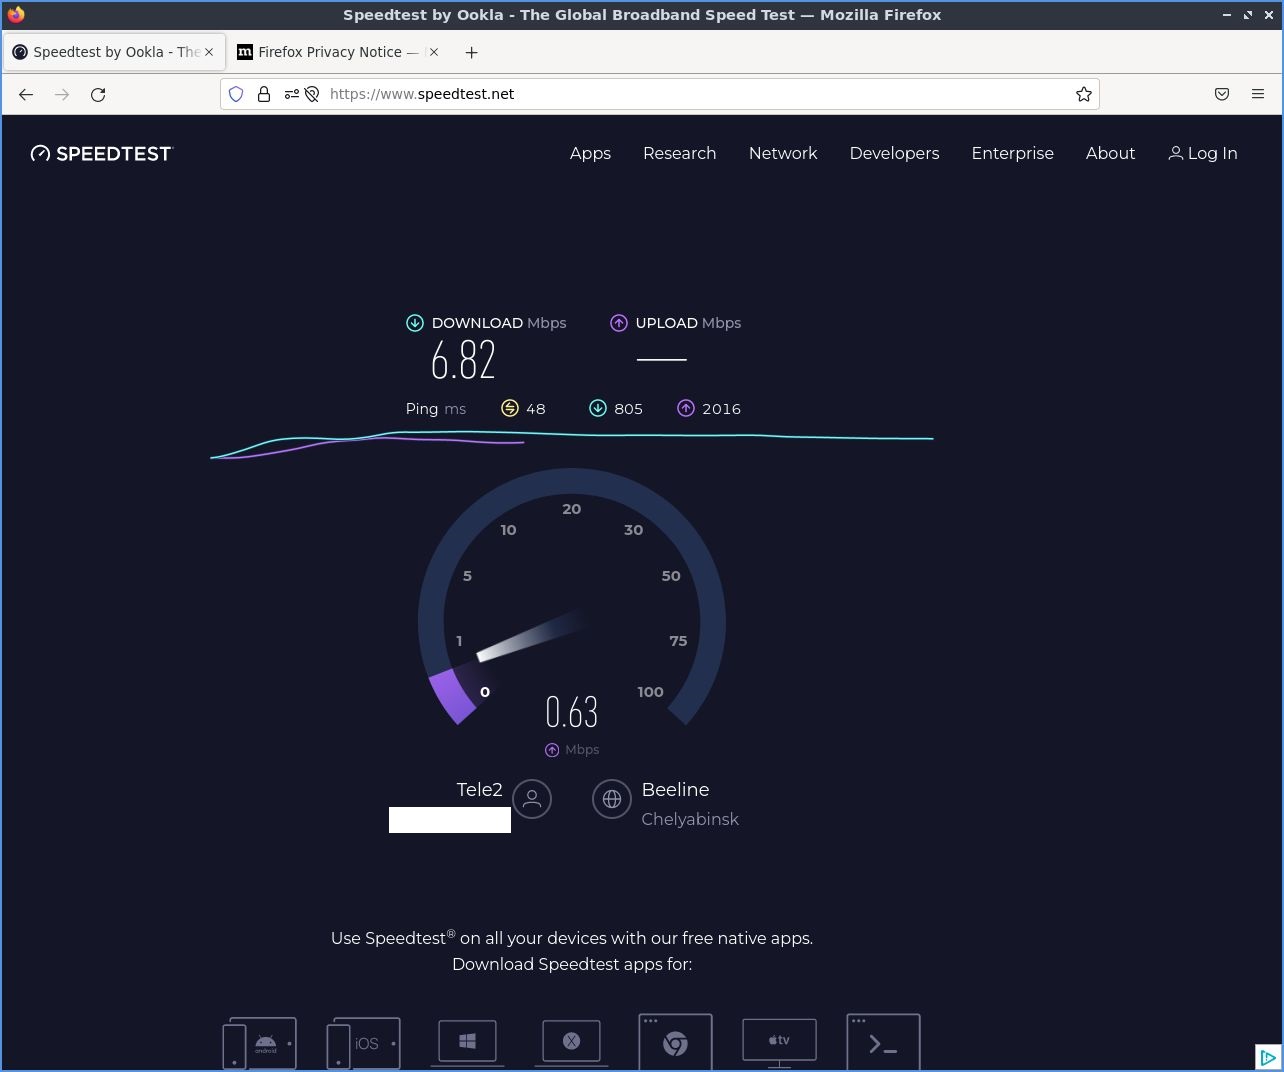
А вот и Speedtest, показывающий, что оператор у меня Tele2, а не домашняя «Интерсвязь».

Для проверки стабильности связи я, как и в случае с БС, открыл на компе YouTube и запустил часовое видео в хорошем качестве. Как оказалось, даже на Tele2 при успешном подключении сеть ловится весьма приемлемо.
❯ Вот как-то так
Как и ожидалось, подключить компьютер к интернету при помощи обычного SDR оказалось даже проще, чем поднять сеть. Коммерческие БС имеют хороший сигнал, поэтому сеть нормально ловится даже с не слишком хорошими антеннами. Впрочем, как оказалось, некоторые нюансы (увы, не зависящие от нас) всё равно есть, так что в идеале запастись симками сразу нескольких операторов: хоть один точно заработает. В остальном же это полностью рабочая реализация сотового модема, которую не составляет труда запустить при наличии оборудования.
Такие дела.
Автор: Лев


