You can’t properly test and debug mobile apps without test devices, which there should be plenty of considering how the same code may behave differently on different models. So how do we keep track of these devices? How do we quickly provide developers and testers with the smartphones they need, configured the way they need, and without much red tape?
I’m Alexey Lavrenuke. Over the years, I’ve worn many hats: one of the authors behind Yandex.Tank, a speaker on load testing, and the guy who calculated energy consumption by mobile phones. Now I’m a Yandex.Rover developer on the self-driving car team.
After the phones and before Yandex.Rover, there was Hypercube.
A few years ago, the head of mobile development popped in to the load testing department and mentioned a problem they were having with test devices: phones had a tendency to inexplicably migrate from one desk to another. Picking the right device and then finding it had become a challenge. We already experienced working with mobile devices from building a digital ammeter to calculate energy consumption, so we decided to help our coworkers out and quickly rig up a handy contraption. We figured the whole thing wouldn’t take more than three months. Oh how wrong we were. Let me tell you what we were really in for.

''Dallas cube''
Concept and initial ideas
We were one of the few Yandex teams that collected hardware, plus we knew a thing or two about cell phones. The concept was clear: connect phones to a hub and track their status and circulation across the office via USB. The whole thing had to fit inside a server cabinet.
Here’s what I pictured:
- We keep records of phones via USB. All the phones in the cabinet are connected via USB. While a phone charges, we can view its information, including its Device ID—a unique identifier (or not so unique when it comes to some Chinese devices) that you use to differentiate phones from one another. By the way, all USB devices have their own ID that you can use to track virtually anything. Use a simple flash drive as a keychain for your car keys and you can automatically keep track of your keys.
- We identify users by their badge. We identify everyone who takes a phone from the cabinet by their badge (the personal ID card given to every Yandex employee). When an employee opens the cabinet, they're responsible for any phone taken from it.
- The service stores information on all phones and their movement. We can see who took a phone and where it is now. We can also collect statistics on which phones are in high demand or short supply.
There can be more than one cabinet, but the information on all the devices inside is stored in one place. All cubes (cabinets) are linked and logically connected, forming a larger Hypercube (which is how we got the internal name of the service).
Everyone liked the idea, so we got down to work.
Hypercube. The beginning
We took an RFID reader and Intel NUC minicomputer from helpdesk. We bought an Arduino, an electric lock, and a compact network cabinet (smaller than a regular server cabinet but with the same rails for mounting equipment).
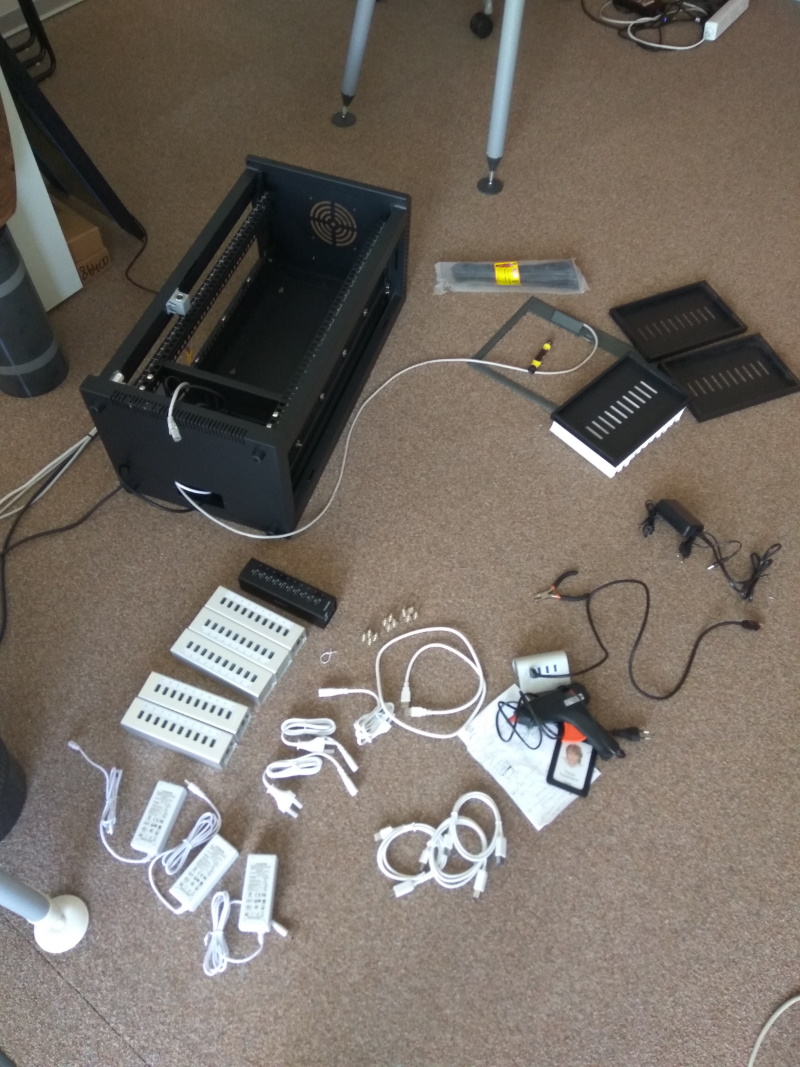
Obviously, we didn’t have any specifications or a shopping list. There wasn’t a clear idea of which cabinet model we needed or how many bolts or meters of wire it would take. Requirements constantly changed as teams came up with new requests. We agreed that one cabinet would hold 40 phones and be kept on a table (since it’s so small and bending over would be a hassle).
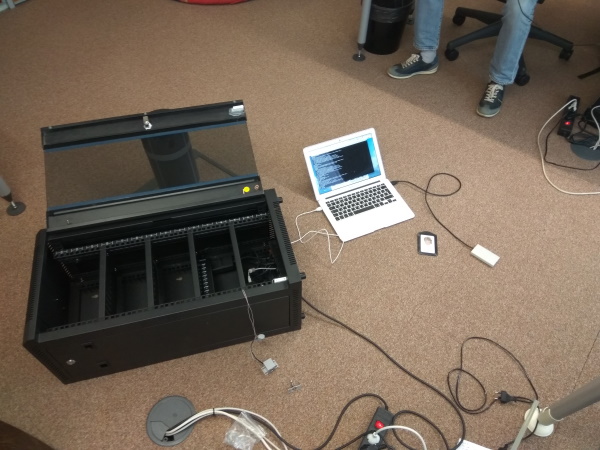
Shelves for phones
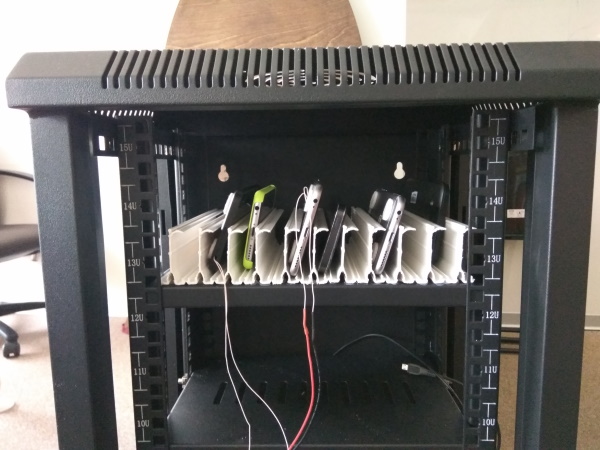
It took us a while to figure how to make the shelves easy to use. Yandex had phone stands for demonstrating phones and testing interfaces. We thought about using them, but they weren’t quite what we were looking for. The stands were designed to hold phones up with the screens to the users, like in a display case, but that wouldn’t do us any good. Our goal was to optimize space in the cabinet, so we decided to make the shelving units ourselves.
We came up with the idea to line the phones up next to one another, like books, inside the cabinet. To do this, we looked at dividers in office supply stores, CD holders, and ready-made shelves. No dice. Through trial and error, we cut the plastic divider of a cable trunk into pieces and hot-glued them to a shelf. The ''book shelf'' seemed to work and we were happy with it.
Little space, lots of hubs
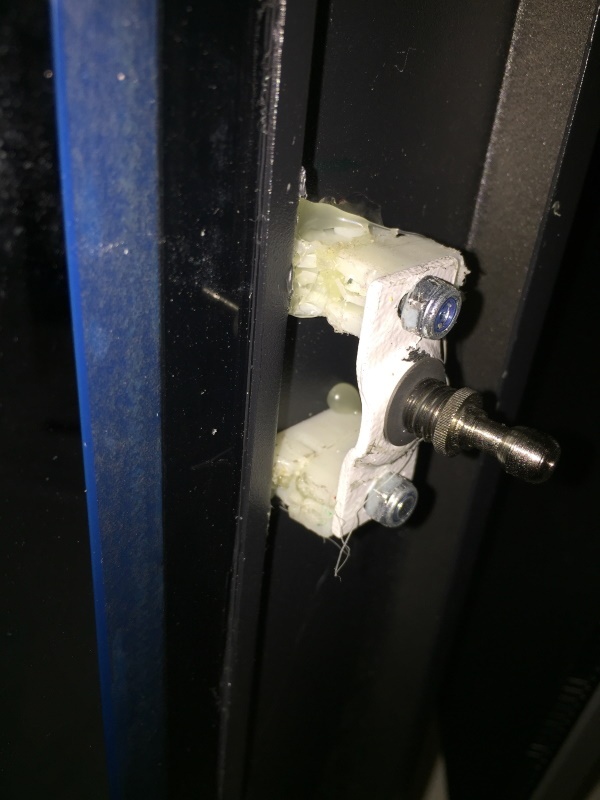
There wasn't enough space at the bottom of the cabinet for four 10-port hubs and an Intel NUC. It took us quite a few tries to squeeze everything inside. The cabinet door wasn’t designed for a lock, so we had to resort to hot glue, wooden bars, and a hand saw. Remember, we were a load testing group, and none of us had much experience using an angle grinder in the office kitchenette.
The Prototype
This didn’t take much time. We made a page that showed where the phones and cabinet were and posted it directly on our load testing service, if for no other reason than to test it quickly without breaking a sweat.
First working prototype
It took us three weeks to put together the first Hypercube and the end product looked like this:
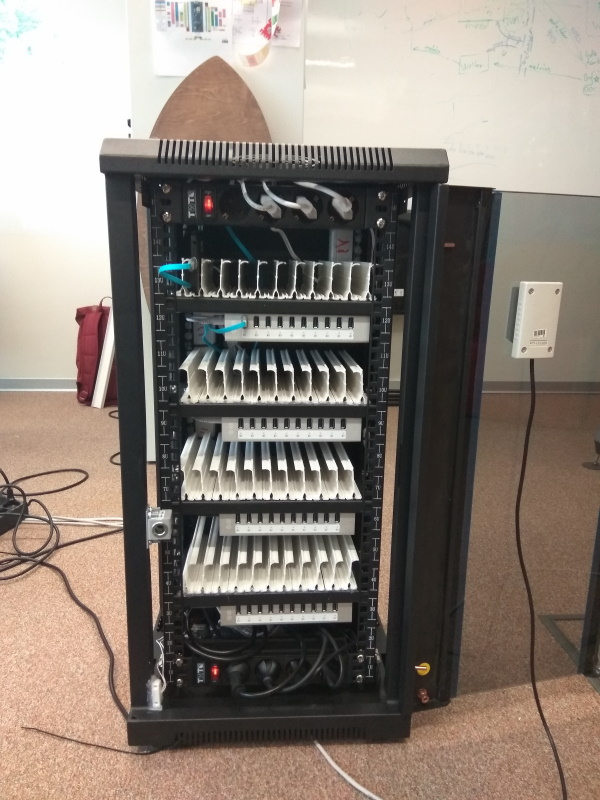
We decided to test the prototype first in our Moscow office (the request came from Yekaterinburg). Testing went to the Yandex.Browser for Mobile team. We met these guys while working on the Yandex Volta project (watch the latest version of the report here). They know everything there is to know about energy consumption.
The first test
Shelves…again
Well, it turned out that the hot glue wasn't strong enough to hold our plastic dividers onto the metal shelves. We went back to the phone stand idea. I spent a while trying to imagine what the perfect cabinet shelf should look like. Thinking about it now, 15 minutes should have been enough. In the end, the shelf didn't look exactly like the first sketch, but here’s what I drew:
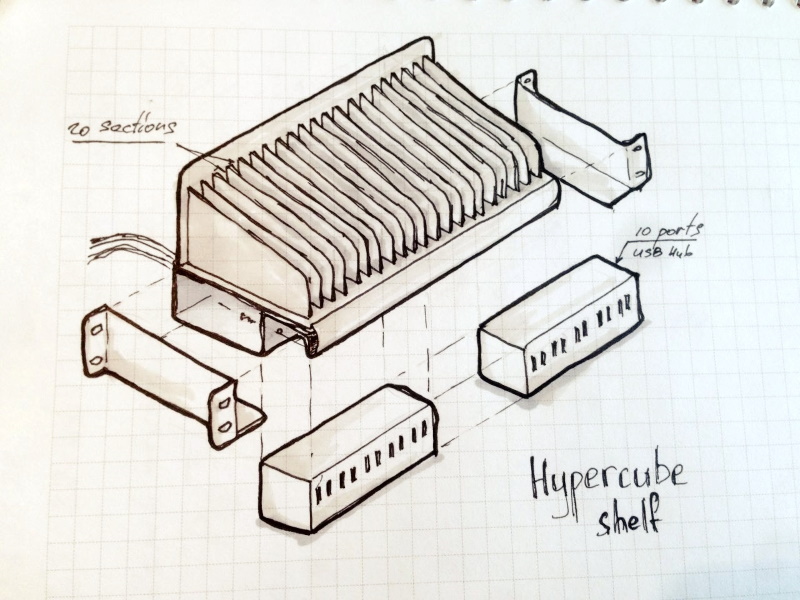
We took ready-made shelves for server cabinets and put custom-cut sheet plastic dividers on top. This construction is still intact today.

Awkward hubs
The hubs for the first cabinets didn’t have a latching switch and the power was off by default, so every time we restarted it, all four hubs had to be manually turned on. We added Yandex SpeechKit to the cube, so if the hubs were ever out of order, it would say, ''I’m not feeling well. Call a supervisor.'' When a supervisor came, the cube would instruct them to check the hubs. Then the voice assistant learned to call employees by name and announce who took phones and how many there were.
Lock problems
The lock underwent several modifications. When I first looked for a lock for our prototype, the only one I liked was the Sheriff model. It was small, strong, and cleverly made. I still haven’t seen anything else like it. It did a great job locking the cabinet, but you had to apply a bit of pressure to open the door. Some users couldn’t figure it out, so we decided to change it.
We took a new Sheriff with a spring that pushed the door. Now opening the cabinet was super easy. Instead, there were issues closing it and it would say it was locked when really wasn’t. This was because the door sensor wasn't connected to the lock. The door was loose, so sometimes the sensor would trigger before the door actually locked. Fixing it was impossible.
We replaced the lock again with another Sheriff model. It was less intricate but had a built-in sensor. The lock worked perfectly on the prototype, but when we installed it in a cabinet, it jammed. Getting it to work required a whole song and dance routine: we disassembled it, lubricated it, and finished it with a file. It just barely worked.
The first tests proved that developers and testers liked and actively used our cabinet. Monitoring the devices and searching for a particular phone using the web service turned out to be much more convenient than asking people who had taken the device you needed. We identified the key problems: the USB hubs had to be turned on manually; the USB wires were too long, were low quality, had connectors that constantly broke, and they always tangled; the lock was bad; and the shelf dividers were unreliable and kept falling off. We struggled on.
Expansion into hyperspace
A coworker from the project management department, the one who later helped us outsource shelf production, actively promoted us inside the company: he visited different teams and would talk about how amazing our service was. We met with representatives from other departments and unexpectedly started getting internal orders for dozens of cabinets. The future was looking grim: we imagined load testers assembling cabinets by hand, week after week, from whatever junk they happened to have around.
That’s when we knew it was time to get some help. Before we could do that though, we had to optimize the cost of one cabinet and its design for small-scale production.
Intern
For a month and a half in the summer, we were lucky to find an intern who could solder, drill, and code a little. He helped us redesign the old cabinet to fit a Raspberry Pi (that would solve the problem of using expensive and unnecessary Intel NUCs) and assemble two more cabinets for helpdesks in Moscow and Saint Petersburg (which had their own smart guys who could help users figure out the prototype and give us feedback).
Budget alternatives
To optimize costs, we replaced the unnecessarily expensive components in the prototype: the Intel NUC minicomputer (25,000 rubles) and RFID reader (5000 rubles). We got a new reader on AliExpress for 150 rubles and switched from the minicomputer to Raspberry Pi for 3500 rubles.
The new platform had a number of challenges in store for us. First, the lock relays wouldn't switch, because the RPi output was 3.3 V, while mechanical relays are designed for 5 V. We had to switch to solid-state relays. Then we realized there wasn’t a clock on the card and that synchronization over NTP would be impossible: authentication in the office network requires the precise time. So we found an RPi expansion card with a clock.
The most bizarre issue we faced had to do with iPhones. After plugging six iPhones into the RPi, it would lose network connectivity. Luckily, an ex-sysadmin turned project manager happened to be passing by and stopped in to help us. It turns out that the network card on the Raspberry Pi was connected via USB. When an iPhone is connected to a Linux computer, it causes a faulty system service to generate load on the USB. So when multiple iPhones were connected, the load grew accordingly. The USB would stop functioning and the network connection would drop. This problem first occurred in the Minsk office, where they were able to quickly reproduce the bug and give us extremely helpful feedback. If memory serves me right, we solved the problem by demolishing the GUI, because that’s where the service was integrated.
Bigger cabinets
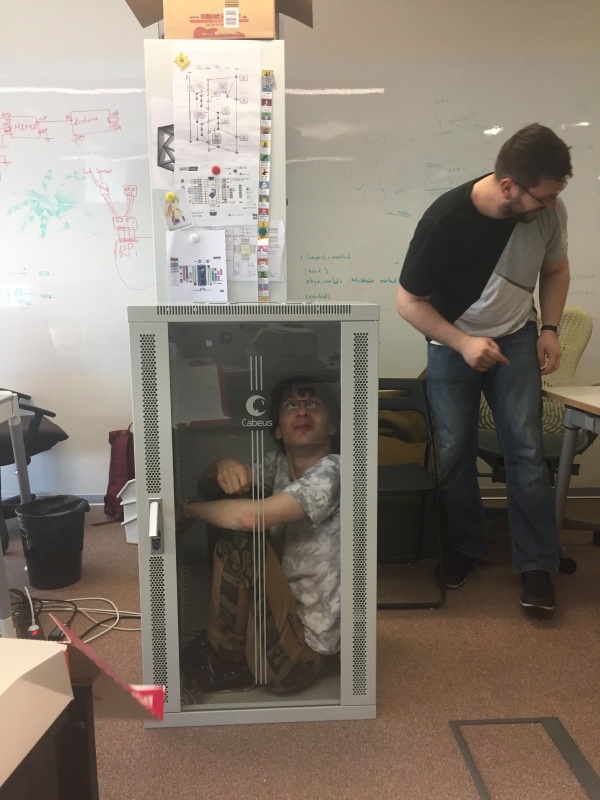
There was a lot of heated debate surround the cabinet size. Some suggested we fit twice as many phones in one cabinet while others argued that a large cabinet would take up too much space. At some point we learned that we had already purchased all the small cabinets available in Moscow, and the next delivery wasn’t expected for three months. This put an end to the debate.
We decided to make all the cabinets larger from that point on. Looking forward, this turned out to be the right decision. The bigger cabinet made it easier to arrange the electronics, we could fit 80 phones inside instead of 40, and the spacing between the rails was standard for a server cabinet, 19 inches. In the smaller cabinets, the spacing was too tight.
Web development and UX
We tried our luck with one of our internal web development frameworks and were happy with it, so we moved the phone list from Django to React. It soon became clear that a simple spreadsheet wouldn't do, though. The geoservices department thought about it and gave us a huge task that took up multiple screens.
We had no choice but to turn to the web development team. We were assigned a product designer, who thought through the process of how the user interacts with the service. He made stickers for the cabinets, marked them on office maps, and monitored the support chat to better understand what users expected. In a nutshell, he took the project under his wing in terms of user experience.
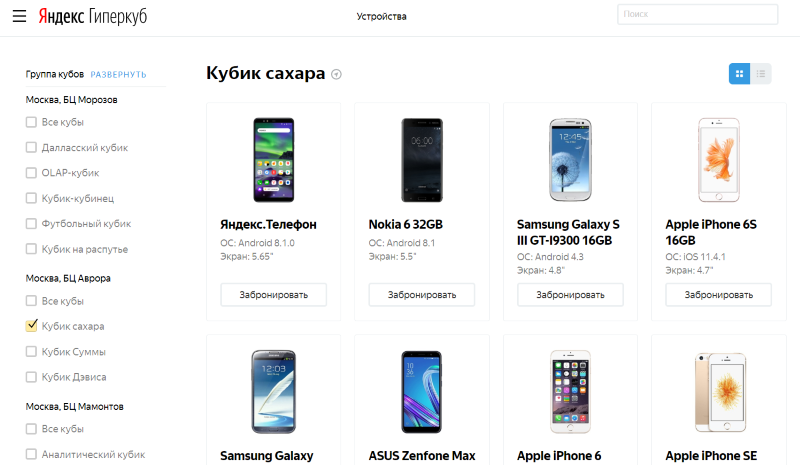
Web developers got down to the frontend and quickly implemented design layouts. All this resulted in something like Yandex.Market, but on a smaller scale. Users could come by, pick out a phone, and take it from the cabinet. It was a dream come true.
At this point, we realized the project had to be rolled out to the entire company. We discussed the amount we'd need to fix bugs and rev up quality, and were given a budget to purchase cabinets, spare parts, and tools. Pasha Melnikov, the then hardware RnD group head (and now involved in developing Yandex.Station), helped us outsource cabinet batch production based on our requirements.
New hubs
We bought a different version of the hubs without power buttons. Now we wouldn’t have to go inside the cabinet to turn the hubs on after restarting. We assembled one prototype by hand, and it worked perfectly. However, when we sent it to Yekaterinburg, we were flooded with complaints that the cabinet didn't recognize some phones. We had to go there to sort it out. As it turns out, the new hubs had a different topology (even different series of the same model may have different topologies).
Both the old and the new 10-port hubs consisted of three USB chips with four ports, but in the old hub that had the power button, two chips were plugged in to one, while in the new one, they were connected in a sort of daisy chain. So even though the number of ports was the same, the nesting depth was different. The ports with a bigger nesting depth couldn't identify older phones. Luckily, these phones were pretty old and thus less in demand. We took care of the headache by taking off the head. In other words, we just used the cabinets for newer phones while we waited for our own hubs. That being said, we still made sure it would be possible to set different USB topology configurations for different cabinets.
A hub of our own
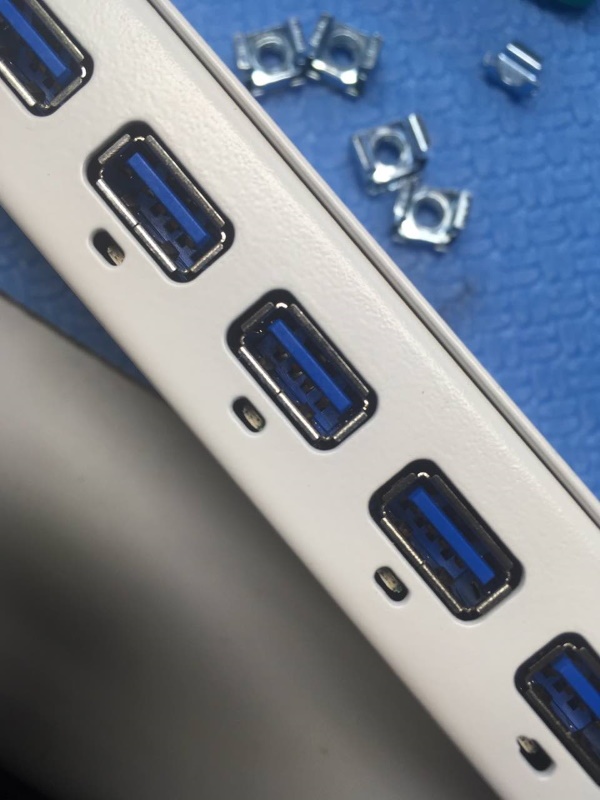
Pasha and I started developing our own USB hub on the side. There were a few reasons we had to do this: to stop buying hubs, to light up the device the user came for, and to make newer phones charge faster. To do this, we installed powerful PSUs and maintained the latest standards. The new hubs made it possible to connect external temperature sensors so that we could monitor the temperature on each shelf. We made sure two hub cards under one shelf would perfectly fit the 19-inch server rack. The hubs were low profile to save space between shelves. In other words, they were cutting-edge and cool. Pasha will go into more detail on this project on Habr.
Assembly
Assembling hubs from spare parts bought for ready-made cabinets was outsourced as well. We figured the assembly team could finish the job in a couple of days. That turned into a couple of weeks because a lot of the work was done by hand. The team had to deal with non-standard wiring according to hand-drawn diagrams, manual soldering, the lack of ready-made slots for components, and the ready-made components themselves. On top of that, they drilled holes for locks and cut weird shapes for other components.
Production draws near
We dreamt of finally going live with the cabinets. We thought that simplifying production and outsourcing more tasks would speed up the process.
Peripheral card
We designed a peripheral card and updated the components. The card connected to the Raspberry Pi with one ribbon cable. All the other components connected using standard connectors.
We mounted a clock on the card for the RPi. Before that, we used a separate ready-made component that we bought in a store. We also included a DC/DC converter (we used to use a separate PSU) and an RS-485 interface to clear up the mess of wires. We used to manually connect them from one point to another by soldering or sticking them onto an RPi pin. For every cable, we consulted the chart and then searched for the right input slot. This was extremely time-consuming and led to errors during assembly. The new card used phone connectors.
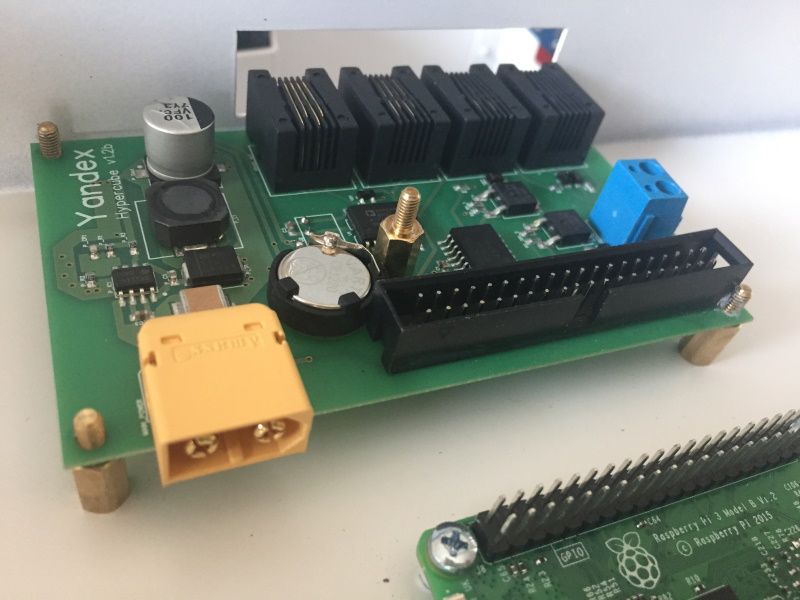
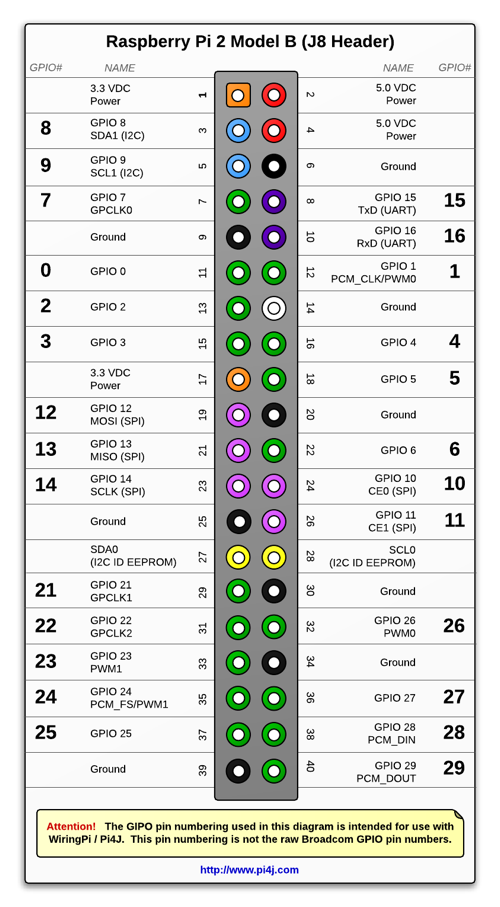
I later realized that while making connections, I ignored the fact that the RS-485 microchip had to connect to very specific RPi pins. We had to update the card. When I drew the component for RS-485 power decoupling, I overlooked the fact that the data sheet depicted the microcircuit from below, not from above, so the very first time it was turned on, it just went ''bang'' and we could smell burning. For that first set, we had to solder the microcircuit to the back of every single card.
Cabinet 2.0
We weren’t happy with ready-made cabinets any more. They looked out of place since they were intended for server rooms and not the office. On top of that, they had to be modified by hand. It took a lot of time, and they looked lame, so we decided to produce our own cabinets at a factory in Arzamas.
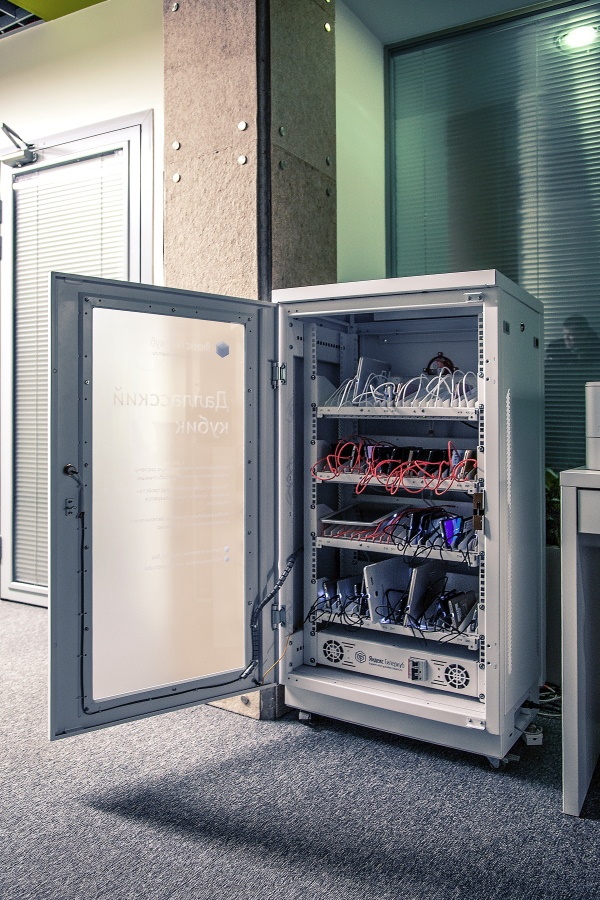
We commissioned the factory to create a modified cabinet based on their standard server cabinet. They changed the size, installed a lock, made all the necessary connectors external, and provided attachment slots. We drew sketches for shelves and made a case for the electronics unit (RPi and Co) and hub shell. When it came to the lock, a factory engineer slightly modified the one we bought so it would work better. Then we sent a bug report to the ''Sheriff'' team with a pull request to refine the hardware.
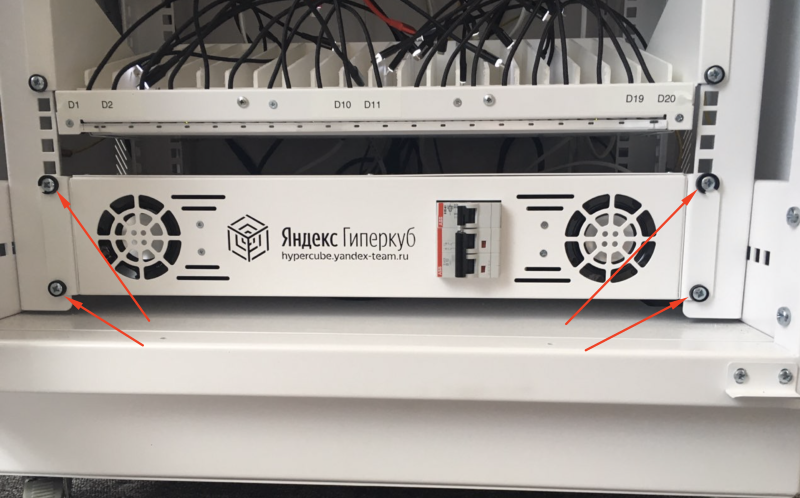
Having all the electronics that manage the cabinet under one shell and fixed by four bolts is super convenient. It means it can be assembled separately from the cabinet and be removed or replaced if it's out of order.
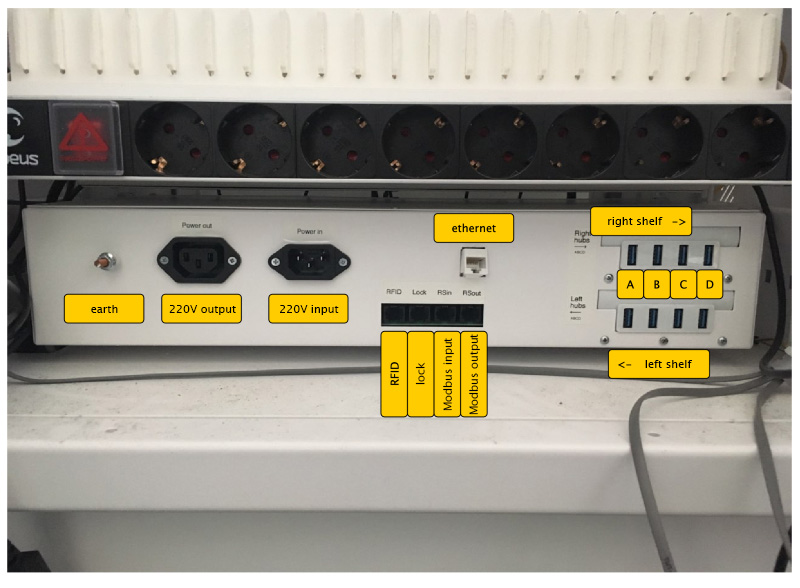
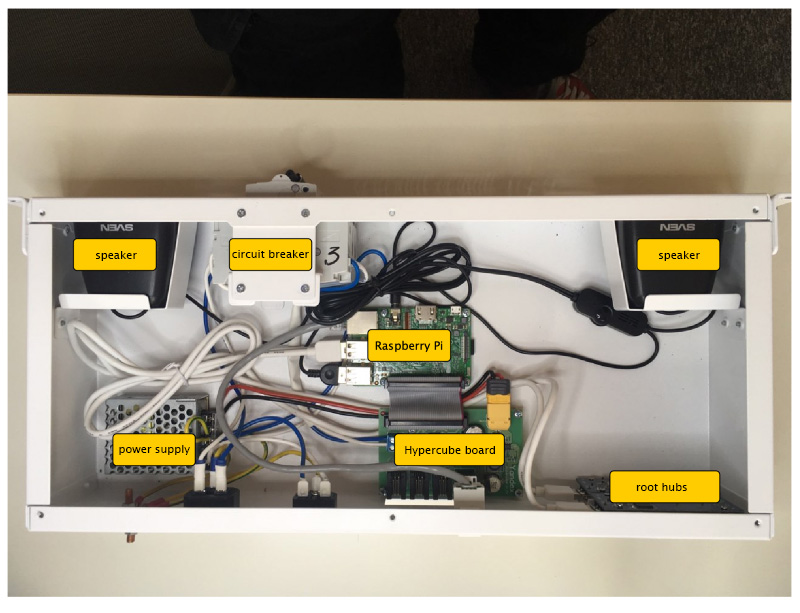
In the test cabinets, the wires would get tangled up, the connectors would pop out of the hub and break, and sometimes employees would just take the cables with them. That’s why we decided to securely attach the wires to the shelves while still making sure they could be replaced. I drew a sketch, and the factory made it metal.
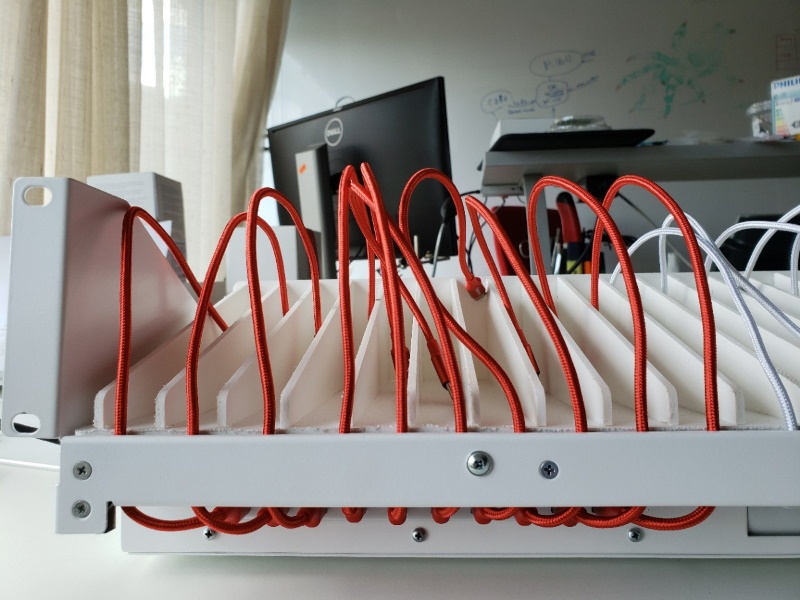
We had to take a number of trips to Arzamas: discuss the design, straighten out production, and then examine the result. Eventually, the cabinets we got were basically ready. All we had to do was put them into operation, but that's another story.
By the way, if you happen to visit Arzamas, check out the burger place in the center. It's worth it.
Coming soon
The company now actively uses our cubes. We even gave them names, like Stanly Cubik.
Our coworkers will tell you what happened next in a future post, like how Yandex.Hub was developed. They’ll even talk about how some ports would go ''mute'' (“mute” ports don’t tell you that a USB device was disconnected, there isn’t even anything in the kernel messages), but would go back to normal when you pulled a phone out of the port and then stuck it back in. While we’re busy writing that article, try and guess the reason why.
Russian version of this post
Автор: Direvius
